Relic of Trismegistus is one of the Locations in Lies of P. Relic of Trismegistus is the Alchemist's base beneath Hotel Krat. Players can access this area through the secret passageway behind Antonia's Portrait in Hotel Krat. As you traverse your way through Krat, you will discover various locales, meet NPCs, encounter Enemies and Bosses, loot key Items, and discover various secrets, as well as critical points of interest that will help you through your gameplay.

General Information
- Previous: Krat Central Station Street
- Next: Arche Abbey Entrance
- Bosses: Black Rabbit Brotherhood
- No. of Stargazers: x2 Stargazer
Relic of Trismegistus Map
[map to be added]
NPCs in the Area
- Alidoro
- Arlecchino (Telephone)
Bosses
Enemies
- Dimensional Butterfly
- Commoner Puppet
- Elite Marching Band Puppet
Items
Weapons
Consumables
Throwables
- n/a
Legion Arms
- n/a
Amulets
Defense Parts
- n/a
Upgrade Materials
- Dark Moon Moonstone of the Covenant
- Enhanced Alchemical Booster
- Full Moonstone of the Covenant
- Full Moonstone
- Half Moonstone
- Legion Caliber
- Star Fragment
- Technique Crank
Enemy Drops
Keys & Other Items
Full Relic of Trismegistus Walkthrough
How to Get to the Relic of Trismegistus
The Relic of Trismegistus becomes accessible after the attack on Hotel Krat. At this point, players would have returned to the Krat Central area and witnessed it in a corrupted state. While exploring through the Collapsed Street and Krat Central Station Street, players will be notified of the situation in Hotel Krat and will be told to return there immediately on foot.
While in Hotel Krat, speak to Antonia and she will inform you of the whereabouts and the instructions to access the secret passage to the Relic of Trismegistus. It is located behind her portrait. Follow the instructions and use the elevator to descend to the base.
Relic of Trismegistus Entrance
Once you descend, there will be a Stargazer that can be activated directly ahead. If you turn the corner behind the exterior corner of the elevator, you can obtain the Dark moon Moonstone of the Covenant. Follow the path heading down and there will be a small passage behind the waterfall. This will lead to the Sealed Underground. Drop down to the ground level to find 3 Dimensional Butterflies which will drop a Half Moonstone, Full Moonstone of the Covenant, and an Enhanced Alchemical Booster.
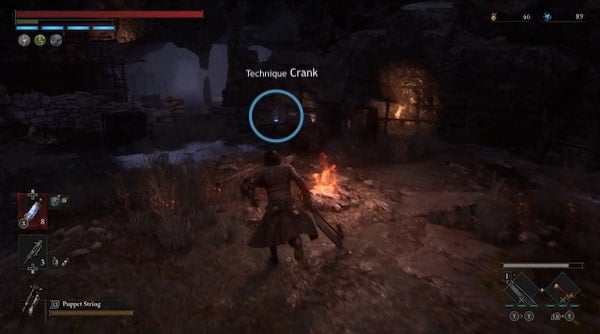
When you've cleared the butterflies, loot the edge of the level towards the cliff edge to find a Technique Crank. After you're done with this area, you may proceed up the slope to the next area. You should find the slope on the right corner if you're facing the opposite cliff away from the passage you first arrived from.
Be careful because the fort walls on this side will have fire projectiles that shoot in threes and will build Overheat along with some standard Puppet enemies. Loot the edge of the cliff on this side to obtain a Star Fragment. When you're done here, you can start to drop down to the lower levels. Head back to where you encountered the butterflies and there will be a slope heading down. There will be an elite Marching Band Puppet wielding an axe. If you manage to clear him, he will drop an Iron Wall Amulet. Take the loot, then you can freely loot the chest at the end of the broken stone bridge to obtain a Cursed Knight's Halberd.
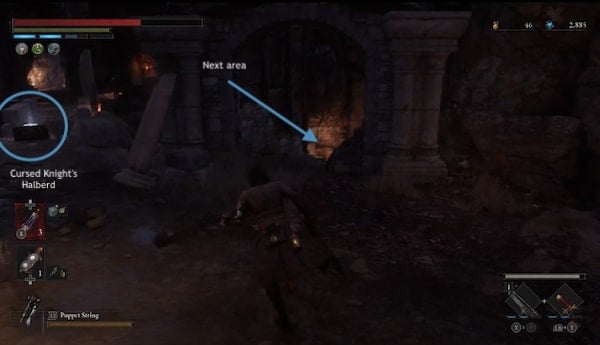
With this area cleared, you can now move on to the next area through the arch where the elite puppet came from. Eventually, it will lead to a split in the path and a few more lower levels.
Take the route on the left with the slope heading up to reach another telephone. Pick up the receiver to see what Arlecchino has to say this time. Eventually, it will lead to a yes or no question.
"Is Geppeto's creation a killer? CONFESS!"
- Yes
- No
If you respond "Yes", he will respond with "Bravo! Fantastico!" and will it give you The Chosen One's Trinity Key. You can then go back to the lantern where the path splits, and take the path to the right this time over the wooden plank path to progress. You will slowly be making your way down to the lower levels.
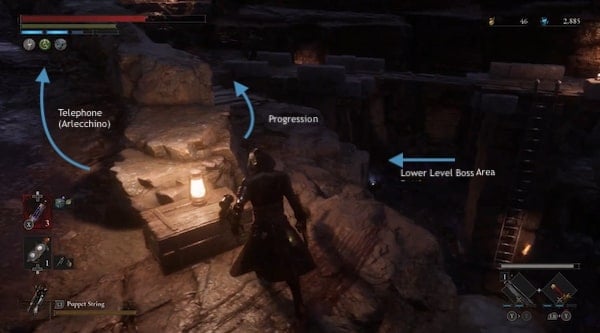
Defeat the Commoner Puppets with pitchforks and loot the drops then proceed over the broken bridge on the makeshift wooden bridge. Watch out for more fiery projectiles. Clear the area and pick up the Vivid Ergo Crystal. Drop down to the lower platform and you will also find a Half Moonstone along with another corrupted fiend and a corrupted dog. There will be a chest down here with a Legion Caliber. Before you move on, make your way back up to drop onto the isolated platform on a pillar to loot another Half Moonstone if you haven't already found it. Jump down again when you're ready.
If you see another set of stairs ahead, you may notice a summoning pool for you to summon a Specter. Prepare for the upcoming boss fight against the Black Rabbit Brotherhood.
Boss: Black Rabbit Brotherhood
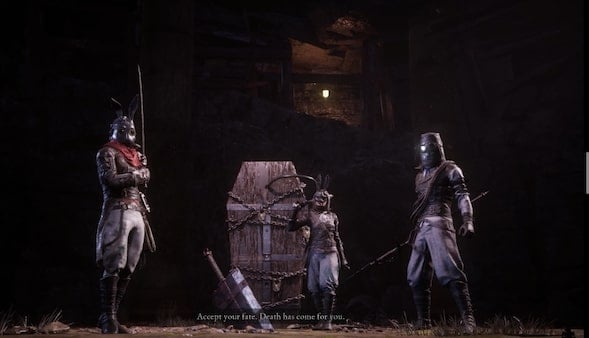
Step through into the boss area to begin the Boss Battle. Unlike the first encounter, this time players will need to clear out all members of the Brotherhood. Each member on their own will have a smaller pool of health rather than the regular bosses. Focus on one member at a time and try not to get overwhelmed by multiple opponents. It would be beneficial to consider a Specter for this battle, to take some of the focus off you. Each member has a unique weapon and generally relies on basic melee attacks. Each of the members can be parried and backstabbed individually so if try to isolate them and charge up your attacks to quickly deplete their health and clear them one at a time. Apply the same approach as other mini-boss Stalker encounters, but always be aware of everyone's position.
For the first phase, you will face the Battle Maniac, Youngest, and Eccentric. They wield a rapier, a double sword, and a spear respectively. For a full breakdown of their attacks, view the Black Rabbit Brotherhood page. Clear all three members and you will face the Eldest of the Black Rabbit Brotherhood. Clear the fight and this time they will drop Quartz. You will also be able to activate the next Stargazer in the area: Relic of Trismegistus Combat Field.
Search for Geppetto's Location
Once you are finished with this location, head through the next passage. It will take you into a tunnel held up by scaffolding. Continue through and you will find Alidoro here. He will tell you that they took Geppetto to the Alchemist's Isle and you can take the submarine to follow. You will also have a few interaction options:
- Purchase
- Talk
- Attack
We highly recommend that you "Talk" to him first to learn about his identity and confession. You now get to decide his fate. If you select "Purchase", you can check his wares to trade in Special Weapons or Amulets that you want, and if you spare his life, he'll stick around as your designated special weapons merchant. On the other hand, if you choose "Attack Alidoro", you'll be prompted another choice to attack him or not. If you choose to attack again, he becomes targetable, instantly killing him with just one hit.
- WARNING: Killing him will lock you out of viewing his wares if you want to buy exclusive Special Weapons or Amulets. However, doing this is a requirement if you want to obtain Alidoro's Cryptic Vessel, which you need to give to Venigni for it to be deciphered. Next, read the decryption and speak to Eugenie, you should have a dialogue option where you'll need to choose "I think he was just a talented Stalker" in order to acquire the Far East Princess record and the Trophy/Achievement "The Story of a Stranger Girl".
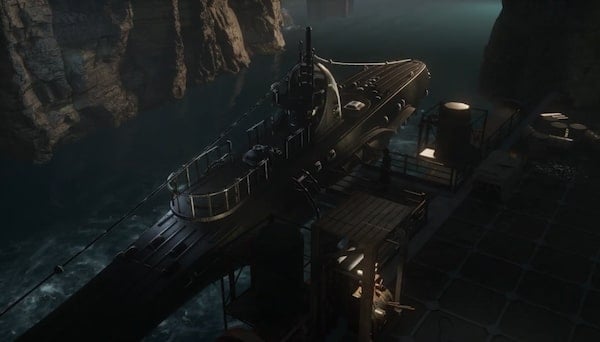
After this interaction, move on down the slope towards the water. There will be a Full Moonstone for you to loot by a lantern. Continue toward the dock and you will find a collectible: The Great Venigni and Pistris the Submarine next to some metal drum barrels. There will also be some levers here. You can interact with the levers to operate the Submarines Alidoro mentioned. This will lead to a cutscene to the next area in the next chapter: XI - Black Seaside.
Relic of Trismegistus Map
Map to be added
Relic of Trismegistus Videos
Videos Related to this Location
 Anonymous
If you Say "No" to the question by Arlecchino, you will receive an interactable box item "King of Riddles Gift Box". When you open it, you will be blasted with Carcass Juice giving you briefly Decay, but you will receive the Key as well.

 Anonymous
If you come back after killing Simon, the area is extremely dark. Even with the Lantern on.

 Anonymous
It’s incorrect to say that killing him locks you out of his wares. As soon as I had killed him and travelled back to Hotel Krat, Hugo takes his exact place and has his full shop selection.

Am I the only one who thought this chapter was REALLY short? When you first get into it, you see a bunch of bridges and stuff. I thought there was going to be a lot more.


Who writes these? You should at least note if something is incorrect or a guess. Killing Alidoro does NOT lock you out of boss weapons/amulets. Hugo takes over in his same spot. Also, killing him and lying to Eugenie afterwards does NOT give you the achievement. You have to do the opposite of what it says here.
3
+10
-1