Arche Abbey is the final Location in Lies of P. The Arche Abbey follows the Arche Abbey Entrance Walkthrough covering the path from the Black Seaside to the Ascension Bridge. Arche Abbey is known as the Alchemist's Isle. Players will need to cross the Black Seaside and face a number of Corrupted Foes to reach Arche Abbey and navigate their way through the many walls and bridges in search of Geppetto. As you traverse your way through Krat, you will discover various locales, meet NPCs, encounter Enemies and Bosses, loot key Items, and discover various secrets, as well as critical points of interest that will help you through your gameplay.

General Information
- Previous: Arche Abbey Entrance
- Next: N/A (Endings)
- Bosses: Simon Manus, Awakened God, Nameless Puppet
- No. of Stargazers: x10 Stargazer (XI)
Arche Abbey Map
[map to be added]
NPCs in the Area
Bosses
- Door Guardian (Entrance)
- Black Cat (Entrance)
- Red Fox (Boss)
- Laxasia the Complete ( Entrance)
- Simon Manus, Awakened God
- Nameless Puppet
Enemies
- Carcass
- Carcass Dogs
- Caracas Corrupted Elite
- Carcass Scorpion Tail
- Corruption Enemies
- Half-body Carcass
- Gamble Hat Puppet
- Elite Top Hat Puppet
- Fire Breathing Puppet
Items
Weapons
- n/a
Consumables
- Acid Abrasive
- Cat Dust
- Dim Ergo Crystal
- Fable Catalyst
- Gemini's Emergency Protection
- Special Purification Ampoule
- Special Resistance Ampoule
- Star Fragment
- Venigni's Urgent Repair Tool
Throwables
Legion Arms
- n/a
Amulets
Defense Parts
- n/a
Upgrade Materials
- Advance Crank
- Balance Crank
- Dark moon Moonstone of the Covenant
- Full Moonstone
- Full Moonstone of the Covenant
- Half Moonstone
- Legion Caliber
- Quartz
Enemy Drops
- Attribute Purification Ampoule
- Dim Ergo Crystal
- Fable Catalyst
- Legion Magazine
- Radiant Ergo Chunk
- Star Fragment
Keys & Other Items
- Arche Abbey Passageway Key
- Arm of God
- Entreat Gesture
- Fallen One's Ergo
- Red Fox's Mask
- Shadow Flower
- So Said Pistris III
- Simon Manus's Confession
Full Arche Abbey Walkthrough
Arche Abbey Upper Part - Inside
Proceed across the bridge through the next set of doors up the stairs. You will be met with a choice after you see the state of Sophia.
- Let her live
- Give her peace
If you give her peace, she will leave you her Ergo and you will gain the Entreat Gesture and the Shadow Flower record. Explore the area. you can pick up a Half Moonstone in the pantry next to the dining room, which will be in the next room from where you found Sophia, the opposite side of the study. To move on, enter the study and there will be a set of stairs leading out.
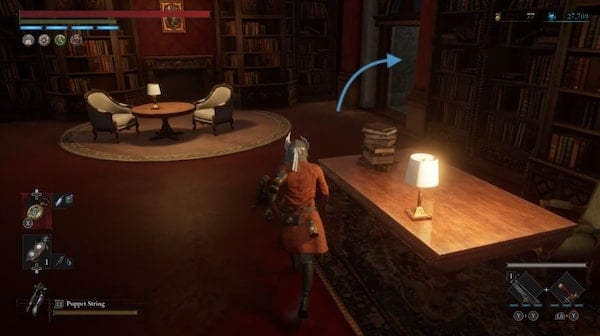
Once you enter the stone corridors. There will be enemies waiting to ambush you from behind the pillars. One will also have the ability to charge at you from the inside of the wall by busting through it. After clearing the area, move on to the end of the corridor. When you get to the end, check the corner and loot the metal platform to the right for a Full Moonstone of the Covenant. Continue down the next corner and there will be another Stargazer for Repair just to the left.
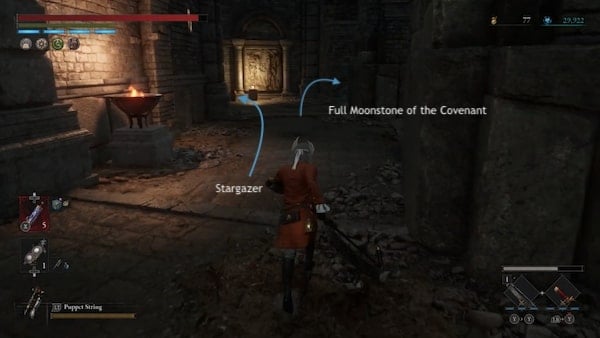
From the Stargazer, there will be a spiral staircase ahead. Enter the area to officially reach the Arche Abbey Upper Part - Inside. Climb the stairs to the upper floor and enter the room. There will be another archway and a set of stairs. Loot the corner past the arch for a Dark moon Moonstone of the Covenant then take the stairs up. There will be two larger enemies with a Gambler hat at the top of the stairs and a Half Moonstone in the corner.
Continue through the next archway into the room with a wall of empty bookshelves. Press on and there will be another set of stairs. Loot the corner at the arch at the base of the stairs to the right for a Dim Ergo Crystal. Another fire-breathing enemy and a Gambler hat enemy will be at the top of the stairs, in the room with the flickering ceiling light. In this room, you will be able to pick up a Special Resistance Ampoule closer to the stairs and another Dark moon Moonstone of the Covenant next to the next set of stairs as you leave. Head down the stairs.
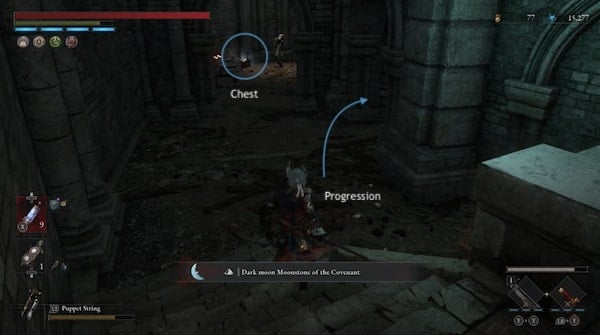
Up ahead is an enemy with a chest containing a Quartz directly in front and another route to your right. After looting the chest, head through the arch on the right and continue down the long set of stairs. A few more gambler hat enemies will be here. Loot the Fable Catalyst by the brazier before entering the next archway. A couple more firebreathers in top hats will be here. There will also be a Half Moonstone at the base of the stairs you descended from just at the corner.
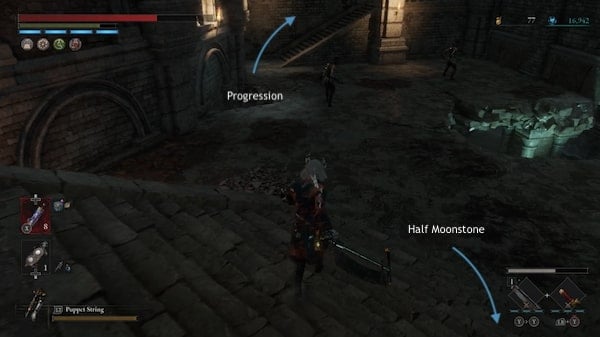
Approach the next set of stairs and you might find another Top Hat enemy with an electric scepter. Continue up the stairs and there will be another archway and a ladder. Take the ladder to the upper floor. Before you cross the wooden planks, loot the Full Moonstone of the Covenant. Then cross the planks to the inner part of the tower. More stairs will take you up one level. As you exit, turn left and pick up the Gemini's Emergency Protection.
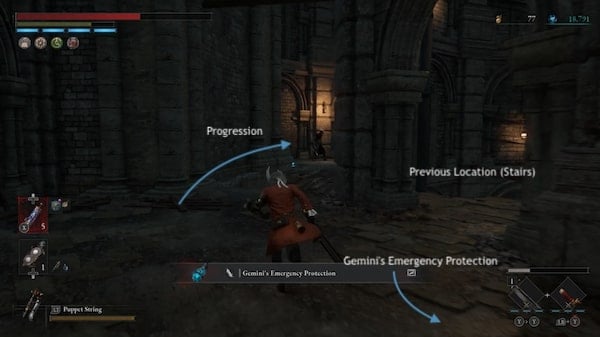
Continue ahead and mind the gap. Clear the enemy ahead and pick up the Electric Blitz Abrasive. There will be more loot and enemies on the ledges. Pick up the Cat Dust and Special Purification Ampoule. Follow the ledges and it will lead back to another opening to the inner side of the tower. Take the loot, cross the beam then clear the puppet. Then climb the ladder on the scaffolding.
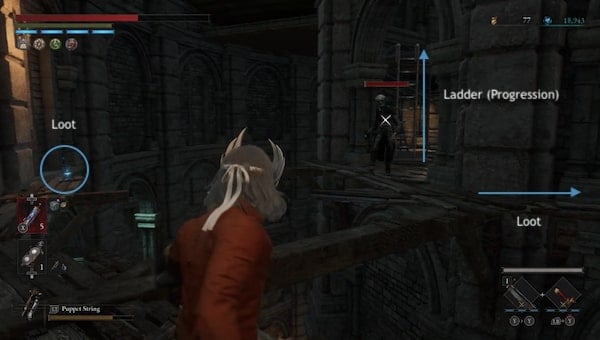
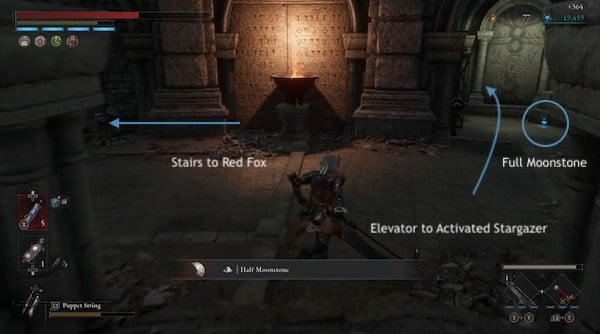
Take the stairs and clear the Gambler Hat Puppet. On this floor, loot the Full Moonstone by the crates under the archway. There will also be an elevator just across. The elevator will take you down to a locked gate that you can now open from this side to access the previously activated Stargazers: Arche Abbey Upper Part - Inside. Unlocking this gate now grants you easy access to this part of the Abbey from this Stargazer. Once you have unlocked the gate, take the elevator back up and proceed to the stairs. This is where you will meet Red Fox.
Optional Boss: Red Fox
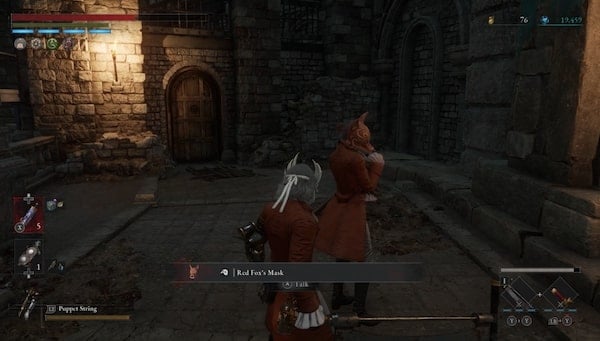
Your interactions with Red Fox can be affected by your interactions with Black Cat. Choosing to fight Black Cat will make her hostile and you will have to fight her as a Mini Boss. If not, you will have the option to show kindness by offering a Gold Coin Fruit which will prevent the boss fight. Whether you choose to fight her or show kindness, she will drop or give you her Red Fox's Mask.
If you choose to fight her: Red Fox wields a Curved Saber and relies on basic, swift melee sword maneuvers and combinations. This includes a series of strikes and slashes. It may be a good idea to wield a long Weapon. If you keep some space between you, you might be able to see her attack animation as she spins and slowly approaches before transitioning into an attack which will give you time to counter or dodge. She makes swift and agile maneuvers, but like most Stalkers, she will be vulnerable to backstabs. Complete the interaction and the door behind her will open so you can proceed.
Finding Geppetto
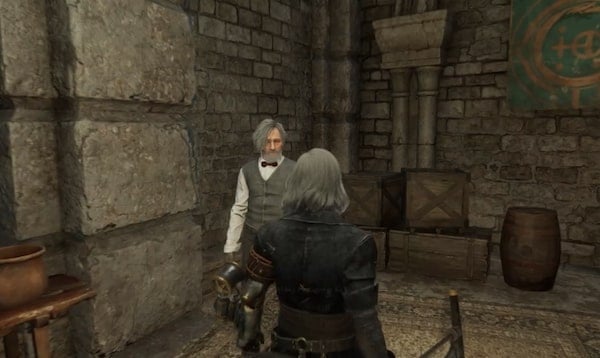
Go through the doors and they will lead you to a row of cell gates. Go all the way to the end and loot Venigni's Urgent Repair Tool. This last cell is also where you will find Geppetto. Unlock the last gate and speak to Geppetto. This will give you a chance to Lie to him. He will ask:
Was I a trustworthy father to you?
- Yes (Lie)
- No
f you choose to say Yes, then he will respond by saying that he now has the courage to carry on because of you. He will ask you to end it all and come back to his side. The usual phenomenon will occur, yet again, P could feel warmth after this interaction depending on your previous choice, and you now have the Arche Abbey Passageway Key.
Arche Abbey Upper Part - Internal Bridge
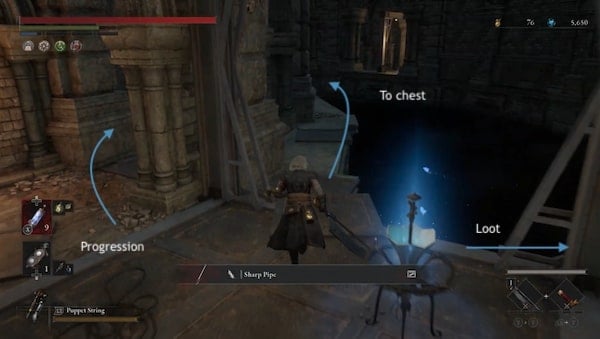
Use the key on the wooden door next to the cell and it will lead to a ladder that will take you to the next repairable Stargazer: Arche Abbey Upper Part - Internal Bridge. Loot the Sharp Pipe at the other end of the metal platform past the Stargazer then follow the ledges on the same level. Stay on the outer ledge and there will be a chest that will contain Assassin's Amulet. Then, follow the hall on the inner side of the wall. There will be a screaming puppet in the way. Follow the hall and then cross the metal bridge. You may notice while crossing the bridge that there is a chest to the left at the other side, if you follow the ledge, containing the Leaping Amulet +1. Beware of the enemy waiting to ambush from behind the wall pillar as you approach the chest. Continue down the path and clear the enemies.
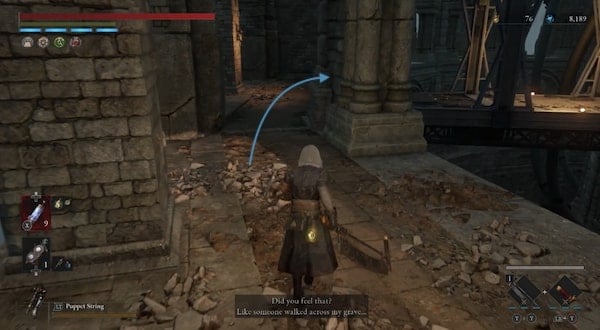
You will reach a flight of stairs. Once you reach the top, there will be a button to release the ladder before you continue. This leads back to the activated Internal Bridge stargazer. Look down where the ladder leads and there will be a metal platform in between the level of the stargazer. This will have a Star Fragment. Continue down the path. Loot the metal ledge for an Advance Crank.
Then cross back to the inner side of the metal bridge. Climb the long set of metal stairs and there will be a Pummeling carcass at the top that can spread Disruption. This enemy will drop a quartz when defeated. Continue on the metal path across the metal beams.
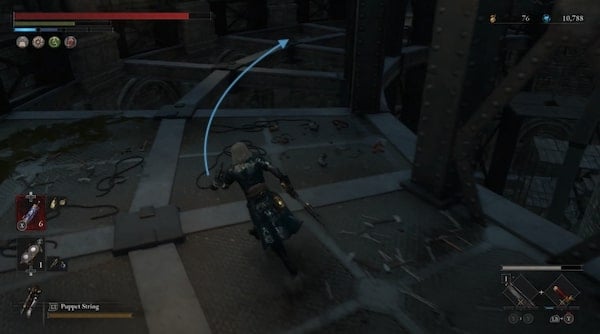
Then cross the bridge again to the outer path. There will be a chest here containing a Legion Caliber. A set of metal platforms will be built alongside the wall. Loot the Dim Ergo Crystal before the first set of steps. Then follow the path, clearing all the enemies in the way. Some of them wield guns and can jump out at you. Along the metal platforms, you should be able to pick up an Acid Abrasive and a Balance Crank.
The archway at the end of the path will lead to a chapel. Loot the Collectible: So Said Pistris III at the altar. There will also be a Vivid Ergo Crystal outside in the small balcony area connected to the chapel.
Next, take the other archway exit out of the chapel and take the stairs all the way up to reach the next Stargazer: Cradle of the Gods just next to a summoning pool. Loot the area outside with the red carpet. The table will have Simon Manus's Confession. When you are ready, summon a Specter if needed then take the stairs into the Cradle of the Gods and prepare for the next boss fight.
Boss: Simon Manus, Arm of God (Awakened God)
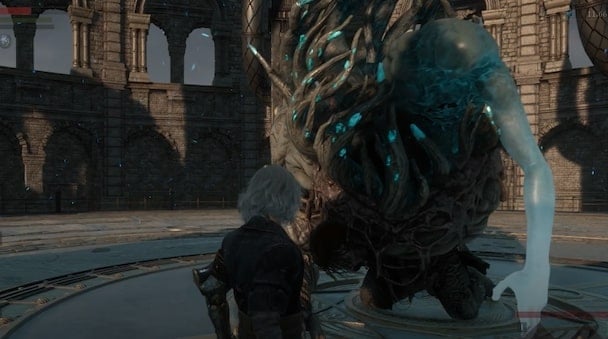
Simon is fought in two distinct phases, at first as the Arm of God and then as the Awakened God. You will need to clear a full bar of health for each phase. During the first phase, he wields a large heavy mace object that he swings around. The weight of the weapon makes these swings move a little slower, but because of his size, he has a long reach. A lot of the time, he'll also be dragging his weapon on the ground while sweeping it around the area surrounding him. His pace picks up once he reaches the second phase.
In his Awakened God state, Simon has additional powers and attacks. He now has the ability to also deal a number of ranged attacks. Watch the animation of his new God Arm. As he makes a summoning motion, this attack shoots out a gust of wind toward you. Another ranged attack will allow him to summon a celestial cloud that can shoot out glowing beams. You will need to continue to run to avoid damage. During this phase, you will need to keep moving to avoid getting caught in these large-scale ranged attacks. He'll also be spamming these attacks and will be able to inflict Disruption, an ailment that can cause instant death when filled. Focus on dodging and parrying so you can continue to approach and continuously attack to slowly deplete his health until the fight is cleared. Once he is defeated, you will obtain the Fallen One's Ergo and the Arm of God.
Under the Abyss
When you are ready to move on, stand in the center of the circle of symbols and it will prompt you to go down. It will take you to one last Stargazer: Under the Abyss. Activate the Stargazer then approach Geppetto in the center of the room to begin the dialogue. You will then be given a choice that will determine the final Ending. Geppetto requests that you hand him your heart.
Give me your heart, son.
- Give your heart
- Refuse
To Achieve the Real Boy Ending, agree to hand over your heart. Refuse and you will need to face another Boss Battle against the Nameless Puppet. View the Endings Guide to see all the conditions of each ending.
Boss: Nameless Puppet
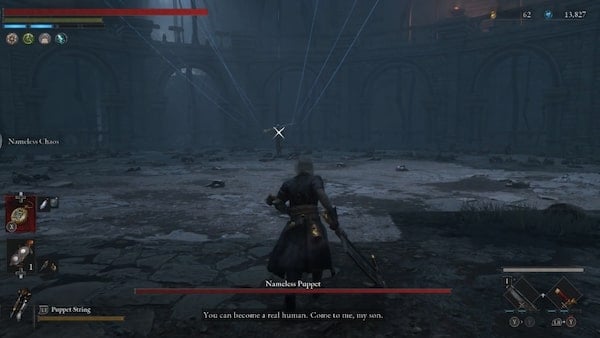
The Nameless Puppet has two phases. His speed and mobility significantly increase for the second phase. It starts off with long swords and slower attacks. this makes it easier to anticipate his next move. Allow it to play out its attacks and wait for each window before you run in and strike. The first phase can be easily cleared by playing aggressively.
During the second phase, its regular melee attacks are now also enhanced with some power and range that can project beyond its direct vicinity. When he jumps, quickly create some space since this is now an AoE attack. There will be a circle that blasts in red upon landing. He will also make use of his double swords, doing a lot of windmill motion attacks. Prepare to react to the quick relentless back-to-back attacks. He will do his fair share of distancing himself and you'll have to continue to attack as you advance. Try to back him up into a corner to prevent him from moving too much. Dodge into his attacks at an angle to try to get him from the side or behind. Clear the fight to complete the game and allow the chosen Ending to play out.
Lies of P Endings and New Game Plus
- View the Endings page for all Endngs and related choices and conditions
- View the New Game Plus page for all retained progress and what awaits when beginning a new playthrough with the same saved file.
At the end of the final cutscene, a Warning will appear for all items that are not inherited when starting the next playthrough:
- All Collectibles except Records
- Krat Supply Boxes
- Venigni Collection
Arche Abbey Map
Map to be added
Arche Abbey Videos
Videos Related to this Location
 Anonymous
This is the best designed area in the game and one of the best in general, It's massive, It's well interconnected, Alot of variety in both puzzles, enemies, loot and rewards, engaging design and phenomenal visual/atmosphere.

 Anonymous
The only thing i dont like about this area is that every attack launches you so far, making it really difficult to not fall off and die

 Anonymous
By far my least favourite area in the game. It's way too long, filled to the brim with tanky and flat-out annoying enemies (almost fell asleep fighting the Door Guardian and rolled my eyes at every one of those big fencer guys) and is aesthetically mismatched with the rest of the game while being very insipid and uninspired looking. Yes, please completely abandon the unique and interesting Belle Epoque urban/industrial setting in favour of a giant bland tower of brown wood and grey stone.
Souls-likes in general tend to have weak final areas, a trend this game unfortunately didn't break.
 Anonymous
Man it's such a shame how badly they dropped the ball at the end of this game, this last area isn't fun at all.

 Anonymous
 Anonymous
This place just goes on and on and on, were they trying to build a tower high enough to reach the moon?


This is the best designed area in the game and one of the best in general, It's massive, It's well interconnected, Alot of variety in both puzzles, enemies, loot and rewards, engaging design and phenomenal visual/atmosphere.
0
+10
-1