Walkthrough for Lies of P covers a comprehensive guide on how to 100% complete the many Locations featured in the game. The Walkthrough Guide for Lies of P also features helpful details and vital information about specific encounters for the many characters such as Enemies, Bosses, NPCs, and important Items that are essential to the main campaign of Lies of P. The Walkthrough intends to guide players through various points of their gameplay and highlight objectives to fully accomplish the story of the game. On the other hand, if you would like to check an overview for a recommended progress path, you may visit our Game Progress Route page. For other helpful guides, you can also visit the Endings page.
Lies of P Helpful Links
- Combat: Learn about the basic and advanced combat mechanics for Lies of P.
- Controls: Features the layout of the default keys and controller for each platform the game is available on.
- FAQs: Discover various frequently asked questions on other aspects of the game that are raised by the community of the game.
- New Game +: Read about the NG+ information of the game, what happens after you beat the game once and what changes are applied.
- Bosses: Explore a compendium of all the Bosses encountered in the game, which includes boss information and guides on how to defeat each one.
Lies of P Walkthrough Guide
Lies of P Krat Central Station Walkthrough Quick Navigation
Click to be redirected to the specific location walkthrough
Krat Central Station is one of the Locations in Lies of P. The Krat Central Station is the first Location players will find themselves in. Many of the enemy encounters and Items found here serve as tutorials to let players ease themselves into the game's unique gameplay. Most Locations will feature at least one Stargazer, checkpoints where players can rest and recuperate, but the Krat Central Station does not. As you traverse your way through Krat, you will discover various locales, meet NPCs, encounter Enemies and Bosses, loot key Items, and discover various secrets, as well as critical points of interest that will help you through your gameplay.

General Information
- Previous: None
- Next: Krat Central Station Plaza
- Bosses: None
- No. of Stargazers: 0x Stargazers
Krat Central Station Map
[map to be added]
NPCs in the Area
- None
Bosses
- None
Enemies
- Krat Police
- Puppet Butler
- Puppet Marksman
- Puppet Officer
Items
Weapons
- None
Consumables
Throwables
- Sawtoothed Wheel x2
- Thermite x1
Legion Arms
- None
Amulets
- None
Defense Parts
Upgrade Materials
- None
Enemy Drops
Keys & Other Items
Full Krat Central Station Walkthrough
The Beginning
When you start up a new game, you will be met with a short cutscene of a mysterious blue butterfly asking Pinocchio for help. After it ends, you will have control of Pinocchio within a train. Your movement and camera rotation controls can be found on the left side of your screen. Head forward into the next train car. On the ground ahead is a glowing lamp - Monad's Lamp. Pick it up using the controls shown to you on the left and the voice of the blue butterfly will introduce themselves as Sophia. She asks that you go find her at Hotel Krat and asks Gemini, the creature in the lamp, to help direct you there.

Enter the next train car and interact with the bench of weapons at the far end. Here, you'll be able to choose your Combat Memory. Combat Memories can be considered the starting classes of Lies of P, giving you your base Stats and starting Weapons. The choices available here are Path of the Cricket: Balance, Path of the Bastard: Dexterity, and Path of the Sweeper: Strength. After you've chosen, exit the train using the door on your right, and you'll find yourself at the Krat Central Station.
Turn left as you exit the train and start heading forwards towards the train benches. You'll be given some basic Combat controls on your left, including how to Lock onto enemies, and how to perform basic attacks. Up ahead will be your first enemy, an Officer-looking puppet. Defeat it and you'll find another one slumped by some boxes on the left. After dealing with both enemies, keep heading forward and to the right is an item on the ground. Pick it up to obtain the Sawtoothed Wheel.

Krat Central Station Lobby
Continue up the stairs ahead and enter the building. In front of the statue are some Pulse Cells. These items are your main means of healing and you'll start with three charges. Once you've consumed all three of your Pulse Cells, more can be regenerated by attacking enemies. Make your way up the next set of stairs and defeat the three Puppet Officers here. On the bench on the left is a Dim Ergo Fragment.

When you ascend up the next staircase, you'll have two main pathways to take - you can either go right through an arched doorway or continue upstairs to a locked door. Start by heading to the right. As you pass through the doorway, you'll be given a tutorial on Guarding. Ahead, you'll find another Puppet Officer and a Marksman-type puppet on the balcony that will attack you from range. Gemini will also teach you how to turn Monad's Lamp on and off to give to more or less light.
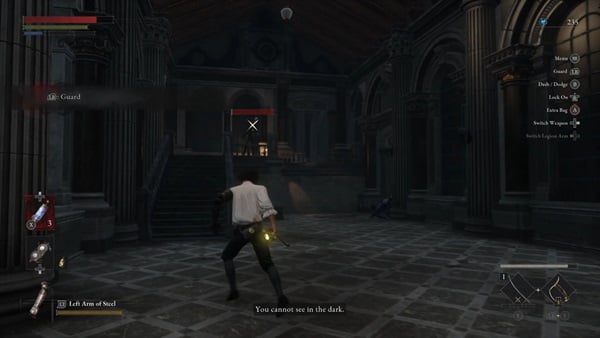
Below the balcony, make your way to the right to find yourself in a bathroom. Here you will encounter another sign-wielding puppet enemy on the left hand side, hiding behind the entryway. Here you can loot a Thermite item on the ground.
Up on the balcony, continue forward and go up the staircase here. Ahead of you will be a Butler-looking puppet with a candlestick. You will be taught about Rear Fatal Attacks and can practice performing it on the Puppet Butler with it's back facing towards you. Head forward and as you turn the corner, you'll find a Puppet Officer ahead. As you're fighting it, you'll be given a quick tutorial on using your Legion Arm. At the next corner is a bar where you'll find the Passenger's Note warning you about a dangerous puppet in the Waiting Room. Turn the corner and you'll be given a short tutorial on Dashing and Jumping. You'll be able to Rear Fatal Attack the Puppet Butler ahead, but there will be another one around the corner, as well as a Puppet Officer, so be careful. In the room with the train schedule, you'll find a Dim Ergo Fragment on the ground. Exit the room and turn left, then descend down the stairs.
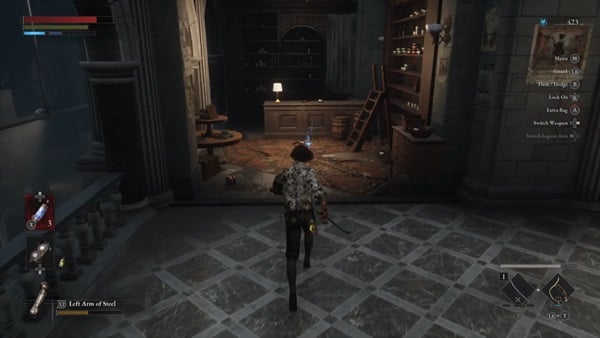
At the bottom, you'll be given a tutorial on Lock Devices. Unlock the door in front of you to open up a shortcut back to the lobby of the Krat Station and pick up the Fable Catalyst in front of the door. If you read the Passenger's Note earlier, you'll recognize this place as the Waiting Room. In the corner is a tough Police-looking puppet. When you defeat it, you'll get the Krat Central Station Main Entrance Key and the Workshop Union Lightweight Frame. In one of the corners of the room is a Sawtoothed Wheel on the ground.
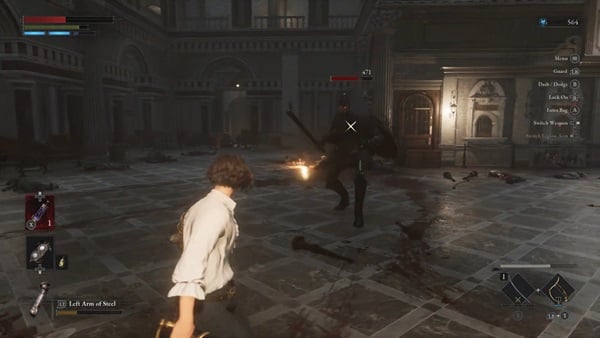
When you're done in this room, return to the lobby and head up the stairs to the locked door. With the Krat Central Station Main Entrance Key in hand, you can now unlock the door to move forward to the Krat Central Station Plaza.
Krat Central Station Map
Map to be added
Krat Central Station Videos
Videos Related to this Location
Lies of P Elysion Boulevard Walkthrough Quick Navigation
Click to be redirected to the specific location walkthrough
Elysion Boulevard Entrance is one of the Locations in Lies of P. The Elysion Boulevard Entrance is the beginning of the Elysion Boulevard, the next section being Inside the House on Elysion Boulevard. Most Locations will feature at least one Stargazer, checkpoints where players can rest and recuperate, of which one can be found at the Elysion Boulevard Entrance. As you traverse your way through Krat, you will discover various locales, meet NPCs, encounter Enemies and Bosses, loot key Items, and discover various secrets, as well as critical points of interest that will help you through your gameplay.

General Information
- Previous: Hotel Krat
- Next: Inside the House on Elysion Boulevard
- Bosses: None
- No. of Stargazers: 1x Stargazer
- Elysion Boulevard Entrance Stargazer
Elysion Boulevard Entrance Map
[map to be added]
NPCs in the Area
- None
Bosses
- None
Enemies
- Brawler Puppet
- Commoner Puppet
- Grenade Puppet
- Puppet Butler
- Puppet Dog
- Puppet Marksman
- Top Hat Puppet
Items
Weapons
- None
Consumables
- Attribute Resistance Ampoule
- Dim Ergo Fragment x2
- Electric Blitz Abrasive
- Fable Catalyst
- Legion Magazine
- Vivid Ergo Fragment x3
Throwables
Legion Arms
- None
Amulets
Defense Parts
Upgrade Materials
Enemy Drops
- Attribute Purification Ampoule
- Fable Catalyst
- Krat Police Baton Head
- Krat Police Baton Handle
- Legion Magazine
- Sawtoothed Wheel
- Star Fragment
- Throwing Cell
Keys & Other Items
Full Elysion Boulevard Entrance Walkthrough
Leaving Hotel Krat
As you leave Hotel Krat through the door behind Sophia, you'll find yourself at the Elysion Boulevard Entrance. Head forward through the archway and Gemini will speak to you, having seemingly fixed himself. He'll warn you about the Black Rabbit Brotherhood, then urge you to find someplace safe where you can talk. Continue forward and you'll find the first Stargazer of the area - the Elysion Boulevard Entrance.
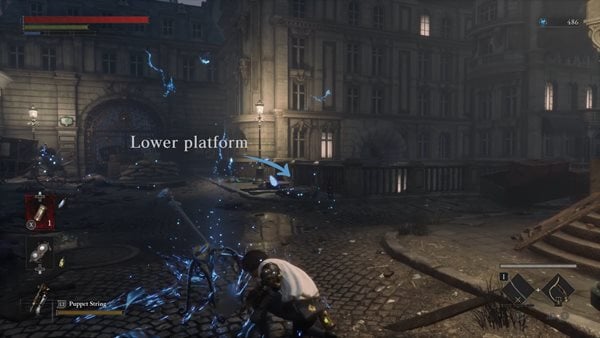
To the right of the Stargazer, you'll find two Puppet Butlers in a lower platform. Jump down to defeat them and pick up the Throwing Cell on the ground. Head up the stairs and defeat the two Puppet Butlers at the corner. Turn left afterwards and head through the archway. There will be a split in the path ahead. If you look to your left, you'll find an item in front of a locked gate. When you approach it, a Puppet Butler will jump down from a knocked over car. Defeat it and pick up the Vivid Ergo Fragment.

Head down the right path next. Turn right onto the main street to find a Puppet Dog, Puppet Marksman, and two Puppet Butlers. At the end of the street is a Chest with the LADA F150 Frame within it. Loot it, and head up the stairs to your right. At the top of the stairs, turn right into an alleyway and climb up the ladder.

You'll find yourself on some rooftops and balconies at the top of the ladder. When you turn the first corner, there will be a Puppet Butler waiting for you. After defeating it, make a beeline for the Puppet Marksman be running across the blue roof. This way, you'll be able to take out the ranged hazard quickly while avoiding the Puppet Butler waiting for you around the next corner. If you continue to the left of the blue rooftop, you'll find a Sawtoothed Wheel and a lock device you can interact with to open up a ladder shortcut back to the Stargazer.

Make your way to the right of the blue rooftop to progress. As you walk over the toppled sign, a tough puppet with a Top Hat will emerge from the apartment in front of you. Cross over the sign as soon as you can to give yourself enough room to fight this enemy. Once it's been dealt with, enter the apartment ahead. Make your way up to the next floor and you'll find three Puppet Butlers within the room. Defeat them and loot the Attribute Resistance Ampoule from the left corner of the room.

When you're done with this room, approach the window. On the opposite ledge, you'll find a Puppet Marksman and a new type of puppet with Commoner-looking clothing. Lure the Commoner Puppet back into the room to lose line of sight of the Marksman. Defeat it, then cross the makeshift bridge to get to defeat the Marksman. When all the threats have been eliminated, turn back around to look at the apartment, and you'll see an item on the skinny ledge. Carefully make your way there and pick up the Electric Blitz Abrasive.

Return across the bridge. Here, you'll be able to circle around to the left or the right. Start by heading to the right. At the end, you'll find an item, but as you approach it, you'll be ambushed by a Puppet Butler hiding around the corner on the right. Pick up the Sharp Pipe when it's been defeated, then head back towards the left path.

There are another two paths to go here - one down the ladder right by the ledge, and another up the ladder further ahead. Start by heading down the ladder. Go to your left, past the spotlight. There'll be a Puppet Butler guarding a Hidden Moonstone at the corner. Turn the corner, and at the end you'll be able to unlock a shortcut back to a previous split by activating the lock device on the gate. Pick up the Dim Ergo Fragment in front of the gate and head back up the ladder you came from.
Make your way up the next ladder, then roll through the boxes on your right. Run quickly around the ledge here as there is a Grenade Puppet you can't deal with on the upper roof to the right. Pick up the Vivid Ergo Fragment on the way, and as you turn the next corner, defeat the patrolling Puppet Butler.

For this next section, you'll have to deal with a few enemies while dodging attacks from the Grenade Puppet. Cross the bridge onto the next roof and take out the Commoner Puppet. Behind it is a Dim Ergo Fragment. Turn the corner and move towards the next Commoner Puppet. Defeat it, and take the ladder ahead of you down to find a Puppet Butler waiting for you. Be careful of the Commoner Puppet and the Grenade Puppet on the same level too. At the end, you'll find a Legion Magazine. Turn the corner once more and head down the stairs. Enter the apartment ahead of you to finally take cover.
When you've made your way in, a Commoner Puppet will turn the corner. Deal with it and head up the ladder. At the top, you'll find a Puppet Butler, then make your way up the next ladder. You'll find yourself on the rooftop with the two Grenade Puppets that you couldn't access before. Defeat them, and loot the Fable Catalyst and Vivid Ergo Fragment. Be careful of falling through the hole in front of the Ergo Fragment. If you do end up falling through, you'll find yourself in the apartment next door.

Instead of falling through the hole, make your way down both ladders you came from and continue forward into the bedroom. You'll find the Frozen Man's Letter on the sofa. When your read the letter to the end, you'll gain the Remembrance Gesture. Head out the door and turn right. Before you cross the bridge onto the large platform ahead, visit the apartment next door and defeat the Commoner Puppet so it doesn't follow you onto the platform.

Cross the bridge after you're done and defeat the Brawler Puppet here. It mostly attacks with it's head and arms, so if you're struggling with this fight, keep an eye out for it's upper body to catch when it's telegraphing an attack. After it's been defeated, loot the nearby chest for the Life Amulet. Continue forward into the next apartment, and you'll find the second Stargazer of the area - Inside the House on Elysion Boulevard.

Elysion Boulevard Entrance Map
Map to be added
Elysion Boulevard Entrance Videos
Videos Related to this Location
Lies of P Venigni Works Walkthrough Quick Navigation
Click to be redirected to the specific location walkthrough
Workshop Union Entrance is one of the Locations in Lies of P. The Workshop Union Entrance consists of both the area leading up to Venigni Works and the entrance of the factory itself. Most Locations will feature at least one Stargazer, checkpoints where players can rest and recuperate, of which one can be found at the Workshop Union Entrance. As you traverse your way through Krat, you will discover various locales, meet NPCs, encounter Enemies and Bosses, loot key Items, and discover various secrets, as well as critical points of interest that will help you through your gameplay.

General Information
- Previous: Krat City Hall
- Next: Workshop Union Culvert
- Bosses: None
- No. of Stargazers: 1x Stargazer
- Workshop Union Entrance Stargazer
Workshop Union Entrance Map
[map to be added]
NPCs in the Area
- Arlecchino (Phone)
Bosses
- None
Enemies
- Blank Puppet
- Brawler Puppet
- Dimensional Butterfly
- Grenade Puppet
- Puppet Lady
- Worker Puppet
Items
Weapons
Consumables
- Attribute Resistance Ampoule
- Dim Ergo Fragment
- Gemini's Emergency Protection
- Legion Magazine
- Radiant Ergo Fragment
- Special Resistance Ampoule
- Vivid Ergo Fragment
Throwables
Legion Arms
- None
Amulets
- None
Defense Parts
Upgrade Materials
- Hidden Moonstone
- Motivity Crank (Butterfly)
Enemy Drops
- Attribute Purification Ampoule
- Fable Catalyst
- Legion Caliber
- Motivity Crank (Butterfly)
- Star Fragment
Keys & Other Items
- Factory Manager's Report
- Miracle Cure
- Trinity Key (NPC reward)
Full Workshop Union Entrance Walkthrough
Reaching Venigni Works
You can get to Vengini Works by unlocking the gate at Krat City Hall with a key given by Geppetto at Hotel Krat. When you emerge, you'll find yourself at the Workshop Union Entrance. To the right, you'll find a note called Miracle Cure at the edge of the lower balcony. After picking it up, go straight ahead from the gate where there'll be a Worker Puppet next to a Throwing Cell.

Head down the stairs and turn right at the corner to find another Worker Puppet. Defeat it, then make your way down the ramp. If you look up and to the right, there'll be a Worker Puppet up on a roof throwing things at you. With the Puppet String equipped, you can pull it down to defeat it. Head down the next ramp, where you'll have to take care of another Worker Puppet and a Brawler Puppet. With these enemies out of the way, you can do a bit of exploring for loot.
At the base of the second ramp, circle around the building to your right. You'll find a Worker Puppet at the corner with a Special Resistance Ampoule next to it. After defeating it, head up the ladder to the roof. If you didn't pull down the puppet earlier with the Puppet String, you'll be able to defeat it here. On the corner of the roof is some loot. When you try to cross the wooden planks onto the next roof, it'll collapse, sending you back down to the alleyway. Either fall through here or descend back down the ladder, but at the very end, you'll find an Attribute Resistance Ampoule.

Back at the second ramp, look to the left and a little bit behind you. There will be a curve at the balcony that you can follow to get another piece of loot. Head back out the alleyway here and progress by going down the stairs on the other end. When you turn the corner, there'll be a Worker Puppet and a Puppet Lady waiting for you. Defeat them and deal with the next Worker Puppet and Grenade Puppet further up.
Before crossing the bridge, look to the left to find Gemini's Emergency Protection. To the right, head through the archway and pick up the ringing receiver. The mysterious voice on the other side introduces themselves as Arlecchino, the King of All Riddles, and gives you a classic riddle to which you have two answers - Human or Monster. If you answer 'Monster', Arlecchino will be disappointed that your answer was incorrect, but give you the Trinity Key anyway. If you roll into the boxes at the end of the street, you'll find a Radiant Ergo Fragment.
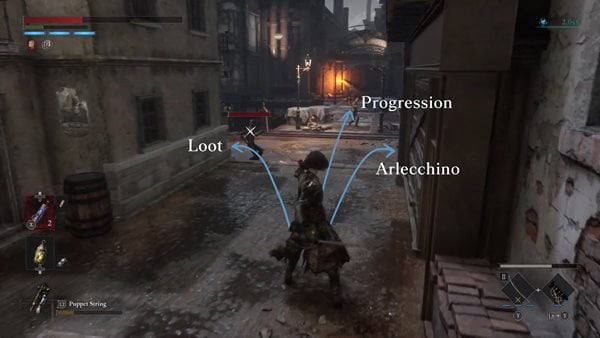
Cross the bridge and take out the three Worker Puppets and Grenade Puppet. Turn right at the end, pick up the Legion Magazine, and make your way up the staircase. At the top, you'll reach Venigni Works.

Exploring Venigni Works
When you reach the top of the staircase, move forward by heading down the ladder in front of you. Descend the next ladder and activate the Workshop Union Entrance Stargazer. By the wall nearby, you'll find a Chains. Pick it up and head up the stairs to the right of the Stargazer. There is a section to the left of the Stargazer as well, but you cannot progress there yet at this point and will be tackling that area later in the Workshop Union Culvert walkthrough.

Turn right at the top and loot the Dim Ergo Fragment from the ground. From the top of the stairs, head into the room on the left and drop down through the hole. Fight the two Blank Puppets here, then loot the Salamander Dagger, consisting of the Salamander Dagger Blade and Salamander Dagger Handle, from the safe. Unlock the door from this side and you'll be back at the Stargazer.

Head back up the stairs and this time, head straight through the doorway ahead. Turn left at the corner, and right at the next. A Grenade Puppet and Worker Puppet will be waiting for you around the middle of the balcony. Be careful of the hole in the floor as you approach the Grenade Puppet. At the end, you can pick up a Hidden Moonstone.
Enter the warehouse. Cross the double pipes on the left to the other side with a ladder, then cross the thin beams on the right to approach an item. Deal with the Blank Puppet and Worker Puppet before grabbing the Sawtoothed Wheel. You'll want to head downstairs next. You can do that by either going down the ladder you passed by earlier or jumping down and ambushing an unsuspecting puppet. Defeat the three Blank Puppets and Worker Puppets in the area. You'll then be able to loot the chest at the end for the Belford Shock Cartridge.

Make your way into the opposite side of the ground floor. To the right, you'll find the Factory Manager's Report. Head to the end and enter the room on the right. Pick up the Vivid Ergo Fragment in the corner, then enter the next room, where a chained up package will break the floor underneath it. Follow the package down, and you'll meet a new type of tough enemy, a puppet with dual Shields. Either defeat it for a Legion Caliber or run past it to the other side of the room.

Run up the stairs here and you'll encounter another Dimensional Butterfly. It will drop a Motivity Crank when defeated. Follow the metal platform, descending the stairs at the end. Grab the Thermite, then turn right at the corner. At the end of the corridor, descend down the ladder and activate the next Stargazer, Workshop Union Culvert.

Workshop Union Entrance Map
Map to be added
Workshop Union Entrance Videos
Videos Related to this Location
Lies of P St. Frangelico Cathedral Walkthrough Quick Navigation
Click to be redirected to the specific location walkthrough
Moonlight Town is one of the Locations in Lies of P. Moonlight Town is a small, deserted town at the base of the cliff housing the St. Frangelico Cathedral. Most Locations will feature at least one Stargazer, checkpoints where players can rest and recuperate, of which one can be found at Moonlight Town. As you traverse your way through Krat, you will discover various locales, meet NPCs, encounter Enemies and Bosses, loot key Items, and discover various secrets, as well as critical points of interest that will help you through your gameplay.

General Information
- Previous: Venigni Works Control Room
- Next: Path of Misery
- Bosses: The Atoned
- No. of Stargazers: 1x Stargazer
- Moonlight Town Stargazer
Moonlight Town Map
[map to be added]
NPCs in the Area
Bosses
Enemies
- Dimensional Butterfly
- Grenade Puppet
- Worker Puppet
Items
Weapons
- None
Consumables
Throwables
Legion Arms
- None
Amulets
- None
Defense Parts
Upgrade Materials
Enemy Drops
- Cable Railway Key (Boss Drop)
- The Atoned's Mask (Boss Drop)
Keys & Other Items
- Cable Railway Key (Boss Drop)
- Moonlight Town Guide
Full Moonlight Town Walkthrough
The Ghost Town
After clearing out Venigni Works of puppets, you will eventually make your way to Moonlight Town. Activate the Moonlight Town Stargazer and head up the slope. Gemini will make a quick comment about the corpses leading up to Moonlight Town. When you enter the building to the left, you'll find a Worker Puppet waiting for you at the corner. Take it out and continue into the building, heading out the hole in the wall and scaling the cliff for an Attribute Resistance Ampoule. Exit the building and up ahead are a couple Worker Puppets by a well, one of which will burst through the planks from the building to the right, and a Grenade Puppet on the roof. You can circle around the side of the building to find some stairs going up to the roof. After they've been defeated, grab the Thermite from the house the Worker Puppet burst through and the Saw Blade from the well.

Continue further into the town by heading down the bridge left of the well. When you reach the middle of the bridge, the planks below you will give way and you'll drop into the ravine below. Pick up the Resplendent Ergo Fragment, then head forward past a couple explosive barrels. After going under the fallen tree trunk, two Dimensional Butterflies will appear, both dropping a Crescent Moonstone. Continue down the path and turn left in the underground area. You'll find the Moonlight Town Guide on a tombstone.

Exit the tomb and go up the slope on the left. Climb up the ladder to get to the other side of town. The hut to your left will have two Worker Puppets. Deal with them, then head up the steps ahead. In the next hut to the left of the road, you'll find two Grenade Puppets, and while you're fighting them, four Worker Puppets will barge in and attack you. When they've been defeated, you can loot the Workshop Union Standard Corrosion Resistance Converter from the chest. Pick up the Star Fragment from the ground on the opposite side of the hut, and head through the hole in the wall to find a Saw Blade. The lever here can be activated to lower the gate next to you.

Exit the building and head further up another set of steps. Within some tombstones to your left you'll find a Dim Ergo Fragment. Continue to the end and you can speak to The Atoned, who tells you that the train going up isn't in service anymore. You will then be put into a Lie System Scenario. Whether you get this scenario or not may depend on if you defeated the Survivor and obtained the Stalker's Promise Gesture. The Atoned will ask you if you are a Stalker, to which you can do nothing, or Lie and perform the Stalker's greeting. If you Lie, you will be given the Cable Railway Key and let through peacefully. If you don't lie and do nothing instead, The Atoned will turn hostile.

Boss: The Atoned
The Atoned is a Stalker with a simple moveset that involves swinging her weapon or attacking you with her free arm. When attacking with her free arm, she will inflict Decay on you even if you blocked the attack. You will be able to tell which arm she'll attack with based on which arm she telegraphs. Despite having a basic moveset, her fast speed can be a nuisance. You'll want to dodge most of her attacks as you'll have an easier time not having to worry about timing perfect guards against her quick attacks and you'll be able to avoid getting afflicted with Decay. Because of her small size, dodging into her also allows to to quickly reposition behind her, giving you multiple opportunities to Fatal Attack her when she misses a move. Her moveset doesn't change at half health. When defeated, she drops the Cable Railway Key and The Atoned's Mask.

Whether you fought her or not, use the key to unlock the cable train, then take it up to the Path of Misery, with Gemini filling the silence of the journey.

Moonlight Town Map
Map to be added
Moonlight Town Videos
Videos Related to this Location
Lies of P Malum District Walkthrough Quick Navigation
Click to be redirected to the specific location walkthrough
Path of the Pilgrim is one of the Locations in Lies of P. The Path of the Pilgrim is the passageway connecting the St. Frangelico Cathedral and the Malum District. Most Locations will feature at least one Stargazer, checkpoints where players can rest and recuperate, of which two can be found at the Path of the Pilgrim. As you traverse your way through Krat, you will discover various locales, meet NPCs, encounter Enemies and Bosses, loot key Items, and discover various secrets, as well as critical points of interest that will help you through your gameplay.

General Information
- Previous: St. Frangelico Cathedral Library
- Next: Malum District
- Bosses: None
- No. of Stargazers: 1x Stargazer
- Path of the Pilgrim Stargazer
Path of the Pilgrim Map
[map to be added]
NPCs in the Area
- None
Bosses
- None
Enemies
- Axe Carcass
- Bear Carcass
- Carcass
- Dog Carcass
Items
Weapons
Consumables
- Attribute Resistance Ampoule
- Dim Ergo Fragment x3
- Gemini's Emergency Protection
- Legion Magazine x2
- Radiant Ergo Fragment
- Special Purification Ampoule
- Special Resistance Ampoule
- Vivid Ergo Fragment x2
Throwables
Legion Arms
- None
Amulets
- None
Defense Parts
Upgrade Materials
- Dark Moon Moonstone of the Covenant (Butterfly)
- Hidden Moonstone x2
Enemy Drops
- Carcass Body Fluid Bottle
- Dark Moon Moonstone of the Covenant (Butterfly)
- Fable Catalyst
- Hidden Moonstone
- Legion Magazine
- Radiant Ergo Fragment
- Sharp Pipe
- Star Fragment
Keys & Other Items
- Scribbles of Slum Resident
- Smiling Bunny Mark
- Sweepers Branch Office Newspaper Archives
- Wanted: Black Rabbit Brotherhood
Full Path of the Pilgrim Walkthrough
Malum District Tomb Slums
After exiting the St. Frangelico Cathedral, you'll find yourself at the Path of the Pilgrim. Walk down the road and you'll eventually find a Dog Carcass, as well as Special Purification Ampoule to the right of the path. Further ahead, you'll come across two Carcasses, one of which has a weapon. Defeat them and head further towards a small village. Just before you get there, you can find a graveyard to the left. Pick up the Smiling Bunny Mark from the tombstone in the middle. There's a powered down stargazer here that you can interact with, but you will get the message that you cannot use it at the moment.

Leave the graveyard and interact with the Path of the Pilgrim Stargazer at the entrance to the village. You'll see a locked gate that you can't interact with yet to your left. Take note of it, and head forward, staying on the upper ledge to the right. At the end, you can roll through some crates to find Gemini's Emergency Protection. Head back to the Stargazer and do down the path this time. On the right, you'll find a Carcass and a Dog Carcass by a fire. Deal with them, then pick up the Hidden Moonstone.

If you head forward, you'll get to Carcass on a split in the path - one going left and the other going right. Head to the right, down the riverbed, first. At the end, you'll find a chest, but will get ambushed by a Carcass before you can loot it. Defeat the enemy and loot the Acidic Crystal Spear, made of the Acidic Crystal Spear Blade and Acidic Crystal Spear Handle, from the chest.

Head back and go left at the split. To the right of the fire, you can pick up a Dim Ergo Fragment, after which a Carcass will jump off of the ledge above you to attack you. On the ledge to the left, you'll find a Saw Blade, and another Carcass will ambush you.
After grabbing these two items, head down the slope curving right. You'll find a Fire Canister and a Dog Carcass at the bottom. Through the rectangular hole ahead, you'll find a Chain, and further down the path, you'll find a Vivid Ergo Fragment and a Dog Carcass. The slope going upwards just takes you back up, but you'll find a Bear Carcass patrolling the slope. When defeated, it may drop a Star Fragment.

Continue forward, where you'll get to another slope curving right with a railing. On the right of the path is a lake with two items. When you approach the middle of the lake, you'll find a Pink Dimensional Butterfly that drops a Dark Moon Moonstone of the Covenant, and two Carcasses will ambush you. After dealing with them, you can pick up the Hidden Moonstone and Legion Magazine in the lake, both of which have a Carcass waiting to jump down at you nearby.

When you're done with the lake, continue further down the slope and you'll get to the Tomb Slums Entrance. There will be a few Carcasses that will charge you as you enter the slums ahead; take them out to be able to freely explore the area. From the entrance, the room to the right has an Attribute Resistance Ampoule within. The area to the left instead has a Dim Ergo Fragment.

Continue onto the rooftops to the left. Defeat the two Carcasses here and take the note Wanted: Black Rabbit Brotherhood from the corner of one of the roofs. Cross the bridge ahead, defeat the Carcass on the small island, then continue down the next bridge, defeating the Carcass here too. Don't head down the ladder, instead, follow the edge of the building and fight the two Carcasses here, then drop down through the hole in the ceiling. There'll be a Fire Abrasive on the corpse and some writing on the table in this lower room. Interact with the locked gate to be able to get back outside.

When you exit the room, there will be a lift to the left. At the top, grab the Scribbles of Slum Resident and unlock the locked gate here to unlock a shortcut back to the Path of the Pilgrim Stargazer. Head back down the lift after you're done. Before leaving the building, you'll want to hop back onto the lift. Before reaching the top, leave the lift through the hole in the elevator shaft a few seconds after you hop on. On this upper platform, you'll find a Dark Moon Moonstone of the Covenant.

Jump down and take the ladder to the left afterwards. Follow the path on the right to be in the area below the rooftops you were navigating earlier. An Axe-wielding Carcass will burst through the gates. It drops the Slum Shack Key when defeated. You can also pick up the Sharp Pipe from the ground afterwards.

The Slum Shack Key is used to open the small door opposite to the gate that was destroyed. Inside the small room, you'll find two Carcasses and a chest containing the Belford Superior Corrosion Resistance Converter. Leave the room after you're done and head up the slope to the right. You'll find a Radiant Ergo Fragment at the end.
Return down the slope and head through the broken gate. Make your way down the path and turn right at the corner. Up ahead are three Carcasses. Defeat them and keep moving forward to reach the Hobbler's Bridge. About midway through the bridge, three Carcasses will ambush you. At the end of the bridge, you'll find a gap in the railing by a wooden wheelbarrow. Jump down to grab the Vivid Ergo Fragment from the ledge ahead. Drop down onto the wooden platforms under the bridge and you'll find a Saw Blade to the left. You can go back up to the bridge using the ladder next to the bridge.

Past the bridge, you'll hear an announcement. Shortly after, an Elite Carcass will come out from the gate ahead. Head through the gate after defeating it and you'll find a note called Sweepers Branch Office Newspaper Archives in the cubby ahead and to the right. Continue further into the area by heading up the stairs. At the top, you'll find a Legion Magazine behind some crates to the right of the doorway ahead.

Enter the doorway and head up the ladder to your left. Carefully make your way across the beam to pick up a Special Resistance Ampoule. Make your way back down the ladder and descend the tower, using the beams, wooden platforms, and broken stone floors to do so carefully. You'll find a Dim Ergo Fragment on the way down.
At the very bottom of the tower, you'll find some writing on the wall that marks this area as Black Rabbit Brotherhood territory. Head through the tunnel ahead and up the stairs to find the Malum District Stargazer.

Path of the Pilgrim Map
Map to be added
Path of the Pilgrim Videos
Videos Related to this Location
Lies of P Rosa Isabelle Street Walkthrough Quick Navigation
Click to be redirected to the specific location walkthrough
Rosa Isabelle Street Entrance is one of the Locations in Lies of P. Rosa Isabelle Street, before being overrun by deadly puppets, was previously a place of entertainment and luxury. Most Locations will feature at least one Stargazer, checkpoints where players can rest and recuperate, of which one can be found at the Rosa Isabelle Street Entrance. As you traverse your way through Krat, you will discover various locales, meet NPCs, encounter Enemies and Bosses, loot key Items, and discover various secrets, as well as critical points of interest that will help you through your gameplay.

General Information
- Previous: Malum District
- Next: Rosa Isabelle Street Culvert
- Bosses: White Lady
- No. of Stargazers: 1x Stargazer
- Rosa Isabelle Street Entrance Stargazer
Rosa Isabelle Street Entrance Map
[map to be added]
NPCs in the Area
Bosses
Enemies
- Dimensional Butterfly
- Puppet Butler
- Puppet Jester
- Puppet Maid
- Soldier Puppet
- Unicycle Puppet
Items
Weapons
Consumables
- Attribute Purification Ampoule
- Attribute Resistance Ampoule
- Dim Ergo Chunk
- Dim Ergo Fragment
- Fable Catalyst
- Radiant Ergo Fragment
- Resplendent Ergo Fragment
- Throwing Cell
- Venigni's Urgent Repair Tool
- Vivid Ergo Fragment
Throwables
Legion Arms
- None
Amulets
- None
Defense Parts
- None
Upgrade Materials
- Crescent Moonstone
- Crescent Moonstone (Butterfly)
- Legion Plug
Enemy Drops
- Attribute Purification Ampoule
- Crescent Moonstone (Butterfly)
- Fable Catalyst
- Legion Magazine
- Sawtoothed Wheel
- Star Fragment
- The White Lady's Locket (Boss Drop)
- The White Lady's Mask (Boss Drop)
Keys & Other Items
- Artist's Doodle
- Rose Estate Incident, left as a mystery
- Special Report! Foreigner's Confession
- The White Lady's Locket (Boss Drop)
- The White Lady's Mask (Boss Drop)
- The Witch's Tower and Princess Poster
Full Rosa Isabelle Street Entrance Walkthrough
Rosa Isabelle Street
After obtaining the Rosa Isabelle Street Entrance Key from Antonia at Hotel Krat, you can find the doors leading to the Rosa Isabelle Street in the east wing on the upper floor of Hotel Krat. After exiting the Hotel, head straight ahead and down some steps to find the Rosa Isabelle Street Entrance Stargazer. Head down the steps ahead and through the archway at the bottom.
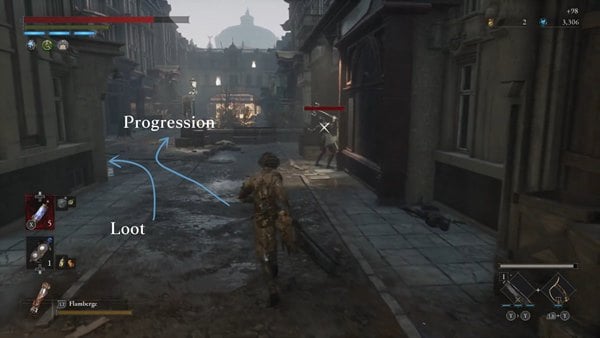
Defeat the two Butler Puppets, then go up the stairs to the left. By the railing, you can roll into the crates to grab the Fable Catalyst. Head back and turn left at the split, not going down the stairs. At the ledge, you'll find a note named The Witch's Tower and Princess Poster. You'll find a lit window next to you here. If you interact with it, you can speak to the Old Lady at the Window. She'll ask you to help her fetch some La Bleiwies wine from Lorenzini Arcade. This will begin her quest. Head back and down the stairs this time to find a Cluster Grenade.

Back at the split, go up the stairs on the right to get to an upper balcony. Here, you'll find a Puppet Butler and a Radiant Ergo Fragment. Go back down the stairs after looting the area, and again down the stairs on the left to get back to the main path. Turn left and in the lower sidewalk on the right, you'll find Venigni's Urgent Repair Tool next to the small steps. Continue forward towards the closed gates ahead and you'll have to defeat four Puppet Butlers. At the end of the street by the large gates, you can pick up a Crescent Moonstone. Next to it, you'll find a smaller gate that will act as a shortcut later on.

Turn around and go through the alleyway on the left. At the end, you'll find the Artist's Doodle on a corpse. Pick it up, then go across the small bridge here. In the apartment ahead, you'll be greeted by a Puppet Maid. If you approach the window on the right side of the room, two Puppet Jesters will burst through. These are new types of puppets that, after a small wind up period, will explode possibly insta-killing you.

You'll find a closed door to the right of the window. If you can get a Puppet Jester to blow up next to it, you can destroy the door, revealing a hole in the floor leading into the lower level. On the bed here, there'll be a note called Special Report! Foreigner's Confession. Leave the room, and in the living room ahead, you'll have to fight four Puppet Babies. The table in the corner of the living room has a Vivid Ergo Fragment on it.

Exit the living room to find two staircases - one going up and the other going down. Head upstairs first. You can open the safe to obtain a Legion Plug. The shortcut gate here leads back to the room to originally fought the Jesters at. Obtain the Sharp Pipe from outside the window and interact with device here to lower the ladder, then head back down the stairs where the safe is.

Descend the other staircase to the ground floor. You'll find three Puppet Maids here. Defeat them, and loot the Saw Blade from behind the bar. You can then exit the building. Behind the car in front of the doorway, you can find a Resplendent Ergo Fragment. A Puppet Maid will jump down from above you when you grab it.

Continue down the opposite end of the street. Defeat the multiple Solder Puppets and Unicycle Puppets found here. In the sheltered area on the right, you'll find an Attribute Purification Ampoule. At the very end of the street, you'll find a chest that contains the Dancer's Curved Sword, which is made of the Dancer's Curved Sword Blade and Dancer's Curved Sword Handle.

Boss: White Lady
Backtrack down the street a bit and head left down a series of steps. You'll get to an open stage-like area. If you interact with the puppet under the spotlight, you'll start the boss fight against the White Lady. The White Lady wields a rapier and her moveset consists of multiple jabs and thrusts using her weapon. She's quick, but can be staggered and interrupted fairly easily. Because of her quick attacks and movement, you may want to focus more on dodging and avoiding her attacks rather than perfect guarding them.

When defeated, the White Lady drops The White Lady's Locket and The White Lady's Mask. Head up the stairs to the right of the stage, and take the next set of stairs to the right to find a Throwing Cell. Head back to the stage, and go through the gates to the left of the stage. Head up the steps here and turn right. Behind the car, you can roll into some crates to reach the Attribute Resistance Ampoule.

On the left from the stairs, pick up the note called Rose Estate Incident, left as a mystery from a corpse. Keep going forward behind the barricade of luggage, and go through the gap in the wall on the left. To the left, you'll find a Dim Ergo Fragment. To the right, you can find a shortcut gate leading back to the street with the Unicycle Puppets and Soldier Puppets. If you head further into this side area, you can find a Dimensional Butterfly that drops a Crescent Moonstone, and a Dim Ergo Chunk.

Return to the barricade, and go up the stairs nearby. At the top, you'll find the Rosa Isabelle Street Culvert Stargazer.
Rosa Isabelle Street Entrance Map
Map to be added
Rosa Isabelle Street Entrance Videos
Videos Related to this Location
Lies of P Grand Exhibition Walkthrough Quick Navigation
Click to be redirected to the specific location walkthrough
Lorenzini Arcade is one of the Locations in Lies of P. Lorenzini Arcade used to be a shopping center, with Lorenzini Venigni as its namesake. Most Locations will feature at least one Stargazer, checkpoints where players can rest and recuperate, of which one can be found at the Lorenzini Arcade. As you traverse your way through Krat, you will discover various locales, meet NPCs, encounter Enemies and Bosses, loot key Items, and discover various secrets, as well as critical points of interest that will help you through your gameplay.

General Information
- Previous: Estella Opera House
- Next: Grand Exhibition Gallery
- Bosses: None
- No. of Stargazers: 1x Stargazer
- Lorenzini Arcade Stargazer
Lorenzini Arcade Map
[map to be added]
NPCs in the Area
Bosses
- None
Enemies
- Bloated Carcass
- Carcass
- Elite Jester Puppet
- Puppet Butler
- Puppet Dog
- Puppet Maid
Items
Weapons
- Circular Electric Chainsaw Blade (Merchant)
- Circular Electric Chainsaw Handle (Merchant)
- Clock Sword Blade
- Clock Sword Handle
Consumables
- Attribute Purification Ampoule
- Dim Ergo Chunk
- Dim Ergo Fragment
- Electric Blitz Canister
- Fable Catalyst
- Gemini's Emergency Protection x2
- Gemini's Iron Protection
- Radiant Ergo Fragment x2
- Special Resistance Ampoule
- Vivid Ergo Fragment x5
Throwables
Legion Arms
- None
Amulets
- Hunter's Amulet
- Indomitable Amulet (Merchant)
Defense Parts
- LADA F250 Frame (Enemy Drop)
Upgrade Materials
Enemy Drops
- Crescent Moonstone
- LADA F250 Frame
- Legion Magazine
- Resplendent Ergo Fragment
- Sharp Pipe
- Special Resistance Ampoule
- Star Fragment
Keys & Other Items
- Arcade Underground Passage Key
- La Bleiwies
- Lorenzini Arcade 1st Floor Key
- Monad Charity House Concert
- Scandal! V, the Tragedy Behind the Flamboyance
- The greatest show on Earth is coming!
- Venigni Commemorative Coin (NPC reward)
Full Lorenzini Arcade Walkthrough
Charity Market Path
After being stopped by Geppetto at the end of the Estella Opera House, head through the gap in the wall next to him to reach the Charity Market Path. Turn right at the corner and defeat the Puppet Maid & Puppet Butler here, then pick up the Vivid Ergo Fragment on the ground. Turn left then head down the stairs.
There'll be three puppets in this fountain area, three Puppet Maids and a Puppet Dog. To the right of the fountain, there'll be a Cluster Grenade, and on the left is Gemini's Emergency Protection. Head down the stairs found on the right of the fountain. Turn right at the bottom and Gemini will comment on how all the puppets look sad. Further down the alleyway, you'll find a Puppet Butler hitting the wall on your right. Behind him is a Radiant Ergo Fragment. Head back out into the alley and climb the stairs near the end to the top, where you'll find an Attribute Purification Ampoule.

Back down the steps, head down the steps going left at the very end of the alley. Turn right at the bottom to find a Crescent Moonstone in front of a Puppet Maid. Turn around, then go down the stairs on the right. Straight ahead will be a Thermite behind another Puppet Maid. Go to the other side of the path and turn right to go down another set of steps

On the left side of the path with stalls, there'll be a Dim Ergo Fragment. Head up the ladder to the right of the tunnel entrance, and at the end you'll find a chest containing the Clock Sword, and its components, the Clock Sword Blade and Clock Sword Handle. Go back down the ladder and head through the tunnel. You'll find a headless Puppet Lady within.

At the end, you'll emerge into an open plaza. On the left side of the area is Gemini's Emergency Protection. Close to the entrance of Lorenzini Arcade, you'll find a Puppet Butler, Puppet Dog, and Puppet Maid. After defeating them, grab the Radiant Ergo Fragment and Saw Blade. Open the sliding gate in front of the arcade to be able to enter the premises.

Lorenzini Arcade
When you enter the arcade, there'll be a Carcass up ahead standing still. As you approach it, two more Carcasses will burst through the right side. Follow the blood trail into a room to the left. Inside, you'll find a new type of Carcass that will try to grab you. After defeating it, pick up the Vivid Ergo Fragment and head back out into the hallway.

About halfway, you'll find a locked gate to the right that you can open up later for a shortcut. Continue down the hallway until you get to a circular area. You can activate the Lorenzini Arcade Stargazer here. On the right, the path leads to a locked gate that requires a key. Head straight forward instead and an Elite Carcass with bladed hands will drop down from the ceiling. Defeat it, and loot the Lorenzini Arcade 1st Floor Key at the end.

You can now return to the Stargazer and go to the path we skipped on the right. Defeat the three Carcasses near the end of the hallway, then unlock the gate at the end with the key. To the left, you'll find a hole in the wall. Go through and head down the stairs, defeating the three Carcasses here. Head through the archway at the far side of the room and turn left. Hug the right wall to pick up a Vivid Ergo Fragment and defeat the Bloated Carcass on the other side.

Turn right through the archway and defeat the Blank Puppet here. Further in the room, you'll find two more Blank Puppets, and your first Golden Dimensional Butterfly. These types of butterflies move very slowly, but will occasionally make an attack that knocks you back. When defeated, it drops a Half Moonstone.

Continue up the stairs when you're done, then through the hole in the wall. Defeat the Blank Puppet and grab the Star Fragment. Jump down into the hole to get back downstairs or head back down the stairs in the previous room. Go down the ramp into another hole in the floor, this one leading into a room full of red liquid. Lure the Elite Carcass here onto the ramp to fight it out of the water, and when defeated, it will drop the LADA F250 Frame.
Make your way back down into the red water and turn left to find a Fable Catalyst by the back wall. Go to the right of the ramp next and exit the room. Out the gates, go up the stairs to your right. At the top, turn left to find a note called Monad Charity House Concert.

When you exit the room into the hallway, turn right and defeat the Carcass patrolling the area. In the large circular area, look to the right to find Gemini's Iron Protection. Continue forward and up the stairs to the left, where you'll find two hulking Carcasses. The item on the left is a Dark Moon Moonstone of the Covenant, but be careful when you approach it as the acid droplet above it will also drop down a Carcass.

After defeating the two large Carcasses, continue forward, to find a Vivid Ergo Fragment in the circular area. Turn into the hallway to the left. At the end, you'll find an open door to your left. Defeat the Carcass here, and when you leave the room on the other side, you can unlock a shortcut door to the right. This door leads back to the Lorenzini Arcade Stargazer.

You'll have two other ways to go here - to the left and straight ahead. Start by heading straight ahead into a bathroom. The last stall has the note called Scandal! V, the Tragedy Behind the Flamboyance. Go back and head through the left path next. On the fountain is the Arcade Underground Passage Key. A Wandering Merchant can be found to the right who, when spoken to, will tell you that the Grand Exhibition can be reached through the cellar of the arcade. The doors ahead can be unlocked to open up a shortcut back to the hallways with the two large Carcasses.

Head out the shortcut door and down the stairs. At the very end of this hallway, you can use the key to unlock the double gates. Ahead will be a Bloated Carcass. Defeat it and go through the archway to the left. After defeating the two Carcasses, look to the left to find some stairs. You can unlock a shortcut gate at the top that leads back to the Stargazer.

Straight ahead at the bottom of the stairs, you'll find a blue mist that inflicts Decay while you're in it. You can lock onto a device within the mist and throw any Throwing Object onto it to disable it, causing the mist to dissipate. At the end, you'll find an Electric Blitz Canister. Don't stand too long in the area, however, as the device will reactivate after a short period of time. Turn back around towards the hallway. In the room to the left, you can find a note called The greatest show on Earth is coming! and a Crescent Moonstone behind some tables.

Exit out the doorway on the other side of the room to find a staircase leading into the cellar. As you go forward into the cellar, you'll find an item in front of some wine barrels. When you approach it, an Elite Jester Puppet will come barreling through the barrels. It drops the Hunter's Amulet when defeated. The gates keeping the other Carcasses will break apart when the elite comes through. In one of the cells that open, you can find a Special Resistance Ampoule.

Pick up the Dim Ergo Chunk from the ground, then continue down the path where the Jester Puppet broke through. Through the gates, turn right and look in the alcove to the right to find a Balance Crank. At the base of the stairs, you'll find some La Bleiwies wine on the left that you can return to the Old Lady at the Window later.
Go up the stairs and defat the three Carcasses, then head up the next set of stairs ahead. At the top, you'll hear an announcement from Venigini. Start by unlocking the gate to the right to open up a shortcut back to the Stargazer and find a Vivid Ergo Fragment. When you interact with the Stargazer, you can speak to Venigni, who'll reveal that the Stargazers were what the King of Puppets were using to communicate with all the other puppets in Krat. He heard a cry for help at the Grand Exhibition and asks you to investigate it.

Head back through the gate, and go to the end of the hallway. At the top of the stairs, you can open a door that leads back outside. Follow the path and at the top of the stairs, you'll be at the Grand Exhibition Gallery.
Completing the Old Lady's request
You can return to the Old Lady at the Window at the Rosa Isabelle Street Entrance to give her the bottle of La Bleiwies you found. She'll reward you with the Venigni Commemorative Coin, which can be given to Pulcinella at Hotel Krat for a Half Moonstone.

Lorenzini Arcade Map
Map to be added
Lorenzini Arcade Videos
Videos Related to this Location
Lies of P Barren Swamp Walkthrough Quick Navigation
Click to be redirected to the specific location walkthrough
Barren Swamp is one of the Locations in Lies of P. This page will guide players on how to traverse the entirety of Barren Swap along with helpful details such as general progression, secret areas, shortcuts, and more. As you travel your way through Krat, you will discover various locales, meet NPCs, encounter Enemies and Bosses, loot key Items, and discover various secrets, as well as critical points of interest that will help you through your gameplay.

General Information
- Previous: Grand Exhibition Conference Room
- Next: Hermit's Cave
- Bosses: Owl Doctor, Green Monster of the Swamp, Puppet-Devouring Green Monster
- No. of Stargazers: 5x Stargazer
- Barren Swamp Entrance
- Barren Swamp
- Barren Swamp Ravine
- Barren Swamp Bridge
- Barren Swamp Nest
Barren Swamp Map
[map to be added]
NPCs in the Area
Bosses
Enemies
- Large Puppet Worker (Shovel)
- Puppet Dog
- Dimensional Butterfly
- Puppet Rifleman
- Carcass
- Clown Brawler Puppet
Items
Weapons
Consumables
- Attribute Resistance Ampoule x3
- Dim Ergo Chunk x3
- Dim Ergo Fragment x4
- Fable Catalyst
- Electric Blitz Abrasive
- Gemini's Emergency Protection
- Gemini's Iron Protection
- Legion Magazine
- Radiant Ergo Fragment
- Resplendent Ergo Fragment
- Special Resistance Ampoule
- Special Purification Ampoule
- Golden Ergo
- Vivid Ergo Fragment
Throwables
- Acid Canister
- Cluster Grenade
- Saw Blade x2
- Sawtoothed Wheel
- Sharp Pipe x2
- Fire Canister
- Carcass Body Fluid Bottle
Legion Arms
- None
Amulets
Defense Parts
Upgrade Materials
- Advance Crank
- Balance Crank
- Crescent Moonstone
- Legion Caliber x2
- Motivity Crank x2
- Half Moonstone x2
Enemy Drops
- Acid Canister
- Alchemical Booster
- Dark Moon Moonstone of the Covenant x2
- Owl Doctor's Mask
- Star Fragment x2
- Quartz x2
- Stabilized Alchemical Booster
Keys & Other Items
- Venigni's Krat Landmark Guide IV
- Experiment Report of Order - Test Subject 890
- Bloody Letter
- Frayed Notebook
Barren Swamp Walkthrough
Activate the Barren Swamp Entrance Stargazer
After riding the train from the Grand Exhibition Gallery, you will be transported to the entrance of the Barren Swamp. Getting off the train will lead you to a small abandoned factory. Head your way there as this is where the entrance of the Barren Swamp lies. Along the way, you will enter a large empty room with a x1 Resplendent Ergo Fragment. Head through the next area that looks like a puppet assembly room with lots of lifeless puppets ready for assembly or rather they are readying it all for abandonment.

On one of the tables, get the x1 Venigni's Krat Landmark Guide IV collectible. Head through the nearest exit and discover the nearest Stargazer which is the Barren Swamp Entrance Stargazer. Activate it and starting from here, players can follow a straightforward path. Before heading through the inner section, grab the x1 Gemini's Iron Protection.


As you move forward, you will come across an x1 Large Puppet Worker who uses a shovel as a weapon. Be careful of its hard-hitting attacks and stagger it as soon as possible to gain the upper hand. After defeating the Large Puppet Worker, proceed through the path ahead and find an x1 Puppet Dog. Eliminate it and you will eventually find x1 Radiant Ergo Fragment lying beside the pathway you are currently in. Continue the path here and soon find another x1 Puppet Dog. Eliminate it and proceed. Not far from your location, you will find a x1 Puppet with a Rifle near the carriage and another x1 Puppet Dog. Take them out by taking advantage of the explosive barrel near the carriage. After taking all the enemies out, open the chest and get x1 Belford Superior Insulation Converter. The only available path here is the way you need to go.

In the next area, you will soon find an area with a swamp. Pay attention to the Puppets stationed on top of the cliffs as they can fire at you with rifle rounds. Dash as fast as you can to avoid being hit and follow the cliff pathway in here. Get the x1 Dim Ergo Chunk along the way. Access the lower levels alongside the drainage is an x1 Puppet Dog and beware of this one as it explodes and deals a lot of damage. There are items here for you to get. As you have guessed the swamp can Corrupt you when traversing on this kind of terrain so to avoid getting the Corruption Status, avoid traversing on these swamps as much as possible. However, if you need to, be sure to do it as quickly as you can. There are two items here, a x1 Dim Ergo Fragment and an x1 Attribute Resistance Ampoule.


After getting both items proceed to the path past the swamp. Follow the path and eventually find a bonfire with a loot near to it. Get the x1 Special Purification Ampoule as quickly as you can since there is exploding rolling debris made of puppet parts in here that can easily hit you if you miss it. Avoid the debris at all costs and continue to the ravine-looking path which will lead you to an x1 Clown Brawler Puppet. Watch out for this puppet since it can inflict Electric Shock status. Aside from its slam attacks, it can also throw speedy rocket punches at you.
Unlock The Shortcut Near The Keep
Get Legion Caliber after eliminating this enemy, and continue following the path here until the path separates into two. Head to the right path first and you will notice the Puppet Riflemen that you were unable to confront in the previous area. Take them out and take the x1 Legion Magazine as a loot in this section. After getting the loot, head back from whence you came and pass the broken bridge there's a building that looks like a keep. Head towards there and take out x1 Puppet Swordsman guarding the wooden bridge. Cross the bridge as fast as you can as the middle part of it will be destroyed. If you fall, just circle back and your regular jump can bridge the gap.

Inside the keep, there is another x1 Puppet Swordsman guarding the circular stairs. Be careful traversing this area as you might fall just in case you do not want to explore the lower areas. After defeating the Puppet Swordsman, get the x1 Half Moonstone on the wooden ledge or broken pillar near where you fought the swordsman. If you want to explore the lower section of the keep there are items available for us to get. Jump to the lower area and soon you will find a Large Puppet Worker ( Shovel ). Deal with it and receive an x1 Attribute Resistance Ampoule, x1 Crescent Moonstone, and x1 Star Fragment. After the battle, you can also loot another x1 Radiant Ergo Fragment in the area and a x1 Throwing Cell.


After getting all items in the lower section of the keep, head to the upper parts instead and find x3 Puppet Swordsmen. Quickly take them out while minding your position as you can easily fall into the lower section again if you are not careful. After defeating all enemies, get the x1 Special Resistance Ampoule and head to the nearest exit. Existing the keep will lead you into an area where a mine cart can be activated by activating the switch. But before tinkering with the switch, get the x1 Chain near your position. There's a ladder that leads to the upper section of the keep, head there and you will find a Puppet Swordsman with a flaming sword. Take it out and receive a x1 Star Fragment. Get the chest as well in this area containing a x1 Recharged Amulet.


Head back to the switch and activate the switch, the cart will move and slam itself into the barricaded wall. Destroying it afterward. This then unlocks a shortcut to the Barren Swamp Entrance where you first access the Stargazer in this area. Replenish your consumables if you want before proceeding.

Activate the Barren Swamp Stargazer
This is going to be our second Stargazer in this area. After replenishing your loadout, from the Stargazer, head back to the shortcut path, and instead of returning to the keep, head to your right and follow the path here that leads to Alidoro. Speak to him if you want to avail Special Weapons. If you are done head past the wooden bridge to proceed. Pick up the x1 Electric Blitz Canister.

Follow the straightforward path in here and the following enemies are waiting, x3 Headless Puppets, x2 Puppet Dog. Notice that the first Puppet Dog on the cliffs is ready to ambush you anytime, lure it first, and deal with the rest of the targets. If all enemies were taken out, pick up the nearest loot which is a x1 Crescent Moonstone. Follow the path until you reach an open area with lots of dead puppet bodies and carriages. Before going into the dump site, get the x1 Vivid Ergo Fragment located near the tree.


This is a large area with a lot of enemies around. Note that there is also a cannon (the cannon can destroy the large metal containers which some contain basic enemies while others have items inside but nothing important.
from the nearby tower that continuously fires rockets at you so it is advisable to be always on the move to avoid getting hit. You can hear the release shot of the cannon in the distance and use the terrain like trees and wagons for cover once before the cannon destroys it.
From the tree where you get the x1 Vivid Ergo Fragment, head to the left side of the area and a x1 Blank Puppet is waiting. Clear it and get another x1 Attribute Resistance Ampoule on the ground. Head to the wide area and hug the walls to the left. You will be encountering x2 Blank Crawling Puppets here and you can pick up a x1 Radiant Ergo Fragment.


Follow the swamp and eventually, you will come across a cave with an elite enemy guarding the pathway. It resembles the movesets of the Krat Police Puppet but it is much stronger. Defeat the x1 Shock Elite Puppet and get x1 Star Fragment. Also, pick up a x1 Gemini's Emergency Protection before moving forward. Follow the cave's pathway and eventually reach another Stargazer before activating it, picking up the x1 Dark Moon Moonstone of the Covenant near you would be a wise choice.


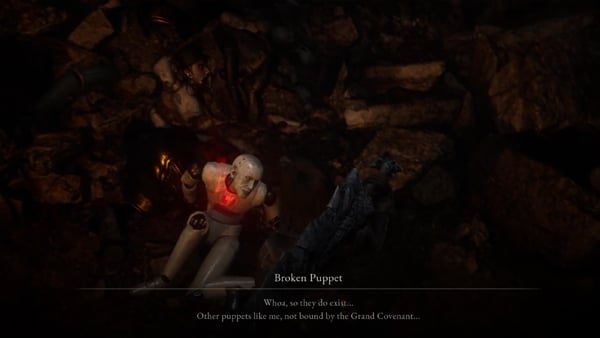
Activate the Barren Swamp Stargazer and speak to The Broken Puppet near it to activate a side quest. For a piece of detailed information about this quest, check out our Quests Page. Since we already activated the Stargazer, tackling the large dumpsite that we've been before would be a wise choice.
Reach the Dump Site's Tower
Head back to the large dumpsite we've been through before this area. We do have a clear goal and that is to destroy the manned cannon situated at the top of the tower. You can skip all enemies in the dumpsite if you wish to and head to the tower entrance. Inside the tower, there is a x1 Puppet Swordsman and x1 Puppet Dog, take advantage of the exploding barrels in here to do a preemptive strike. Once the enemies were taken out, get the nearest loot which is a x1 Radiant Ergo Fragment.
The area ahead contains another cannon and large metal containers along with more enemies and optional bosses. So back track first.

Head to the ladder to access the upper section of the tower. Upon reaching the upper area of the tower, you will notice a Puppet, operating the cannon. Take out both the puppet and the cannon and get the chest in the area that contains x1 Live Puppet's Axe Blade and x1 Live Puppet's Axe Handle. Head back to the large dumpsite since you can now explore it without worries. Get an x1 Sharp Pipe and an x1 Half Moonstone in the area.

Defeat the Owl Doctor
Now that we've explored the area, it is time to fast travel back to the Barren Swamp Stargazer we came from. Head straight to the other exit and notice another large dumpsite with a handful of enemies with x2 Puppet of the Future mini Bosses. Hug the walls on your left. You can pick enemies here one by one and just be sure to always be on the move as there's an active cannon situated on a tower once again. On your way, pick up the x1 Fable Catalyst. You can also find x2 Dimensional Butterflies that drop x1 Stabilized Alchemical Booster x1 Alchemical Booster. Not far from your location is another x1 Dim Ergo Fragment. Turn 180 degrees and you will notice a nearby shack. Note the cannon can damage the enemies but can pierce through and hit you so time your attacks carefully with the dodges of both or eliminate the cannon first and come back.

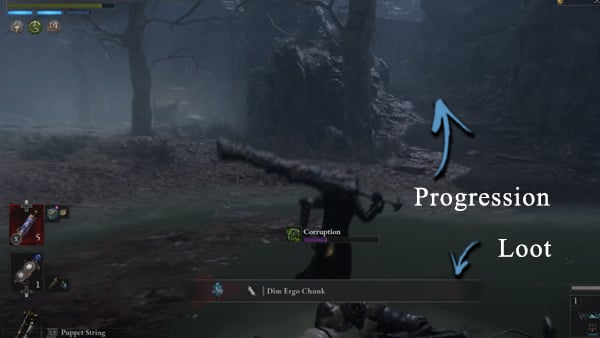
Head inside and get the x1 Experiment Report of Order - Test Subject 890 collectible. Get another loot here near the exit which is x1 Crescent Moonstone. Head back to the shack and our main objective is to defeat the Owl Doctor. Take the ladder and head to the lower part of the shack to confront the Owl Doctor. After a brief dialogue with him, the battle will start. He loves to deal with combination attacks and throws his knife and closes the gap by leaping towards you. However, most of his attacks are easy to counter. Plan ahead and always wait for him to attack first then counter afterwards. After defeating the Owl Doctor, you will get his Mask the Owl Doctor's Mask.

Reach the Barren Swamp Ravine Stargazer
We have defeated the Owl Doctor and it is now time to explore the large dumpsite. If you have not taken out the nearest Puppet of the Future in your location, this is the time to do so. On your way to the second Puppet of the Future, pick up the following items, a x1 Cluster Grenade, a x1 Half Moonstone, and x1 Resplendent Ergo Fragment. Before reaching the next Puppet of the Future, another Dimensional Butterfly will spawn here and will drop a x1 Dark Moon Moonstone of the Covenant. Defeat the second Puppet of the Future mini-boss to get another x1 Quartz. The entrance of the tower is tightly shut however, we can take advantage of the items around. The first thing that we need to do is to spawn the Dimensional Butterfly near the gate, kill it, and get an x1 Motivity Crank. Near the gate's location, pick up another x1 Sawtoothed Wheel.


Not far from your current location, we can pick up more items. Head straight and pick up a x1 Vivid Ergo Fragment and far from here, you will notice another loot situated on a higher ground. This loot is being guarded by two Blank Puppets. Deal with them and pick up x1 Sharp Pipe. Not far from this location, you can spawn another Dimensional Butterfly for a x1 Balance Crank. Before we enter the Ravine, notice the nearest tower entrance, and as mentioned this gate is shut tight. Facing the tower entrance, head to your right and hug the walls of the tower. You will eventually reach the back part of the tower. This place is very distinct due to the tall grasses surrounding the area. Head to the tall grasses and pass this specific section, you will notice a chest. After opening it. you will receive the Fancy Venigni Collection. We looted most of the items in the Dump Site and it is now time to enter the Ravine.

From the Barren Swamp Stargazer head straight and you will find a pathway that leads you to the Ravine. Follow it and eventually, you will reach the Barren Swamp Ravine. This place is a little confusing due to its layout. Just take it slow when progressing. Pass the tree, you will be encountering the first areas of the ravine. Beware of Human Carcasses in here, pick each and every one of them slowly as much as possible and you will be fine. There will be two Human Carcasses at the beginning of the area.


After taking them out, notice two loots that we can acquire. One on the lift and the one near its location. Let's get this one first. The loot on the other side contains a x1 Crescent Moonstone. You can jump to the lift to reach the loot and it is a x1 Fire Canister. After getting the item, simply jump to the next available platform.

Climb the ladder first to get x1 Star Fragment in the open space below the locked Stargazer Shortcut. Head back to the ladder we just used to access the lower part of the structure. There is a wooden bridge near another shack, this is where we need to go. Note that the middle part of the bridge will collapse, so proceed with caution. Inside the Shack is a x1 Radiant Ergo Fragment

Follow the path and it will be split into two. First, take the path on your left and traverse the long wooden platform. Be cautious about dealing with the enemies here since you can be caught up with the explosive barrels placed in here. Lure the enemies in a safe spot and pick them one by one. Once it's safe, get the treasure chest and receive a x1 Legion Caliber. Head back where the path splits and climb the ladder this time, this ladder can lead you to the Stargazer that we need to activate.


You will notice an item situated on a plank. You can get this one by slowly hopping to it however, take note that some of the parts will break after you step on it. Get x1 Gemini's Iron Protection. Jump to the nearest platform so you can safely get back on track. Climb the ladder that leads to the Stargazer shortcut again. Notice another loot that lies on the nearest lift. Hop on it and get an x1 Special Resistance Ampoule. Return to the original platform and head to the upper section and finally, activate the Barren Swamp Ravine Stargazer and unlock the shortcut.

Activate the Barren Swamp Bridge Stargazer
After restocking your inventory, let us proceed to the next area to progress. Head back to the ladder again and use it to climb down. We will be progressing through the inner parts of the Ravine from here. Go through the opening near the ladder.

After entering the cave, head to your left to get an x1 Attribute Resistance Ampoule. Notice the rolling debris is back so proceed with caution. After getting the item proceed to the only available pathway. On your way, A Human Carcass will ambush you, take it out, and a Dimensional Butterfly also spawns. Killing it will provide you with an x1 Advance Crank. To proceed safely at this level, you can hide and wait at the allotted space or covers that you can find as you traverse the narrow pathways here. So you can avoid getting hit by the rolling debris. Proceed and along the way, pick up an x1 Vivid Ergo Fragment. Wait for the debris to pass and proceed. You will eventually encounter two Human Carcasses along the cliffs with a Dimensional Butterfly. Take out all targets and get x1 Half Moonstone from the Butterfly. Follow the path once again and eventually stumble upon an x1 Electric Blitz Abrasive.
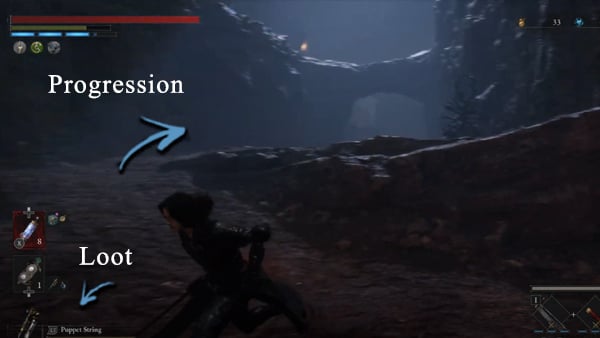

A few steps away a x1 Dim Ergo Chunk can be looted. From this location, notice the other side of the cliff where you can safely jump to access the lower parts of the area. Jump on it and find a Dimensional Butterfly that drops a x1 Half Moonstone. Follow the path and it will lead you to a wide area where the cave exit lies.

On your left, a Mutated Bear resides. This enemy loves to charge at you. Carefully time your attacks you shouldn't have too much problem taking it out. It will drop an x1 Star Fragment upon defeat. Open the chest as well that contains an x1 Arch Disruption Cartridge. Head back to the exit and notice a ladder on your right. This is a shortcut that you can unlock to access the Barren Swamp Ravine Stargazer. To progress, head to your left and notice a nearby shack with a lamp on it. An enemy will ambush you when you approach its entrance to proceed with caution. Deal with the Puppet equipped with a propane tank and open the chest which contains a x1 City Longspear Blade and x1 City Longspear Handle. Head out from the shack and get the x1 Vivid Ergo Fragment near your location.

To progress, follow the pathway past the shack. In this area, Kid Puppet will appear. It is an elite enemy that loves to stomp and leap at you. This enemy packs a lot of HP as well so plan your attacks and be patient. Be mindful of its grab attacks as well as it can deal a lot of damage. Upon defeating the Kid Puppet, it will drop a x1 Leaping Amulet and an x1 Dark Moon Moonstone of the Covenant. Also, pick up the x1 Carcass Body Fluid Bottle near your location.

To proceed, you will only have a path to follow here. Notice that this path led to the tower that we were not able to access since the entrance was tightly shut. Head inside to get a x1 Dim Ergo Fragment. Head to the lower floor and notice that you can activate a switch here for you to be able to unlock the gate. Just in case you want to return to a Stargazer, this is the nearest path. Head back and collect another x1 Dim Ergo Fragment. Head back to the tower entrance and take the ladder this time.

You will eventually find the second cannon in here and also the Puppet that operates it. Eliminate both targets and notice a ladder that can lead you to the other side of the tower. Follow the straightforward path here until you reach a series of long wooden bridges.

You will hear an explosion coming from Krat Central Station. Do not mind this for now and continue your progress by crossing the wooden bridges. When you cross the last wooden bridge, turn to your left and activate the Barren Swamp Bridge Stargazer.

Defeat the Puppet-Devouring Green Monster
We are about to complete this level and prepare for the main boss of Barren Swamp. From the Stargazer, follow the straightforward path that will lead you to the boss arena. Before you enter the arena, you can summon a Specter to gain leverage in battle. Enter the arena and a cutscene will play. This Green Monster of the Swamp could be challenging in all aspects. A considerable amount of health has a wide range of attacks and movesets. Movesets such as charge attacks, rake, tentacle whipping attacks, and more.

However, what makes this boss difficult is its second form. After defeating its first form, it will eventually subdue a puppet's dead body to have a second life. Its second form is called Puppet-Devouring Green Monster. It will gain additional movesets such as stomps and lunges. One thing that we noticed is it is much faster compared to its previous form. For more information regarding how to beat this boss, please check our Bosses page.


When you successfully defeat this boss, it will drop x1 Golden Ergo and a Puppet-Devouring Green Hunter's Ergo. To continue, speak to Alidoro and he will give you his thanks for helping him complete all the special weapons. He also mentioned that he will see you back at Hotel Krat. After speaking to Alidoro, Activate the Barren Swamp Nest Stargazer before moving forward.
Head to Krat Central Station
After speaking to Alidoro, you will come across a cave. Before following the path here to reach the lower levels, jump off the cliff to get an x1 Acid Canister. Follow the path here and eventually encounter x2 Blank Puppets. Take them out and reach the platform with a ladder. Climb down and get the nearest loot which is a x1 Legion Magazine.


You will be confronted by an elite enemy that looks like a Muscular Woman Puppet that loves to hit you with melee attacks. This Puppet has a lot of HP, dodge its speedy moves and you will do fine. Upon defeat, it will drop x1 Attribute Resistance Ampoule. Proceed and along the way, you will find an x1 Dim Ergo Fragment. Follow the path until you see a tunnel with iron doors. You cannot miss this since this is the only path. Follow the tunnel and climb the ladder at the end of the tunnel. After climbing the ladder make a 180-degree turn. Access the secret area where you can get the x1 Frayed Notebook collectible. Return to the ladder and this time head in the opposite direction. Upon proceeding, an earthquake will trigger.

Unlock the Krat Central Station Platform Stargazer
From here the path will be split into two and note that the water here will inflict a Decay Status ailment so try not to stay too long unless you need to. Go to the left path first and traverse the waters. At the end of the pathway, get an x1 Saw Blade. Return to your original position and this time head to your right.

This will lead you to a train car and eventually, you will notice that you are in Krat Central Station. You will be dealing with a lot of Carcasses in here so proceed with caution. At the end of the platform, near the train car, pick up the x1 Bloody Letter Collectible. Head to the opened train car entrance and use it to get to the other side of the car. There's a Carcass in here and pick up the x1 Attribute Resistance Ampoule lying on the ground.


Proceed to the inner section of the station and you will hear a voice asking you to investigate a phenomenon in Krat Central Station. Proceed and you will eventually stumble upon the Krat Central Station Platform Stargazer in this area.
Barren Swamp Library Map
Map to be added
Barren Swamp Videos
Videos Related to this Location
Lies of P Krat Central Station (Collapsed) Walkthrough Quick Navigation
Click to be redirected to the specific location walkthrough
Krat Central Station Platform is one of the Locations in Lies of P. The Krat Central Station is one of the iconic places in the game and it is where the people of Krat ride trains. Making it their main mode of transportation. Most Locations will feature at least one Stargazer, checkpoints where players can rest and recuperate. As you traverse your way through Krat, you will discover various locales, meet NPCs, encounter Enemies and Bosses, loot key Items, and discover various secrets, as well as critical points of interest that will help you through your gameplay.

General Information
- Previous: Hermit's Cave
- Next: Krat Central Station Lobby
- Bosses: Robber Weasel
- No. of Stargazers: 1x Stargazer
- Krat Central Station Platform
Krat Central Station Platform Map
[map to be added]
NPCs in the Area
Bosses
Enemies
- Four-Legged Scorpion
- Carcass
- Butler Puppets
- Spores
- Dimensional Butterfly
Items
Weapons
Consumables
- Acid Abrasive
- Dim Ergo Fragment
- Fable Catalyst
- Legion Magazine
- Radiant Ergo Chunk
- Resplendent Ergo Fragment x2
- Radiant Ergo Fragment x2
- Special Purification Ampoule
Throwables
Legion Arms
- None
Amulets
Defense Parts
- None
Upgrade Materials
- None
Enemy Drops
Keys & Other Items
Barren Swamp Walkthrough
From the Krat Central Station Platform Stargazer
As mentioned be prepared as you will be dealing with Carcasses in this area and they always come in groups. Be quick to take all of them out while maintaining your composure. First off, head to the exit near you. You will be traversing a long hallway with a locked shortcut on both ends. First, follow the long hallway and you will find an opening that grants you access to the train cars' roofs.

Notice as well that in the area in the middle of the two train cars, there are spores that release a deadly decay gas and fill the middle area. To safely traverse this part, simply destroy the spores for the deadly gas to dissipate. After doing so, Confront the Carcasses guarding the items here. One thing to note is the Large Carcass that spits projectiles drops an x1 Star Fragment and x1 Carcass Body Fluid Bottle. Once all enemies are defeated, collect the loot first. Get x1 Fire Canister and x1 Resplendent Ergo Fragment and finally, the one with the chest provides an x1 Quartz.

Head back to the ladder and it is time to proceed. After climbing the ladder, head to your left and notice a large crack where you can jump into. Get the x1 Chain in here after you land. You will find yourself on the other side of the train car. Traverse the platform until you find the opened entrance of the nearby train car and head inside. Inside the train car traverse the straightforward path and notice that a carcass will open the exit for you at the end of the train car. Grab the x1 Shot Put along the way.

Exit the train car and you will notice an area with spores, head to this area first and eliminate all the spores to get rid of the decay gas surrounding the area. Get the following items as well here, a x1 Special Purification Ampoule and x1 Radiant Ergo Fragment. Head to the other side of the area and notice a metal staircase leading to the upper floor. Once you reach the upper floor, unlock the shortcut here so you can access the first stargazer in this area if you need to rest.

Confront the Four-legged Scorpion
To progress, from the shortcut, head straight to the uncharted area with an elite carcass again. Be careful with Carcasses that hangs from the ceiling waiting to ambush you. Bait them and wait for them to drop and then strike. The Large Carcass will drop x1 Acid Abrasive. Get it and move forward. Proceed to the path and along the way, get the x1 Radiant Ergo Fragment lying here. At the end of this platform, notice a ladder, and climb down to the lower area. From the ladder, near the covered boxes with two Carcasses, get the x1 Dim Ergo Fragment.

Head to the nearest gate from your position. The next area is a wide area to cover. Start from the nearest platform with spores on it. Clear the enemies and spores here and get the following items lying around. These are x1 Resplendent Ergo Fragment and x1 Radiant Ergo Chunk. It is time to cover the other side of the train where an elite enemy is waiting. You can easily distinguish the area due to its size. Confront the Four-legged Scorpion and be careful when doing so. Its overall damage packs a punch but it is slow in terms of movement speed. Use this to your advantage and once it's down, receive an x1 Murderer Puppet's Amulet.

Defeat Robber Weasel
Near the train car entrance get a x1 Special Resistance Ampoule. Head to the ladder, traverse the platform, and unlock the nearby shortcut. Pick up the x1 Special Resistance Ampoule near the shortcut. This is the shortcut nearest to the first Stargazer in this area. If you prefer to rest, now is the time. To progress, starting from the shortcut that you've unlocked, notice the staircase leading to the lower floor. Take the stairs and it will lead to the lower platform with an open empty train car (if you go back to hotel karat and speak with belle she will initiate the find my partner quest he will be in this train car) and also an entrance to an area with a destroyed ceiling. Get the Resplendent Ergo Fragment near where the large ceiling hole is can be found, take the nearest stairs to access the upper section of the destroyed building, and get another x1 Vivid Ergo Fragment.

Head back to the station platform and instead head straight to the area where the bags were dropped off for additional items in here. This is a straightforward area, just go around the baggage and hunt down the following items, x1 Chains and the x1 Master Chef's Knife Blade and Master Chef's Knife Handle from a chest. Head back to the room with a hole in the ceiling. Head straight and you will find yourself in a wide area and a mini-boss is waiting for you. Robber Weasel is a humanoid mini-boss that loves to deal combination melee attacks with her axe. You can parry her for a faster stagger or just avoid her attacks completely and you will be fine. After defeating Robber Weasel, she will drop x1 Robber Weasel's Mask and x1 Robber Weasel's Hunting Apparel.

Activate the Krat Station Lobby Stargazer
After the battle with Robber Weasel, proceed to the nearby stairs to access the upper parts of the station. You've been here before and you will find the map familiar. You just need to defeat a different set of enemies this time which are the Carcasses. After the stairs head to your right to the next room where you can get an x1 Resplendent Ergo Fragment. From this empty room, head straight and traverse the long bridge-like hallway. After the long hallway, you will encounter a mini bar that hides x1 Fable Catalyst behind the counter. Head to the hallway that you have not been through yet and along the way, a Dimension Butterfly will respawn. Kill it and get an x1 Stabilized Alchemical Booster.

Continue following the hallway and pick up x1 Cat Dust along the way. Nearing the lobby, before you activate the next Stargazer, go ahead and get an x1 Dark Moon Moonstone of the Covenant item loot in the nearest restroom. After doing so head back and activate the Krat Station Lobby Stargazer.
Krat Central Station Platform Map
Map to be added
Krat Central Station Platform Videos
Videos Related to this Location
Relic of Trismegistus is one of the Locations in Lies of P. Relic of Trismegistus is the Alchemist's base beneath Hotel Krat. Players can access this area through the secret passageway behind Antonia's Portrait in Hotel Krat. As you traverse your way through Krat, you will discover various locales, meet NPCs, encounter Enemies and Bosses, loot key Items, and discover various secrets, as well as critical points of interest that will help you through your gameplay.

General Information
- Previous: Krat Central Station Street
- Next: Arche Abbey Entrance
- Bosses: Black Rabbit Brotherhood
- No. of Stargazers: x2 Stargazer
Relic of Trismegistus Map
[map to be added]
NPCs in the Area
- Alidoro
- Arlecchino (Telephone)
Bosses
Enemies
- Dimensional Butterfly
- Commoner Puppet
- Elite Marching Band Puppet
Items
Weapons
Consumables
Throwables
- n/a
Legion Arms
- n/a
Amulets
Defense Parts
- n/a
Upgrade Materials
- Dark Moon Moonstone of the Covenant
- Enhanced Alchemical Booster
- Full Moonstone of the Covenant
- Full Moonstone
- Half Moonstone
- Legion Caliber
- Star Fragment
- Technique Crank
Enemy Drops
Keys & Other Items
Full Relic of Trismegistus Walkthrough
How to Get to the Relic of Trismegistus
The Relic of Trismegistus becomes accessible after the attack on Hotel Krat. At this point, players would have returned to the Krat Central area and witnessed it in a corrupted state. While exploring through the Collapsed Street and Krat Central Station Street, players will be notified of the situation in Hotel Krat and will be told to return there immediately on foot.
While in Hotel Krat, speak to Antonia and she will inform you of the whereabouts and the instructions to access the secret passage to the Relic of Trismegistus. It is located behind her portrait. Follow the instructions and use the elevator to descend to the base.
Relic of Trismegistus Entrance
Once you descend, there will be a Stargazer that can be activated directly ahead. If you turn the corner behind the exterior corner of the elevator, you can obtain the Dark moon Moonstone of the Covenant. Follow the path heading down and there will be a small passage behind the waterfall. This will lead to the Sealed Underground. Drop down to the ground level to find 3 Dimensional Butterflies which will drop a Half Moonstone, Full Moonstone of the Covenant, and an Enhanced Alchemical Booster.
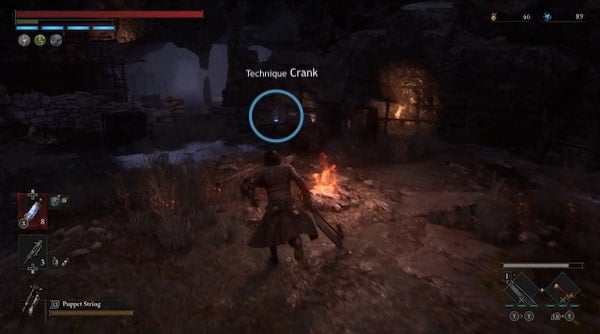
When you've cleared the butterflies, loot the edge of the level towards the cliff edge to find a Technique Crank. After you're done with this area, you may proceed up the slope to the next area. You should find the slope on the right corner if you're facing the opposite cliff away from the passage you first arrived from.
Be careful because the fort walls on this side will have fire projectiles that shoot in threes and will build Overheat along with some standard Puppet enemies. Loot the edge of the cliff on this side to obtain a Star Fragment. When you're done here, you can start to drop down to the lower levels. Head back to where you encountered the butterflies and there will be a slope heading down. There will be an elite Marching Band Puppet wielding an axe. If you manage to clear him, he will drop an Iron Wall Amulet. Take the loot, then you can freely loot the chest at the end of the broken stone bridge to obtain a Cursed Knight's Halberd.
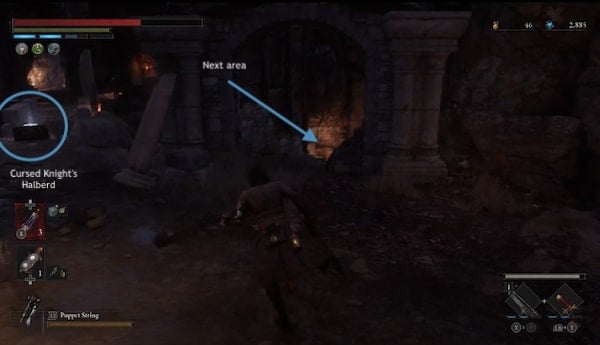
With this area cleared, you can now move on to the next area through the arch where the elite puppet came from. Eventually, it will lead to a split in the path and a few more lower levels.
Take the route on the left with the slope heading up to reach another telephone. Pick up the receiver to see what Arlecchino has to say this time. Eventually, it will lead to a yes or no question.
"Is Geppeto's creation a killer? CONFESS!"
- Yes
- No
If you respond "Yes", he will respond with "Bravo! Fantastico!" and will it give you The Chosen One's Trinity Key. You can then go back to the lantern where the path splits, and take the path to the right this time over the wooden plank path to progress. You will slowly be making your way down to the lower levels.
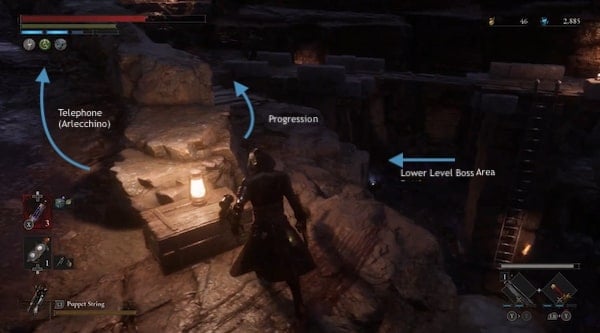
Defeat the Commoner Puppets with pitchforks and loot the drops then proceed over the broken bridge on the makeshift wooden bridge. Watch out for more fiery projectiles. Clear the area and pick up the Vivid Ergo Crystal. Drop down to the lower platform and you will also find a Half Moonstone along with another corrupted fiend and a corrupted dog. There will be a chest down here with a Legion Caliber. Before you move on, make your way back up to drop onto the isolated platform on a pillar to loot another Half Moonstone if you haven't already found it. Jump down again when you're ready.
If you see another set of stairs ahead, you may notice a summoning pool for you to summon a Specter. Prepare for the upcoming boss fight against the Black Rabbit Brotherhood.
Boss: Black Rabbit Brotherhood
Step through into the boss area to begin the Boss Battle. Unlike the first encounter, this time players will need to clear out all members of the Brotherhood. Each member on their own will have a smaller pool of health rather than the regular bosses. Focus on one member at a time and try not to get overwhelmed by multiple opponents. It would be beneficial to consider a Specter for this battle, to take some of the focus off you. Each member has a unique weapon and generally relies on basic melee attacks. Each of the members can be parried and backstabbed individually so if try to isolate them and charge up your attacks to quickly deplete their health and clear them one at a time. Apply the same approach as other mini-boss Stalker encounters, but always be aware of everyone's position.
For the first phase, you will face the Battle Maniac, Youngest, and Eccentric. They wield a rapier, a double sword, and a spear respectively. For a full breakdown of their attacks, view the Black Rabbit Brotherhood page. Clear all three members and you will face the Eldest of the Black Rabbit Brotherhood. Clear the fight and this time they will drop Quartz. You will also be able to activate the next Stargazer in the area: Relic of Trismegistus Combat Field.
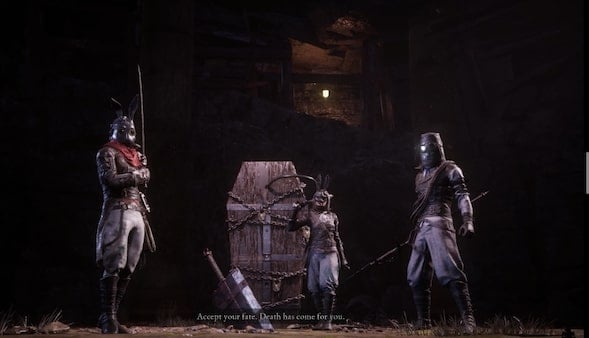
Search for Geppetto's Location
Once you are finished with this location, head through the next passage. It will take you into a tunnel held up by scaffolding. Continue through and you will find Alidoro here. He will tell you that they took Geppetto to the Alchemist's Isle and you can take the submarine to follow. You will also have a few interaction options:
- Purchase
- Talk
- Attack
We highly recommend that you "Talk" to him first to learn about his identity and confession. You now get to decide his fate. If you select "Purchase", you can check his wares to trade in Special Weapons or Amulets that you want, and if you spare his life, he'll stick around as your designated special weapons merchant. On the other hand, if you choose "Attack Alidoro", you'll be prompted another choice to attack him or not. If you choose to attack again, he becomes targetable, instantly killing him with just one hit.
- WARNING: Killing him will lock you out of viewing his wares if you want to buy exclusive Special Weapons or Amulets. However, doing this is a requirement if you want to obtain Alidoro's Cryptic Vessel, which you need to give to Venigni for it to be deciphered. Next, read the decryption and speak to Eugenie, you should have a dialogue option where you'll need to choose "I think he was just a talented Stalker" in order to acquire the Far East Princess record and the Trophy/Achievement "The Story of a Stranger Girl".
After this interaction, move on down the slope towards the water. There will be a Full Moonstone for you to loot by a lantern. Continue toward the dock and you will find a collectible: The Great Venigni and Pistris the Submarine next to some metal drum barrels. There will also be some levers here. You can interact with the levers to operate the Submarines Alidoro mentioned. This will lead to a cutscene to the next area in the next chapter: XI - Black Seaside.
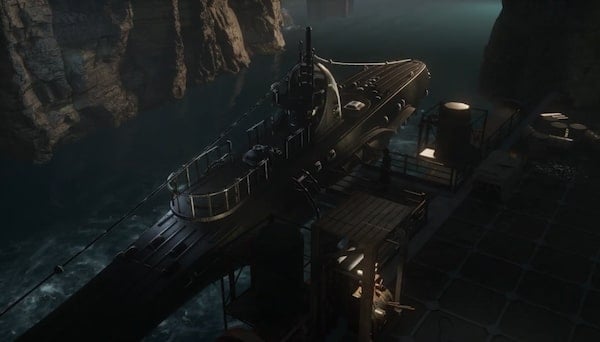
Relic of Trismegistus Map
Map to be added
Relic of Trismegistus Videos
Videos Related to this Location
Lies of P Arche Abbey Walkthrough Quick Navigation
Click to be redirected to the specific location walkthrough
Arche Abbey Entrance is one of the Locations in Lies of P. Arche Abbey Entrance covers the first half of the final location where P searches for Geppetto. Arche Abbey is known as the Alchemist's Isle. Players will need to cross the Black Seaside and face a number of Corrupted Foes to reach Arche Abbey. As you traverse your way through Krat, you will discover various locales, meet NPCs, encounter Enemies and Bosses, loot key Items, and discover various secrets, as well as critical points of interest that will help you through your gameplay.

General Information
- Previous: Relic of Trismegistus
- Next: Arche Abbey
- Bosses: Door Guardian, Laxasia the Complete
- No. of Stargazers: x10 Stargazer (XI)
Arche Abbey Entrance Map
[map to be added]
NPCs in the Area
Bosses
- Door Guardian
- Black Cat (Optional)
- Red Fox (Optional)
- Laxasia the Complete
- Simon Manus, Awakened God (Arche Abbey)
- Nameless Puppet (Arche Abbey)
Enemies
- Dimensional Butterfly
- Carcass
- Carcass Dogs
- Caracas Corrupted Elite
- Carcass Scorpion Tail
- Corruption Enemies
- Disruption Mist Sprayer
- Half-body Carcass
- Gamble Hat Puppet
- Elite Jester Puppet
- Elite Monkey Puppet
- Elite Top Hat Puppet
- Fire Breathing Puppet
Items
Weapons
Consumables
- Acid Abrasive
- Attribute Purification Ampoule
- Attribute Resistance Ampoul
- Carcass Body Fluid Bottle
- Electric Blitz Abrasive
- Fable Catalyst
- Fire Abrasive
- Gemini's Emergency Protection
- Gemini's Iron Protection
- Special Purification Ampoule
- Special Resistance Ampoule
- Venigni's Urgent Repair Tool
- Dim Ergo Crystal
- Dim Ergo Fragment
- Resplendent Ergo Chunk
- Vivid Ergo Fragment
Throwables
Legion Arms
- n/a
Amulets
Defense Parts
Upgrade Materials
- Balance Crank
- Crescent Moonstone
- Dark moon Moonstone of the Covenant
- Full Moonstone
- Full Moonstone of the Covenant
- Half Moonstone
- Hidden Moonstone
- Legion Caliber
- Quartz
Enemy Drops
- Attribute Purification Ampoule
- Dim Ergo Crystal
- Fable Catalyst
- Legion Magazine
- Radiant Ergo Chunk
- Star Fragment
Keys & Other Items
- Alchemist's Cape
- Black Cat's Mask
- Bundle of Old Letters
- First Discovery, Camille
- Happy (Gesture)
- High-level Alchemist Badge
- Mechanical Cryptic Vessel
- So Said Pistris II
Full Arche Abbey Entrance Walkthrough
How to Reach the Arche Abbey Entrance
Players reach this location following the Attack on Hotel Krat which will lead to the Relic of Trismegistus. Players will reach a dock and a submarine will take you to the Black Seaside where the Arche Abbey Entrance will be.
Black Seaside
Once players activate the submarine and reach the Black Seaside, a dialogue with Sophia will begin. This will be followed by a few scenes molded into the snow. Explore this location and visit all the scenes. As you approach each area, a dialogue sequence will play out before the scene fades away.
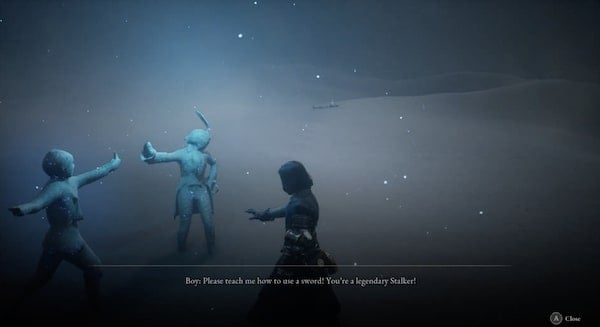
You will receive an Ergo piece starting with the Resplendent Ergo Chunk. After the second scene, you will receive another chunk. There will be body on the top of the slope where you can loot a Dim Ergo Fragment. After the third scene, another body ahead will have a Hidden Moonstone. A few other bodies in the area will contain another Dim Ergo Fragment.
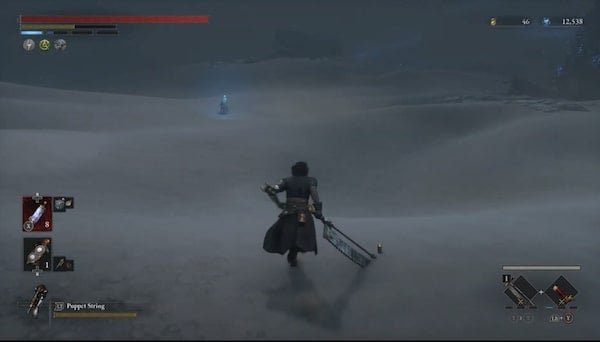
Following the scene with the two boys training to be Stalkers, you will gain a Dim Ergo Crystal. The body nearby will have a Crescent Moonstone and a few other ones with a Hidden Moonstone and a Vivid Ergo Fragment. Your next scene will glow in red. This will be the final one. After listening to all the dialogue play out, Pinnochio could feel warmth depending on your choices and progress. There will be a Stargazer to activate in the area for the Black Seaside. Walk on to reach the Arche Abbey Entrance.
Arche Abbey Entrance
As you approach the entrance, the defensive Enemies atop the fort walls will begin to fire missile projectiles and the walls will be surrounded by a few elite enemies with a scorpion tail. There will also be a number of bodies strewn around the surrounding area where you can obtain more Dim Ergo Fragments Vivid Ergo Fragments, an Attribute Purification Ampoule, Gemini's Emergency Protection a Crescent Moonstone, a Shot Put, and other Materials.
To get in, approach the walls and there will be a few sets of stairs that you can use to reach the top. You can start clearing the enemies manning the missile launchers from behind them. Loot the table with the lantern to obtain So Said Pistris II. Walk the whole outer wall to find a few more bodies to loot. You'll be able to pick up an Acid Canister and an Acid Abrasive from these bodies. You will also be able to pick up a Fable Catalyst and a Thermite along the edges of the wall.
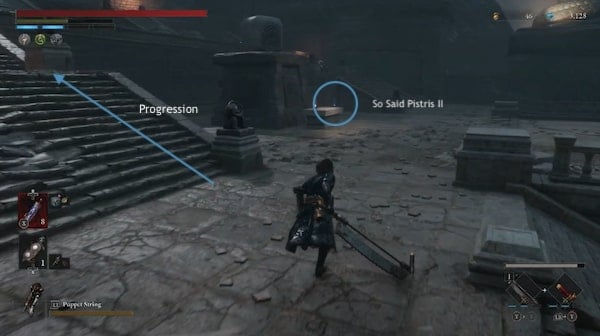
If you want to, you can clear all the enemies lining the wall to gain their dropped loot then destroy their launchers so you can go back and search the area surrounding the Arche Abbey more thoroughly without worrying about the projectiles. When you are ready to enter the Arche Abbey, head up the stairs and it will lead into a room with a mini-boss, the Door Guardian.
Boss: Door Guardian
The Door Guardian is a giant much like Champion Victor who relies on heavy fist attacks that involve a lot of punching, smashing, and slamming. Some of these attacks will be laced with Shock, which can slowly decrease your Stamina when afflicted. These heavy attacks are usually slow-moving, making them easier to dodge. However, they are likely to knock you over if you get caught in them. Take advantage of his lack of mobility by charging up your attacks to deal greater damage. Circle around him throughout the fight so it will be forced to reposition. This will give you more opportunities to deal standard attacks as he repositions for his next attack. Just make sure to steer clear of his rolls. If you do get in the way of his attacks, they will be able to knock you over. Stay close to him and dodge through his punches. Use a combination of dodging behind him and a combination of attacks. When he performs a larger attack, this will give you a longer period to deal heavier attacks of your own. For an attack breakdown and a more in-depth guide, view the Door Guardian page. Clear the fight to obtain the High-level Alchemist Badge.
Arche Abbey Outer Wall
Use the badge obtained from the Door Guardian on the panel in front of the next set of doors to get through. There will be a Stargazer just in front of the door you can now activate for the Arche Abbey Entrance. Head up the stairs and you will be met by a few corrupted Carcass Enemies and a large elite Carcass enemy. The elite enemy could drop a Fable Catalyst, Radiant Ergo Chunk, and a Star Fragment. If you continue all the way up the stairs there will be another platform on the floor and a door where you can once again use the High-level Alchemist Badge.
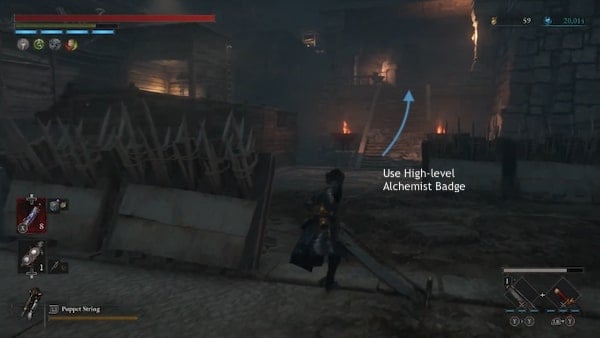
Use the badge and the next scene will trigger to reveal the new emerging platforms. Head back down and you can now use those newly raised bridges. This will lead you to the wooden fort fort area of Arche Abbey which will also be overrun by Corrupted Carcass enemies that will have the ability to inflict Decay. From here, you will need to continue ascending up the ladders, bridges, and ramps. Make sure to check the platform corners. You should be able to pick up Venigni's Urgent Repair Tool. Be careful of any stray missiles that could shoot down from above.
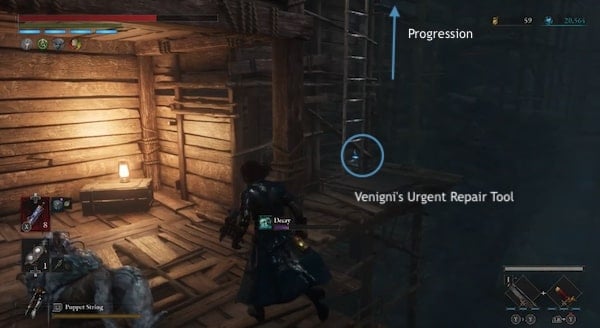
Once you climb this ladder, you will need to clear a few more Enemies. A plank on this platform will jut out and you can pick up a Star Fragment. Then up ahead, there will be a ramp leading down where you can press a button. Once you've activated the button, head back up. Take the stairs up all the way. The final platform with a lantern will have a Special Resistance Ampoule.
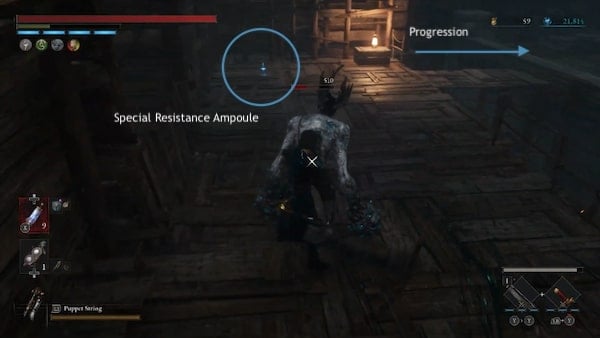
Pick it up then cross to the right. This is where you'll find the missile launcher. Clear the Carcass Dog in the area then go ahead and destroy the Missile Launcher and the enemy manning it. Behind the spiked fence will be a Saw Blade. After clearing this corner, you can then begin to ascend the large set of stairs.
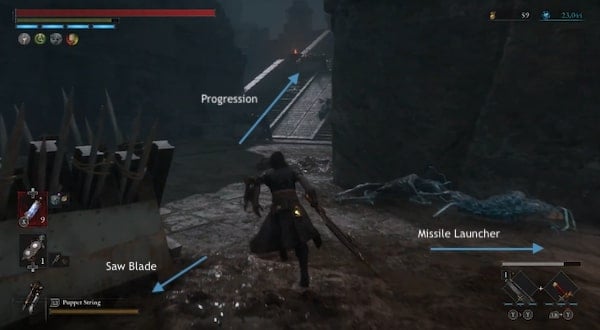
At the top of the stairs, pick up the Cluster Grenade by the spikes. On this level, there will be a couple more of those Scorpion-Tailed Carcass enemies on the bridge. Clear then at a chance for their enemy drops. They could drop a Star Fragment and a Radiant Ergo Chunk. The bridge will have a couple of stone Tablets that you can read. It will say: Wake up evolve, ascend. Greet the God who will soon resurrect from the top of the abbey. Loot the chest in the middle of the bridge to obtain the Veteran's Amulet. Cross to the other and you'll be met with a door. Before you enter, take the ladder to the right.
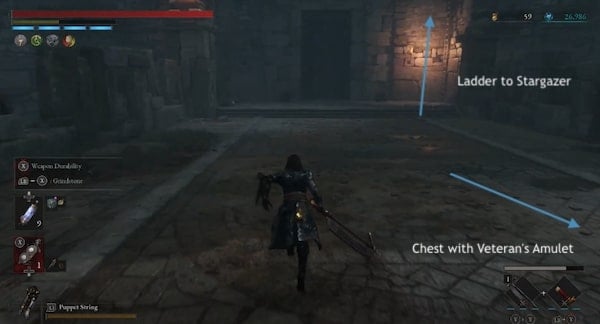
The ladder will lead up to the upper level where you can activate the Stargazer for the Arche Abbey Outer Wall. Behind the stargazer is a corridor leading up to the outer ledges of the wall. If you turn the corner, there will be a corrupted Carass waiting to attack. It may push you down to the lower ledges. If you manage to clear it, you can pick up the Dark moon Moonstone of the Covenant at the corner ahead from where the Carcass was. From here, drop down to the lowest ledge, it will be covered in more Carcass and a fog of Decay.
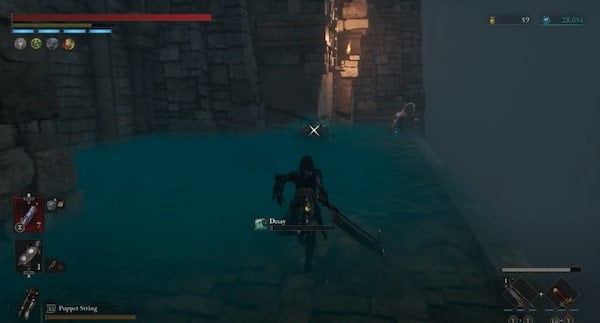
Destroy the spores in the corner to clear the fog. then clear the carcass in the area. There will be an Acid Abrasive at the edge that you can pick up and a Carcass Body Fluid Bottle at the opposite corner where the ladder is. Take the ladder back up and it will take you to a room with piles of books. Here, you can pick up a Bundle of Old Letters. Continue to the next room and a Dimensional Butterfly will appear which will drop a Full Moonstone of the Covenant.
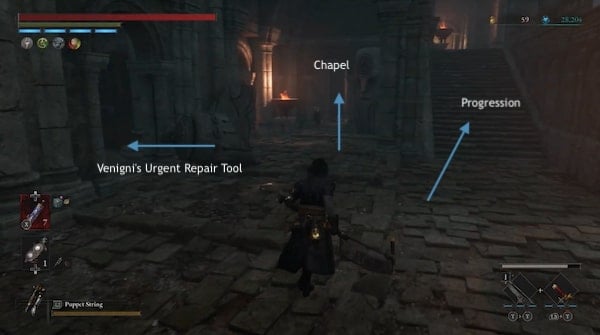
Be careful, since it could lead you into a chapel with carcass enemies that can inflict both Corruption and potentially Overheat if they knock over a fire barrel. Check the rest of the area for loot. You can pick up Venigni's Urgent Repair Tool in front of a brazier in the first room. Once you are done here, you can take the set of stairs leading up and it will lead you back outside to the outer ledges.
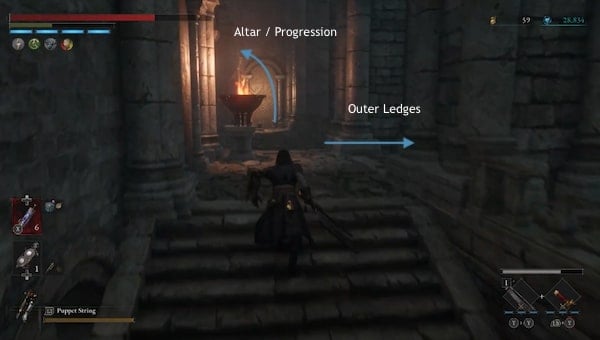
If you choose to explore the ledge and clear the Carcass here, it will lead you back to a closed gate- this is an unlockable shortcut to the Outer Wall Stargazer. Press the button and it will lead you back towards the path of the Outer Wall Stargazer, where the Carcass was hiding behind the corner. Once you have unlocked the door, you can easily access this area from the Stargazer. Go back to where the path leads out to the ledges where you took the stairs from the chapel.
This time, keep going straight ahead until you reach the end where there will be a set of stairs to the left leading to an altar and a few more Corrupted enemies spreading Disruption. Loot the ledge for a Shot Put. Take the second set of stairs up, and you can clear the enemy at the corner.
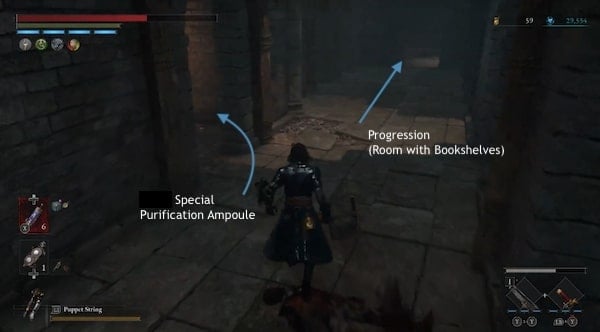
Take the left and there will be room ahead with another Disruption carcass and a body where you can pick up a Special Purification Ampoule. Go back to the entryway and continue down the path and the next room will have a few bookshelves. Loot the corner to pick up First Discovery, Camille.
Continue up the stairs and clear the Scorpion tail carcass in the next area. There will be a room here with a chest where you can pick up the Acidic Great Curved Sword Blade. Exit the room and keep going. The next exit will take you back outside. You will be able to see the lower levels and if you missed anything you can drop down and pick them up. There will be a small platform that you can land on before the lowest level to prevent fall damage. The lower ruins will have a Special Resistance Ampoule and a Full Moonstone of the Covenant. If you decide to jump down, it will take you down to the previous floors you visited while making your way up. You can easily find your way back up from there.
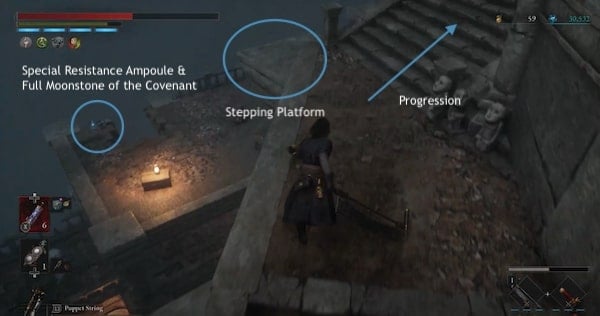
Once you are done with the lower floors, continue taking the stairs up. In this area, you will need to watch out for more incoming projectiles. Once you reach the top, there will be a large gap that you won't be able to jump. There is a platform on the floor indicating that you will need that you will need to activate the area to cross. Turn around and there will be an entryway heading back in with another set of stairs. There is a trap on the wall that will extend forward, so wait for it to retract. Make your way all the way up and finally, there will be a base platform where you can use your High-level Alchemist Badge. This will extend the platforms below filling in the large gap. Drop down to a ledge. There will be a Gemini's Iron Protection you can pick up.
You can now go back and cross the gap. Watch out for the missiles. Clear the Scorpion tail enemy and then you will be clear to loot the chest here in front of the altar table. The chest will contain an LADA F350 Frame. Continue up the stairs and you can destroy the missile launcher. There will be a set of stairs leading down ahead. You will be able to see the button mechanism that you can press just across.
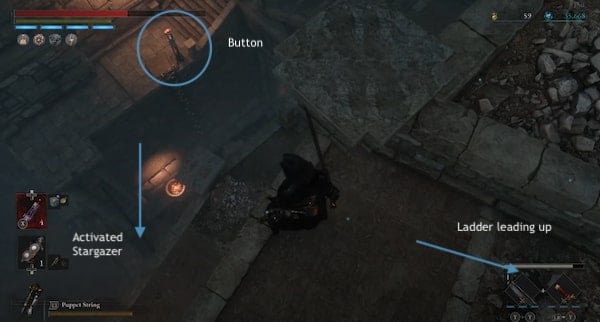
Make your way to the button and press it so you can now easily access this area. You should see a thin beam connecting the gap on a slightly lower level above the activated Outer Wall Stargazer. You can land and walk on this plank to get to the ledge across and pick up the Acid Canister on the ledge. There will be another plank sticking out slightly where the Brazer is at the corner. Loot the item and you will get the Electric Blitz Abrasive. If you fall anywhere here, you can take the ladders to get back up.
Go back all the way up to where the missile launcher was, and this time take the ladder going up. This will continue to lead you to another set of stairs going up. Once you reach the top, you will be in a room lined with arches and vaults. You can take a left to go straight ahead or a right to head to the lower level.
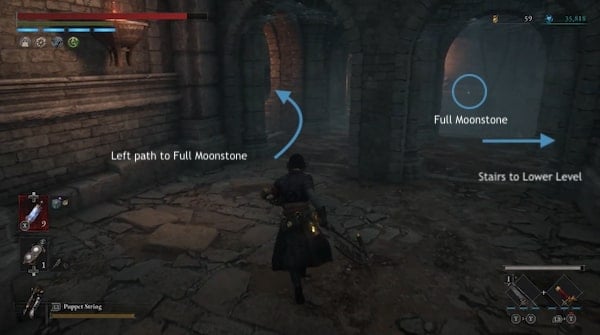
Head left first to reach the loot across and watch out for the emerging pillar trap. There will be an armed enemy at the end of the path hiding behind the pillar past the small wooden bridge on the gap. Take the loot. It will be a Full Moonstone. You can now head back and take the left route instead leading to a set of stairs going down. Another enemy will be at the base of the stairs. Watch out for when you pass a room lined with a nice rug. This room will have arrow projectiles shooting out of it laced with Electric Shock. Avoid the arrows and approach the room to loot the Fable Catalyst. You should also be able to pick up a Resplendent Ergo Chunk at the end of one of the corridors.
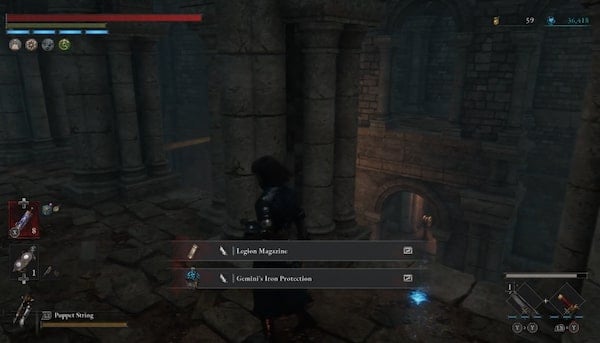
Once you are done with this floor, you can take the ladder to the lower floor. Clear the area. Loot Gemini's Iron Protection. This time, do not take a wooden beam across the gap, because it will break and drop you to the ground floor where an Elite Bawler enemy will be waiting. Circle this floor and loot the chest for a Legion Caliber. When you are done exploring the higher levels, drop down to the ground floor and clear the elite enemy. He may drop an Attribute Purification Ampoule, Dim Ergo Crystal, and a Star Fragment.
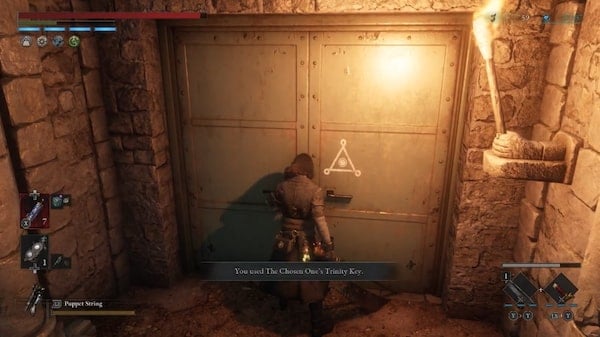
There will be a door on the ground floor where you can use The Chosen One's Trinity Key to reveal the King of Riddles, Arlecchino. You will be given the chance to answer.
Are you a puppet? or a human being? Which one are you?
- Puppet
- Human
Say that you are human and he will agree. You will receive the Alchemist's Cape and a Quartz at the end of your interaction. P could feel warmth depending on your choices and progress. When you are done with this location, there will be an elevator on the ground floor to take you back up. Just across where the elevator in the main square is, is a short corridor with another elevator at the end that can easily be missed. Take this elevator to another corridor and you will find Test Subject 826. Interact with him to obtain the Happy Gesture. Exhaust his dialogue and he will say that he will head to Rosa Isabelle Street. This is where you can find him again to proceed with his questline. Once you're done here, return to the room with arches and take the other main elevator. Lift the lever to activate the elevator. Another elite enemy will be here. You may also find a yellow Dimensional Butterfly that will drop a Full Moonstone. Once you've cleared the area, you'll be able to find another button that will activate the ladder.
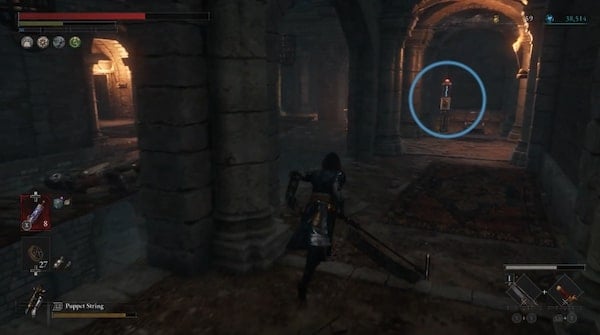
From here, unless you want to continue exploring there will be another set of stairs leading up.
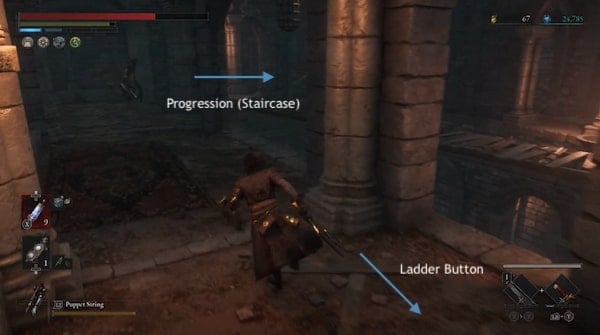
Loot the Electric Blitz Canister in between the flights of stairs. Continue on and it will lead you to a chamber where the Black Cat is.
Optional Boss: Black Cat (Boss)
Interact with him and he will request a Gold Coin Fruit. If you refuse, you will have to face him as a Mini Boss. Whether you choose to fight him or not, he will give you the Black Cat's Mask. If you defeat him, he will drop the mask.
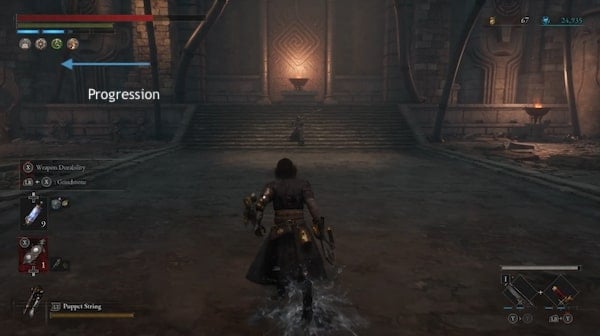
If you choose to fight him: Black Cat wields a City Longspear used to extend the range of his regular melee attacks. Wield a long weapon yourself if you have a good one. With his spear, he will commonly thrust and lunge forward and deal a number of striking attacks. The majority of his attacks will be a combination of back-to-back thrusting, poking, and stabbing, so you will be able to sidestep or dodge out of the way. There will be a slight indication of an incoming attack which will also allow you to block in time once you see his arm pull back in preparation to thrust his spear forward or dodge.
Be patient with your charged attacks which will take out a chunk of his health. Continue allowing his attack combos to complete and counter them as they come so that you can follow with your own attacks until the fight is cleared.
Arche Abbey Broken Rift
Continue onward, taking the corridor to the left behind the Black Cat. It will lead outside where there will be a wooden lift. Loot the area underneath the wooden lift platform to pick up Gemini's Emergency Protection. When you're ready, hop on the wooden platform and interact with the lever to ascend. This will take you to the next Stargazer: Arche Abbey Broken Rift.
Enter into the next area and another Corrupted enemy will attack. Watch out for Electic Shock Arrows in this room. Loot the area. The source of the arrows will have a Dark moon Moonstone of the Covenant for you to loot. Other enemies will litter the area. Clear them and loot the area to obtain a Fire Abrasive, Attribute Resistance Ampoule, and Half Moonstone. When you're done, take the stairs up to the next level. Clear the area. Loot the Dim Ergo Crystal then move on to the next room.
This room will have other connected rooms. Loot the area then locate the ladder to the upper floor. You will find an Electric Blitz Canister nearby.
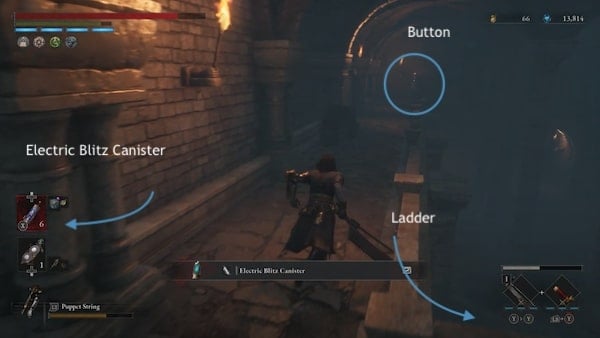
There will also be a button on the other end that will release the ladder. Activate it first before proceeding. As you continue this floor, be careful of the Jester Puppet, an elite enemy wielding two spiked clubs. If you lead it to the other enemies in the area, he will also proceed to clear them out. He has a chance to drop Special Resistance Ampoule and Star Fragment x1. There will be a chest for you to loot at the end of the opposite path that will contain a Mechanical Cryptic Vessel. When you are done here, there will be a set of stairs leading up to the higher level which will have a lever you can pull and another Star Fragment at the end of the path.
Pull the lever to raise the gates and open up the next area. A short scene will reveal the open gates. Head into the newly opened area. There will be a Special Purification Ampoule just past the gate. A giant elite Puppet Monkey will be in the next room. Clear it to obtain a Quartz.
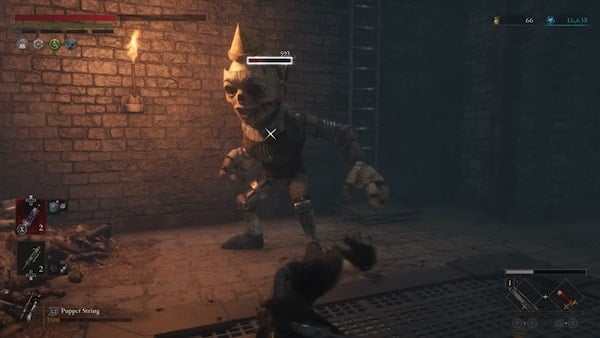
After clearing the Elite Monkey Puppet, take the ladder leading out and there will be another Dimensional Butterfly that will drop a Balance Crank. A few more corrupted carcasses will be in the area along with an Elite enemy with a top hat wielding a staff that can inflict Electric Shock. Continue making your way through the wooded area. Take the stairs up and you should come across a Half Moonstone. There will be another button here where you can release a ladder which will lead back down to the activated Stargazer.
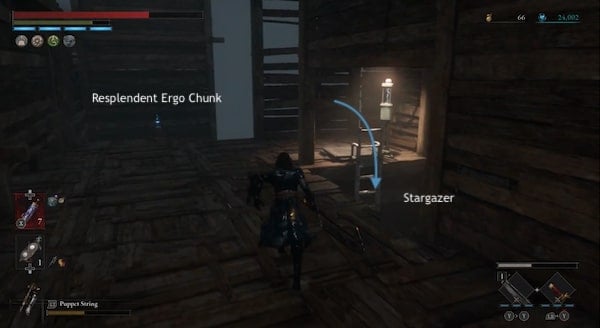
From this point onward, anytime you die, you will be able to resume and take the ladder all the way to this point. Take the loot at the tip of the extended plank to get the Resplendent Ergo Chunk. Then continue making your way up.
Keep going forward. Clear the way and another Dimensional Butterfly will appear that will drop Half Moonstone. Be aware of the enemies spraying Disruption mist. From where the butterfly appears, there will be a path leading down.
Drop to the lower platforms to pick up another Half Moonstone. Continue descending and there will be a red chest that will contain Red Fox's Amulet. After this continue making your way left when facing the wall, there will be a few larger enemies here. A ladder will allow you to go down one level.
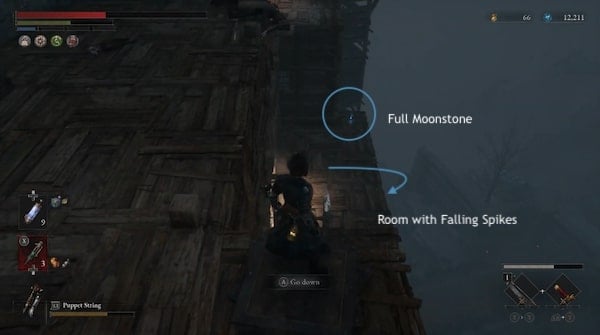
Loot the corner for a Full Moonstone. A gap in the wooden wall will lead to a hall with falling spikes.
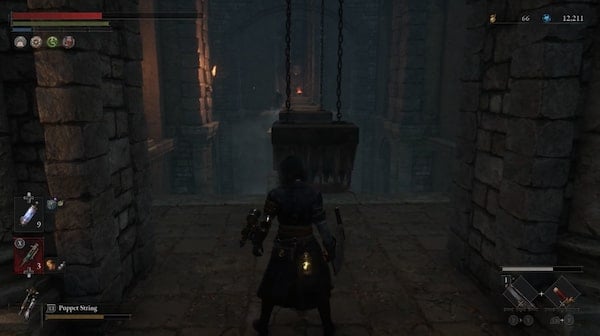
Make your way all the way to the end to reach a chest that will contain a Quartz and a lever for you to activate that will deactivate the spikes. There will also be one enemy waiting for you here. Make your way back. Follow the stairs up and there will be an elite enemy that will bust through the wall wielding a broken puppet.
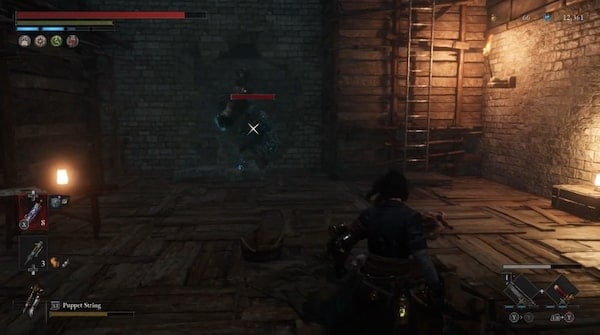
Take the ladder next to it and it will lead you back in. This room will have an Elevator. Loot the next room for a Carcass Body Fluid Bottle. Then enter the elevator to ascend. This will lead to the next repairable Stargazer in the Arche Abbey Prayer Room. This is a room right next to the next boss fight. There will be a summoning pool just before you proceed. This will lead to the face-off against Laxasia the Complete.
Boss: Laxasia the Complete
Laxasia is a large powerful boss whose boss-fight encounter is split into two phases. For each phase, you will need to clear a full bar of health. Her mobility and power of her attacks will significantly increase during the second phase and she will display a new set of attacks to accompany them.
She has the ability to afflict Electric Shock with her Weapon. She has a large Great Sword Swing that cuts downwards and follows up with an Electric shock in addition to her regular melee attacks. She has all the basic melee sword combinations from swinging, sweeping posting, and combinations of slashing and cutting that have a far reach due to how tall her sword is. Any chance you get, land a fully charged attack to stagger her in between these swings while they don't exert electricity. For the second phase, you will need to look out for the windows following her larger attacks. Her lightning attacks can now also be deflected back at her to deal a significant amount of damage. View the page for Laxasia the Complete to see an expanded strategy guide and a breakdown of her attacks. Once you clear her, she will drop Sad Zealot's Ergo and you will be able to activate the Stargazer for the Ascension Bridge.
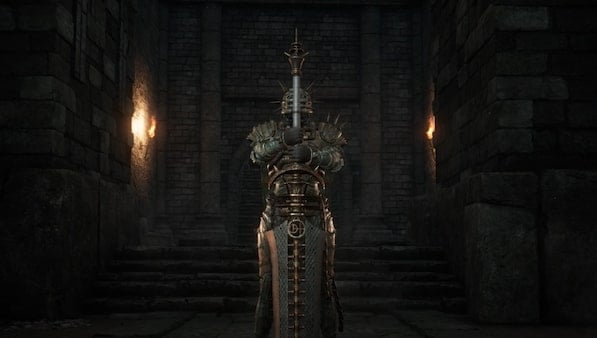
Walkthrough Proceeds on the Arche Abbey page.
Arche Abbey Entrance Map
Map to be added
Arche Abbey Entrance Videos
Videos Related to this Location
Arche Abbey is the final Location in Lies of P. The Arche Abbey follows the Arche Abbey Entrance Walkthrough covering the path from the Black Seaside to the Ascension Bridge. Arche Abbey is known as the Alchemist's Isle. Players will need to cross the Black Seaside and face a number of Corrupted Foes to reach Arche Abbey and navigate their way through the many walls and bridges in search of Geppetto. As you traverse your way through Krat, you will discover various locales, meet NPCs, encounter Enemies and Bosses, loot key Items, and discover various secrets, as well as critical points of interest that will help you through your gameplay.

General Information
- Previous: Arche Abbey Entrance
- Next: N/A (Endings)
- Bosses: Simon Manus, Awakened God, Nameless Puppet
- No. of Stargazers: x10 Stargazer (XI)
Arche Abbey Map
[map to be added]
NPCs in the Area
Bosses
- Door Guardian (Entrance)
- Black Cat (Entrance)
- Red Fox (Boss)
- Laxasia the Complete ( Entrance)
- Simon Manus, Awakened God
- Nameless Puppet
Enemies
- Carcass
- Carcass Dogs
- Caracas Corrupted Elite
- Carcass Scorpion Tail
- Corruption Enemies
- Half-body Carcass
- Gamble Hat Puppet
- Elite Top Hat Puppet
- Fire Breathing Puppet
Items
Weapons
- n/a
Consumables
- Acid Abrasive
- Cat Dust
- Dim Ergo Crystal
- Fable Catalyst
- Gemini's Emergency Protection
- Special Purification Ampoule
- Special Resistance Ampoule
- Star Fragment
- Venigni's Urgent Repair Tool
Throwables
Legion Arms
- n/a
Amulets
Defense Parts
- n/a
Upgrade Materials
- Advance Crank
- Balance Crank
- Dark moon Moonstone of the Covenant
- Full Moonstone
- Full Moonstone of the Covenant
- Half Moonstone
- Legion Caliber
- Quartz
Enemy Drops
- Attribute Purification Ampoule
- Dim Ergo Crystal
- Fable Catalyst
- Legion Magazine
- Radiant Ergo Chunk
- Star Fragment
Keys & Other Items
- Arche Abbey Passageway Key
- Arm of God
- Entreat Gesture
- Fallen One's Ergo
- Red Fox's Mask
- Shadow Flower
- So Said Pistris III
- Simon Manus's Confession
Full Arche Abbey Walkthrough
Arche Abbey Upper Part - Inside
Proceed across the bridge through the next set of doors up the stairs. You will be met with a choice after you see the state of Sophia.
- Let her live
- Give her peace
If you give her peace, she will leave you her Ergo and you will gain the Entreat Gesture and the Shadow Flower record. Explore the area. you can pick up a Half Moonstone in the pantry next to the dining room, which will be in the next room from where you found Sophia, the opposite side of the study. To move on, enter the study and there will be a set of stairs leading out.
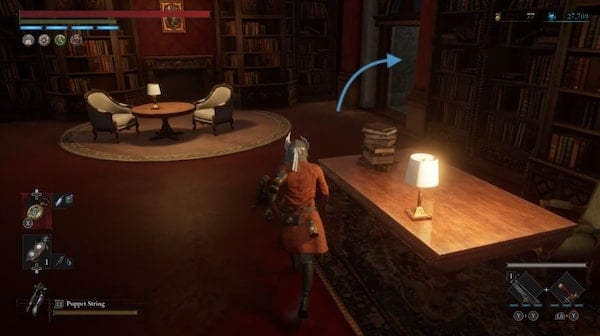
Once you enter the stone corridors. There will be enemies waiting to ambush you from behind the pillars. One will also have the ability to charge at you from the inside of the wall by busting through it. After clearing the area, move on to the end of the corridor. When you get to the end, check the corner and loot the metal platform to the right for a Full Moonstone of the Covenant. Continue down the next corner and there will be another Stargazer for Repair just to the left.
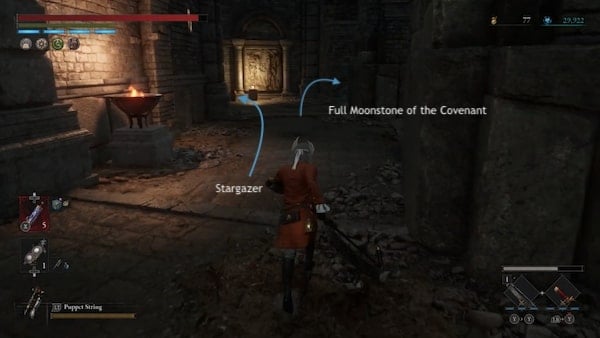
From the Stargazer, there will be a spiral staircase ahead. Enter the area to officially reach the Arche Abbey Upper Part - Inside. Climb the stairs to the upper floor and enter the room. There will be another archway and a set of stairs. Loot the corner past the arch for a Dark moon Moonstone of the Covenant then take the stairs up. There will be two larger enemies with a Gambler hat at the top of the stairs and a Half Moonstone in the corner.
Continue through the next archway into the room with a wall of empty bookshelves. Press on and there will be another set of stairs. Loot the corner at the arch at the base of the stairs to the right for a Dim Ergo Crystal. Another fire-breathing enemy and a Gambler hat enemy will be at the top of the stairs, in the room with the flickering ceiling light. In this room, you will be able to pick up a Special Resistance Ampoule closer to the stairs and another Dark moon Moonstone of the Covenant next to the next set of stairs as you leave. Head down the stairs.
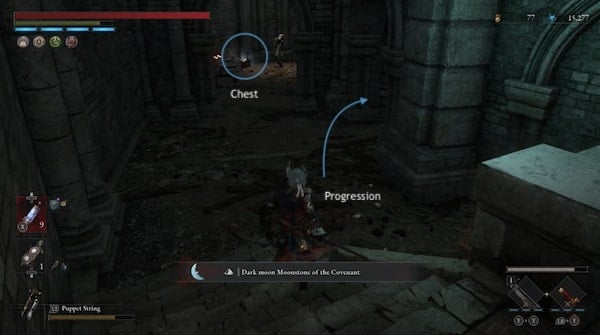
Up ahead is an enemy with a chest containing a Quartz directly in front and another route to your right. After looting the chest, head through the arch on the right and continue down the long set of stairs. A few more gambler hat enemies will be here. Loot the Fable Catalyst by the brazier before entering the next archway. A couple more firebreathers in top hats will be here. There will also be a Half Moonstone at the base of the stairs you descended from just at the corner.
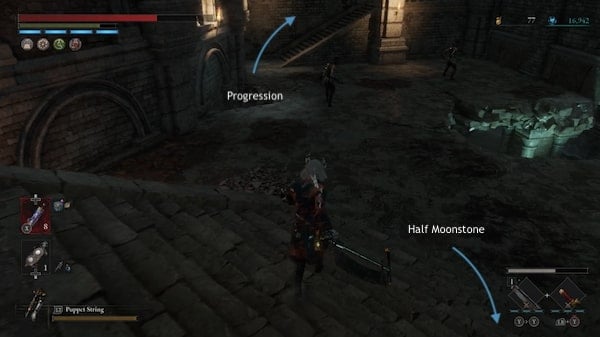
Approach the next set of stairs and you might find another Top Hat enemy with an electric scepter. Continue up the stairs and there will be another archway and a ladder. Take the ladder to the upper floor. Before you cross the wooden planks, loot the Full Moonstone of the Covenant. Then cross the planks to the inner part of the tower. More stairs will take you up one level. As you exit, turn left and pick up the Gemini's Emergency Protection.
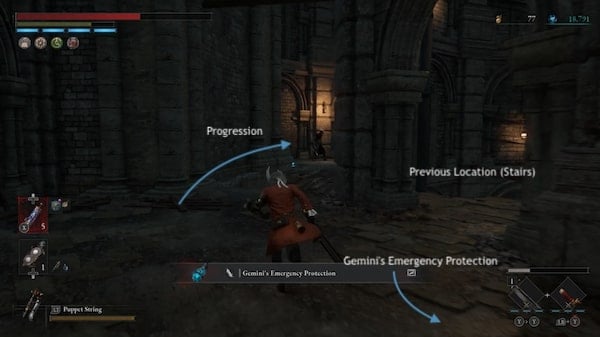
Continue ahead and mind the gap. Clear the enemy ahead and pick up the Electric Blitz Abrasive. There will be more loot and enemies on the ledges. Pick up the Cat Dust and Special Purification Ampoule. Follow the ledges and it will lead back to another opening to the inner side of the tower. Take the loot, cross the beam then clear the puppet. Then climb the ladder on the scaffolding.
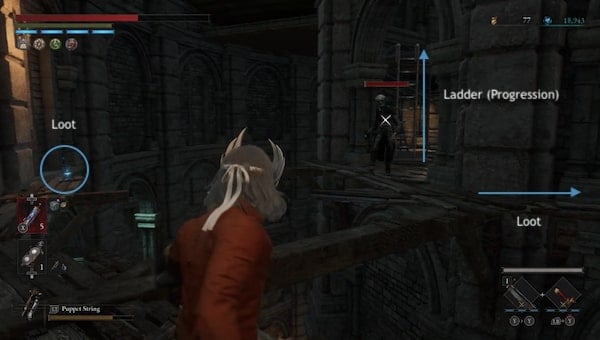
Take the stairs and clear the Gambler Hat Puppet. On this floor, loot the Full Moonstone by the crates under the archway. There will also be an elevator just across. The elevator will take you down to a locked gate that you can now open from this side to access the previously activated Stargazers: Arche Abbey Upper Part - Inside. Unlocking this gate now grants you easy access to this part of the Abbey from this Stargazer. Once you have unlocked the gate, take the elevator back up and proceed to the stairs. This is where you will meet Red Fox.
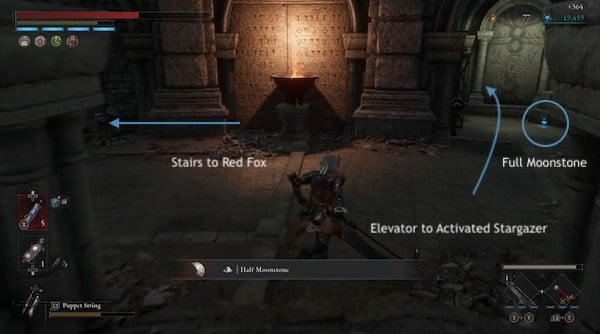
Optional Boss: Red Fox
Your interactions with Red Fox can be affected by your interactions with Black Cat. Choosing to fight Black Cat will make her hostile and you will have to fight her as a Mini Boss. If not, you will have the option to show kindness by offering a Gold Coin Fruit which will prevent the boss fight. Whether you choose to fight her or show kindness, she will drop or give you her Red Fox's Mask.
If you choose to fight her: Red Fox wields a Curved Saber and relies on basic, swift melee sword maneuvers and combinations. This includes a series of strikes and slashes. It may be a good idea to wield a long Weapon. If you keep some space between you, you might be able to see her attack animation as she spins and slowly approaches before transitioning into an attack which will give you time to counter or dodge. She makes swift and agile maneuvers, but like most Stalkers, she will be vulnerable to backstabs. Complete the interaction and the door behind her will open so you can proceed.
Finding Geppetto
Go through the doors and they will lead you to a row of cell gates. Go all the way to the end and loot Venigni's Urgent Repair Tool. This last cell is also where you will find Geppetto. Unlock the last gate and speak to Geppetto. This will give you a chance to Lie to him. He will ask:
Was I a trustworthy father to you?
- Yes (Lie)
- No
f you choose to say Yes, then he will respond by saying that he now has the courage to carry on because of you. He will ask you to end it all and come back to his side. The usual phenomenon will occur, yet again, P could feel warmth after this interaction depending on your previous choice, and you now have the Arche Abbey Passageway Key.
Arche Abbey Upper Part - Internal Bridge
Use the key on the wooden door next to the cell and it will lead to a ladder that will take you to the next repairable Stargazer: Arche Abbey Upper Part - Internal Bridge. Loot the Sharp Pipe at the other end of the metal platform past the Stargazer then follow the ledges on the same level. Stay on the outer ledge and there will be a chest that will contain Assassin's Amulet. Then, follow the hall on the inner side of the wall. There will be a screaming puppet in the way. Follow the hall and then cross the metal bridge. You may notice while crossing the bridge that there is a chest to the left at the other side, if you follow the ledge, containing the Leaping Amulet +1. Beware of the enemy waiting to ambush from behind the wall pillar as you approach the chest. Continue down the path and clear the enemies.
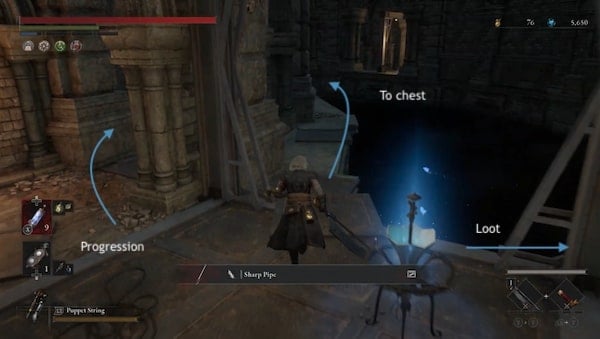
You will reach a flight of stairs. Once you reach the top, there will be a button to release the ladder before you continue. This leads back to the activated Internal Bridge stargazer. Look down where the ladder leads and there will be a metal platform in between the level of the stargazer. This will have a Star Fragment. Continue down the path. Loot the metal ledge for an Advance Crank.
Then cross back to the inner side of the metal bridge. Climb the long set of metal stairs and there will be a Pummeling carcass at the top that can spread Disruption. This enemy will drop a quartz when defeated. Continue on the metal path across the metal beams.
Then cross the bridge again to the outer path. There will be a chest here containing a Legion Caliber. A set of metal platforms will be built alongside the wall. Loot the Dim Ergo Crystal before the first set of steps. Then follow the path, clearing all the enemies in the way. Some of them wield guns and can jump out at you. Along the metal platforms, you should be able to pick up an Acid Abrasive and a Balance Crank.
The archway at the end of the path will lead to a chapel. Loot the Collectible: So Said Pistris III at the altar. There will also be a Vivid Ergo Crystal outside in the small balcony area connected to the chapel.
Next, take the other archway exit out of the chapel and take the stairs all the way up to reach the next Stargazer: Cradle of the Gods just next to a summoning pool. Loot the area outside with the red carpet. The table will have Simon Manus's Confession. When you are ready, summon a Specter if needed then take the stairs into the Cradle of the Gods and prepare for the next boss fight.
Boss: Simon Manus, Arm of God (Awakened God)
Simon is fought in two distinct phases, at first as the Arm of God and then as the Awakened God. You will need to clear a full bar of health for each phase. During the first phase, he wields a large heavy mace object that he swings around. The weight of the weapon makes these swings move a little slower, but because of his size, he has a long reach. A lot of the time, he'll also be dragging his weapon on the ground while sweeping it around the area surrounding him. His pace picks up once he reaches the second phase.
In his Awakened God state, Simon has additional powers and attacks. He now has the ability to also deal a number of ranged attacks. Watch the animation of his new God Arm. As he makes a summoning motion, this attack shoots out a gust of wind toward you. Another ranged attack will allow him to summon a celestial cloud that can shoot out glowing beams. You will need to continue to run to avoid damage. During this phase, you will need to keep moving to avoid getting caught in these large-scale ranged attacks. He'll also be spamming these attacks and will be able to inflict Disruption, an ailment that can cause instant death when filled. Focus on dodging and parrying so you can continue to approach and continuously attack to slowly deplete his health until the fight is cleared. Once he is defeated, you will obtain the Fallen One's Ergo and the Arm of God.
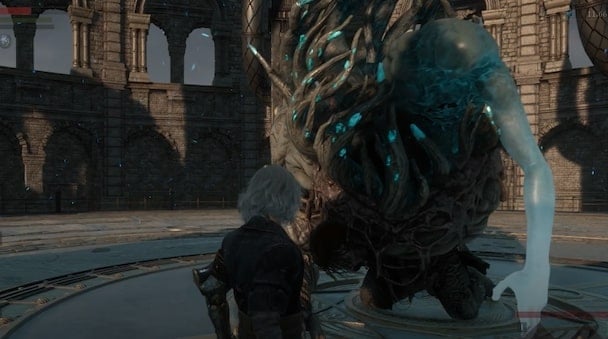
Under the Abyss
When you are ready to move on, stand in the center of the circle of symbols and it will prompt you to go down. It will take you to one last Stargazer: Under the Abyss. Activate the Stargazer then approach Geppetto in the center of the room to begin the dialogue. You will then be given a choice that will determine the final Ending. Geppetto requests that you hand him your heart.
Give me your heart, son.
- Give your heart
- Refuse
To Achieve the Real Boy Ending, agree to hand over your heart. Refuse and you will need to face another Boss Battle against the Nameless Puppet. View the Endings Guide to see all the conditions of each ending.
Boss: Nameless Puppet
The Nameless Puppet has two phases. His speed and mobility significantly increase for the second phase. It starts off with long swords and slower attacks. this makes it easier to anticipate his next move. Allow it to play out its attacks and wait for each window before you run in and strike. The first phase can be easily cleared by playing aggressively.
During the second phase, its regular melee attacks are now also enhanced with some power and range that can project beyond its direct vicinity. When he jumps, quickly create some space since this is now an AoE attack. There will be a circle that blasts in red upon landing. He will also make use of his double swords, doing a lot of windmill motion attacks. Prepare to react to the quick relentless back-to-back attacks. He will do his fair share of distancing himself and you'll have to continue to attack as you advance. Try to back him up into a corner to prevent him from moving too much. Dodge into his attacks at an angle to try to get him from the side or behind. Clear the fight to complete the game and allow the chosen Ending to play out.
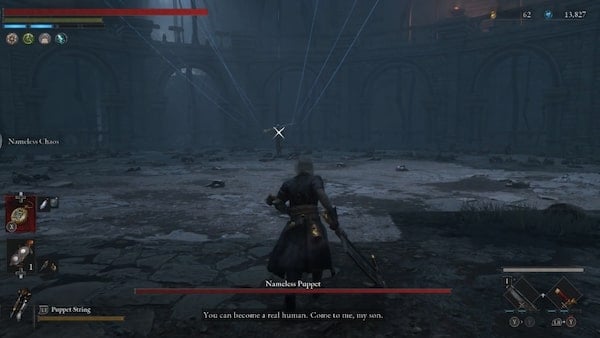
Lies of P Endings and New Game Plus
- View the Endings page for all Endngs and related choices and conditions
- View the New Game Plus page for all retained progress and what awaits when beginning a new playthrough with the same saved file.
At the end of the final cutscene, a Warning will appear for all items that are not inherited when starting the next playthrough:
- All Collectibles except Records
- Krat Supply Boxes
- Venigni Collection
Arche Abbey Map
Map to be added
Arche Abbey Videos
Videos Related to this Location
 Anonymous
So the cursed knights halberd is an amulet too? It doesn't seem to want to go around Pistachio's neck. lolz

 Anonymous
If you dont wanna fight the Elite monkey Puppet, you can just run past all the enemys in the lower level and go up the ladder. The puppet will fight the the enemys and eventually die, ez gg


First page, first problem. No combat advice for the "tough police-looking puppet". IGN said to watch out for the puppet keeping his feet on the ground before attacking which means it's just a one-hit attack. If he raises his feet it's going to be 2 or 3 hit combo. Basic stuff really helps, man. Not everyone is a souls gangsta.
1
+10
-1