Malum District is one of the Locations in Lies of P. The Malum District is the base of operations for the Black Rabbit Brotherhood. Most Locations will feature at least one Stargazer, checkpoints where players can rest and recuperate, of which two can be found at the Malum District. As you traverse your way through Krat, you will discover various locales, meet NPCs, encounter Enemies and Bosses, loot key Items, and discover various secrets, as well as critical points of interest that will help you through your gameplay.

General Information
- Previous: Path of the Pilgrim
- Next: Rosa Isabelle Street Entrance
- Bosses: Eldest of the Black Rabbit Brotherhood
- No. of Stargazers: 2x Stargazer
- Malum District Stargazer
- Malum District Town Hall Stargazer
Malum District Map
[map to be added]
NPCs in the Area
Bosses
Enemies
- Bloated Carcass
- Carcass
- Dog Carcass
- Dimensional Butterfly
- Elite Carcass
- Jug-wielding Carcass
Items
Weapons
- Bone-Cutting Sawblade
- Bone-Cutting Handle
- Bramble Curved Sword Blade (Merchant)
- Bramble Curved Sword Handle (Merchant)
Consumables
- Attribute Purification Ampoule x2
- Dim Ergo Fragment x2
- Fable Catalyst
- Gemini's Iron Protection
- Radiant Ergo Fragment x3
- Resplendent Ergo Chunk (Boss Drop)
- Resplendent Ergo Fragment x2
- Special Purification Ampoule
- Special Resistance Ampoule
- Vivid Ergo Fragment x4
Throwables
Legion Arms
- None
Amulets
- Patience Amulet (Enemy Drop)
Defense Parts
Upgrade Materials
- Balance Crank (Butterfly)
- Crescent Moonstone x2
- Legion Caliber
- Motivity Crank
- Quartz x2
- Star Fragment
Enemy Drops
- Attribute Purification Ampoule
- Balance Crank (Butterfly)
- Fable Catalyst
- Hidden Moonstone
- Patience Amulet
- Radiant Ergo Fragment
- Resplendent Ergo Chunk (Boss Drop)
- Star Fragment
- Taunt (Boss Drop)
Keys & Other Items
- Black Rabbit Brotherhood Ledger
- Clap (NPC reward)
- Gold Coin Fruit
- Have a taste of La Bleiwies, the greatest wine in the world!
- Monad Charity House Guide
- Portrait of a Boy
- Rosa Isabelle Street Entrance Key (NPC reward)
- Taunt (Boss Drop)
- [This month's trend: Stalker masks]
- Trinity Key (NPC reward)
Full Malum District Walkthrough
Black Rabbit Brotherhood Territory
At the end of the Path of the Pilgrim, you'll find yourself at Malum District. After activating the Stargazer, you can speak to the Red Fox and Black Cat standing nearby. They'll be surprised that you made it out of the Venigni Works in one place and offer to team up to take out the Black Rabbit Brotherhood who are terrorizing the residents of Malum District. If you accept, they'll be glad and will trail behind you, joining you in combat whenever the need arises.
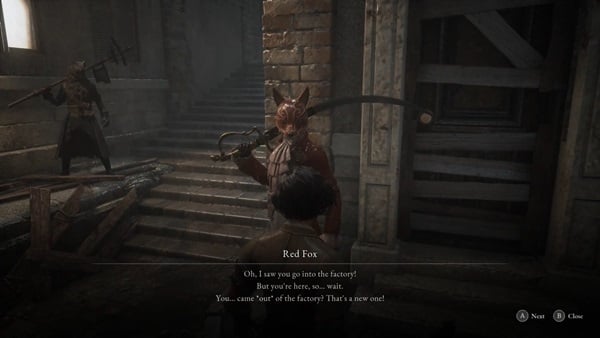
Head up the alleyway between the two siblings and turn left at the corner. Up ahead, a Carcass will drop down from the upper balcony. Defeat it and the Carcass ahead, then continue forward. When you turn left and attack the stationary Carcass, a Dog Carcass will burst through the metal gates. In the room it was in, you'll find a Vivid Ergo Fragment.
Back in the alleyway, look to your right to find a ladder going up. At the top here, you can find a Crescent Moonstone. Head back down the ladder and turn left at the corner ahead to enter the building ahead. Waiting for you inside is a Carcass holding a Jug that may drop a Hidden Moonstone among other things.
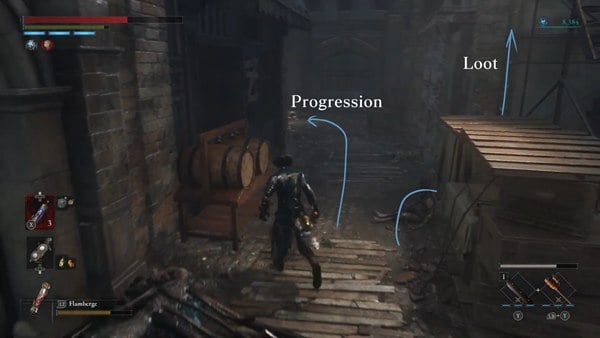
Roll through the barrel on a short ladder in the right side of the room to find a Cluster Grenade. In the room to the right, look to the right to find an item on the floor. As you approach it, you'll fall down through the floor downstairs. When you turn the corner down here, you'll face a Dog Carcass. Head into the next room to find the Arch Break Cartridge in a chest guarded by a Carcass.

Make your way out of the room to find a staircase going back upstairs. To the right of the staircase, you'll find a flyer called Have a taste of La Bleiwies, the greatest wine in the world!. Go up the staircase to find a locked door that will lead back into the room you fell through. You can then loot the Sharp Pipe and Vivid Ergo Fragment from this room.
Exit the room to the lobby of the building, and head up the stairs right outside. When you exit through the doorway at the top, you'll be back outside. Turn right and head down the alleyway. If you agreed to work together with the Black Cat & Red Fox earlier, they'll stop following you at this point, with the Black Cat saying that he needs to take a breather.

Head into the doorway at the other end of the alley. On the right side of the room is a Motivity Crank. Pick it up, then head down the ladder on the other side. At the bottom, defeat the Carcass, then you can grab the Chain. Head out the doorway on the other side. When you emerge, you'll hear another announcement. Head down the steps and defeat the Elite Carcass walking in circles around a fiery sign for the Patience Amulet. There will be Carcasses above you throwing projectiles at you that inflict Break, so try moving around as much as you can.
From the fiery sign, roll into the wooden wheelbarrow on the right. At the end of the alleyway is a Dog Carcass and a Radiant Ergo Fragment. You'll see another item on a higher ledge here, but won't be able to obtain it from this alley. Back at the fiery sign, go into the alley going straight on the left side where the locked gate is. Roll through the crates and turn the corner to find a Dog Carcass by a Special Resistance Ampoule. Head back out the alley and roll into the crates by the large doorway next to it to find a chest with a Quartz guarded by a Carcass.

Afterwards, once again by the fiery sign head straight ahead, this time into the alleyway on the right. At the wall, turn right to find a Resplendent Ergo Fragment. A Carcass will drop down behind you. Head back to the split in the path, and instead of going forward straight into the next alleyway, look to your left to find a ladder going up. A Dimensional Butterfly will appear when you walk forward a bit. It will drop a Balance Crank when defeated.

Back at the top of the ladder, you may want to start by going across the platforms on the right to take out the Bloated Carcass. Next to it, you'll find a Star Fragment. On the left side from the top of a ladder, you'll find an item straight ahead. Approach it by walking on the slanted part of the roof. If you step on the misaligned planks right in front of the item, you'll fall through back down to where you found a Quartz in a chest. The item ahead is a Vivid Ergo Fragment.

Continue to the left to find an Attribute Purification Ampoule on a small pillar. Defeat the Bloated Carcass ahead, then head up the ramp behind it to find a chest that contains the Bone-Cutting Saw, comprised of the Bone-Cutting Sawblade and Bone-Cutting Handle.
With all this loot in hand, you can now progress through the area. Head down the ladder you used to to climb up to this roof and while facing the wall behind you, head into the unexplored alleyway to the left. A Dog Carcass will emerge from the cage ahead. Deal with it, then turn right into the archway. The cage on the right has Gemini's Iron Protection within it. Head back out the archway and continue forward.

Through the rectangular doorway, you'll find a Carcass in a large, empty room. Another Carcass will drop from the ceiling. Defeat them and climb up the ladder here. You'll find another ringing receiver, similar to the one found at Venigni Works. Answer it to speak to Arlecchino, who'll once again ask another riddle. The correct answer is 'Candle', and if you answer correctly, he'll give you another Trinity Key that can be used to open the Trinity Sanctum back at the St. Frangelico Cathedral Library.

After speaking with Arlecchino, head through the doorway to the right. Walk across the platform in the left corner. Sprint and jump across to the wooden platform on the left to grab the Shot Put. If you keep following this walkway, you can also find a Dim Ergo Fragment. Run back to the stone wall and head down the ladder. To the left of the ladder, you'll be able to unlock the shortcut gate back to the fiery sign.

Do a 180 and go all the way to the wall ahead. To your left, you'll find a narrow alleyway with a Vivid Ergo Fragment. Exit the alleyway and turn right. You'll find a Hidden Moonstone to the left of a staircase. Pick it up, then make your way upstairs. Turn right at the top of the stairs and down another set to find an item in a small area. As you approach it, a Carcass will drop down from above, knocking you over. Defeat it and you can loot the Radiant Ergo Fragment. Head back up the small staircase and turn right to progress forward.

At the corner ahead, turn right into a small alley to find an Attribute Purification Ampoule. Back out of the area and head up the stairs ahead. Turn left at the top to find a Dim Ergo Fragment in the corner by the ledge. Continue forward, turning left at the corner. You'll have two ways to go - to the left or right. Start by heading to the left. A Dog Carcass will burst through the metal gates on the right, after which you can loot the Crescent Moonstone behind it. Back in the alley, take the ladder up to pick up a Fable Catalyst.

Return to the previous split, and head down the path on the right this time. There'll be a Carcass by the doorway ahead. Enter the building after defeating it and turn right to go down some steps. The Elite Carcass on the lower floor may be tricky to deal with, as the blades in its hands have far reach and can quickly deal high amounts of damage. You'll also have to deal with another two Carcasses down here. After the Elite has been defeated, you'll be able to find a Resplendent Ergo Fragment by the bar, and a Special Purification Ampoule by the barrels.

Head up the steps on the other side of the room and look to the left to find a Radiant Ergo Fragment. Through the doorway ahead, you'll find the Monad Charity House Guide on a covered up sofa, as well as a shortcut door you can unlock that leads back to the Malum District Stargazer. Opposite to the sofa, you'll find a ladder going upwards. Take it to find the Malum District Black Market Trader. Before he sells his wares, he'll ask you if you're a part of the Black Rabbit Brotherhood. If you found the Smiling Bunny Mark at the Path of the Pilgrim earlier, he'll accept it as a sign that you're in the brotherhood and will sell you his wares. Within the room, you'll also find a chest that contains a Legion Caliber.

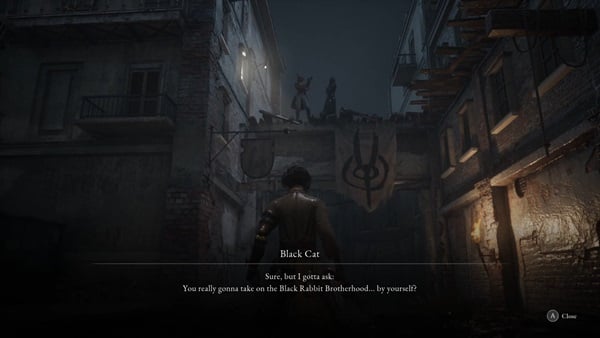
When you're done, descend back down the ladder, head out the room into the main bar area and up the stairs to the left. Head out the doorway at the top to find yourself back outside. When you make it into the alleyway ahead, you'll find the Red Fox and Black Cat on a bridge above, who, if allowed to follow you earlier, will ridicule you a bit for believing that they would help you fight the Black Rabbit Brotherhood. Ignore them and continue down the alleyway. There will be a Crack's Calling ahead, signaling a boss fight past the metal gates.
Boss: Eldest of the Black Rabbit Brotherhood
Though the boss is named the Eldest of the Black Rabbit Brotherhood, this boss fight is in fact against the four main members of the brotherhood. Despite this, only the eldest, the big guy with a gas mask carrying the large sword, has to be defeated. You can focus on attacking him and largely ignore the sibling's attacks, or defeat the siblings to get them out of the fight early.
1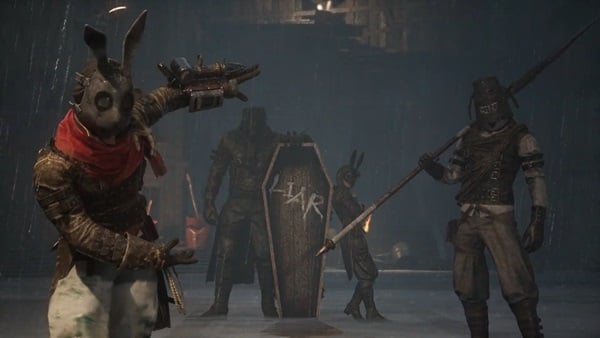
You'll start the boss fight against only the eldest. He has a lot of combo attacks that you may want to keep in mind. You can visit its individual boss page for a list of them. After taking the Eldest's health down to about three quarters, the Youngest will join the battle with her swift double blades. At half health, the Eccentric, who wields a long reaching spear will drop down. Then at a quarter health, the Battle Maniac with his claws will join the fray.
After the Eldest has been defeated, the other members of the Black Rabbit Brotherhood will flee using a smoke grenade, leaving with an ominous promise of revenge. You'll be rewarded with a Resplendent Ergo Chunk and the Taunt Gesture. Repair the Stargazer that appears to activate the Malum District Town Hall Stargazer.
The Lost Flower Garden
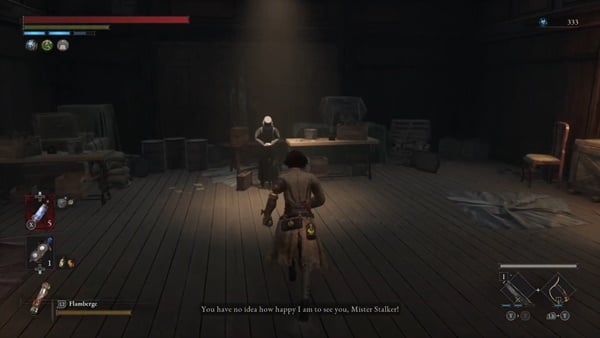
Past the Stargazer, you'll be able to climb up some steps into the building ahead. On the table in front of you is the Black Rabbit Brotherhood Ledger. In the room on the left, by the base of the stairs, you'll be able to interact with a painting of a young boy. Gemini comments on how similar the boy looks to P, and you'll obtain the Portrait of a Boy after the conversation. This item is important to getting a hidden Weapon later on in the game.

Head out the room and up the stairs to find a newspaper clipping called [This month's trend: Stalker masks]. Head back down the stairs. Behind the bar underneath the staircase, you'll find a chest that contains a piece of Quartz. Head through the doorway next to the bar and make it all the way to the end to find an elevator.
Take the elevator up, and you'll find Giangio. He'll tell you that he's found the Gold Coin Tree but wasn't able to pick the fruits off of it. If you speak to him about using Gold Coin Fruit, he'll hint at the Saintess of Mercy Statue you'll encounter later in the game and the power it has. Ask him how to gain fruit quickly, and he'll inform you about a Merchant who may be selling boosters capable of speeding up the growth rate of the tree's fruit.
After speaking to Giangio, interact with the closed doors on the left. You'll find the Gold Coin Tree within the Lost Flower Garden. The game will give you a short tutorial about the tree and harvesting its fruit, after which you'll be given some Gold Coin Fruit. These fruits can be given to Giangio next door. Rather than being a quest where you're rewarded for handing in some fruit, Gold Coin Fruits are used as currency in Giangio's Wishstone shop.

At the Lost Flower Garden, head up the steps to the left of the tree to progress forward. A door will open up to the right leading back into Hotel Krat. Speak to Geppetto on the upper floor, and he'll direct you next to Rosa Isabelle Street. If you speak to him a second time, you'll give him the Portrait of a Boy and learn that the boy in the painting is in fact his son. The portrait will then be displayed in his office, and you'll be given the Clap Gesture.
Visit Antonia in the west wing to ask for the key unlocking the way to Rosa Isabelle Street, and you'll be given the Rosa Isabelle Street Entrance Key. You can speak to her again to learn more about the Gold Coin Tree. The doors leading to the Rosa Isabelle Street can be found in the east wing on the upper floor of Hotel Krat.

Malum District Map
Map to be added
Malum District Videos
Videos Related to this Location
 Anonymous
It is always morally correct to use Spectre against these bunny *******s.

 Anonymous
How do I get on the roofs just before the boss battles arena?

 Anonymous

well, the first time using Spectre and it was great
3
+10
-1