Arche Abbey Entrance is one of the Locations in Lies of P. Arche Abbey Entrance covers the first half of the final location where P searches for Geppetto. Arche Abbey is known as the Alchemist's Isle. Players will need to cross the Black Seaside and face a number of Corrupted Foes to reach Arche Abbey. As you traverse your way through Krat, you will discover various locales, meet NPCs, encounter Enemies and Bosses, loot key Items, and discover various secrets, as well as critical points of interest that will help you through your gameplay.

General Information
- Previous: Relic of Trismegistus
- Next: Arche Abbey
- Bosses: Door Guardian, Laxasia the Complete
- No. of Stargazers: x10 Stargazer (XI)
Arche Abbey Entrance Map
[map to be added]
NPCs in the Area
Bosses
- Door Guardian
- Black Cat (Optional)
- Red Fox (Optional)
- Laxasia the Complete
- Simon Manus, Awakened God (Arche Abbey)
- Nameless Puppet (Arche Abbey)
Enemies
- Dimensional Butterfly
- Carcass
- Carcass Dogs
- Caracas Corrupted Elite
- Carcass Scorpion Tail
- Corruption Enemies
- Disruption Mist Sprayer
- Half-body Carcass
- Gamble Hat Puppet
- Elite Jester Puppet
- Elite Monkey Puppet
- Elite Top Hat Puppet
- Fire Breathing Puppet
Items
Weapons
Consumables
- Acid Abrasive
- Attribute Purification Ampoule
- Attribute Resistance Ampoul
- Carcass Body Fluid Bottle
- Electric Blitz Abrasive
- Fable Catalyst
- Fire Abrasive
- Gemini's Emergency Protection
- Gemini's Iron Protection
- Special Purification Ampoule
- Special Resistance Ampoule
- Venigni's Urgent Repair Tool
- Dim Ergo Crystal
- Dim Ergo Fragment
- Resplendent Ergo Chunk
- Vivid Ergo Fragment
Throwables
Legion Arms
- n/a
Amulets
Defense Parts
Upgrade Materials
- Balance Crank
- Crescent Moonstone
- Dark moon Moonstone of the Covenant
- Full Moonstone
- Full Moonstone of the Covenant
- Half Moonstone
- Hidden Moonstone
- Legion Caliber
- Quartz
Enemy Drops
- Attribute Purification Ampoule
- Dim Ergo Crystal
- Fable Catalyst
- Legion Magazine
- Radiant Ergo Chunk
- Star Fragment
Keys & Other Items
- Alchemist's Cape
- Black Cat's Mask
- Bundle of Old Letters
- First Discovery, Camille
- Happy (Gesture)
- High-level Alchemist Badge
- Mechanical Cryptic Vessel
- So Said Pistris II
Full Arche Abbey Entrance Walkthrough
How to Reach the Arche Abbey Entrance
Players reach this location following the Attack on Hotel Krat which will lead to the Relic of Trismegistus. Players will reach a dock and a submarine will take you to the Black Seaside where the Arche Abbey Entrance will be.
Black Seaside
Once players activate the submarine and reach the Black Seaside, a dialogue with Sophia will begin. This will be followed by a few scenes molded into the snow. Explore this location and visit all the scenes. As you approach each area, a dialogue sequence will play out before the scene fades away.
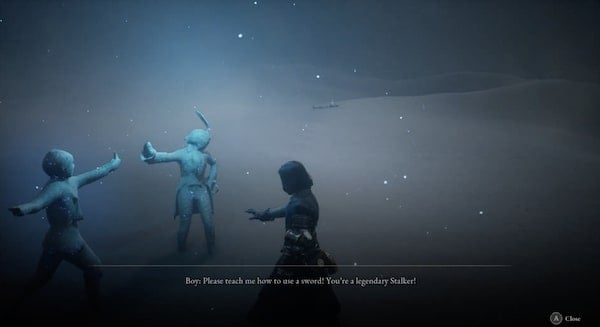
You will receive an Ergo piece starting with the Resplendent Ergo Chunk. After the second scene, you will receive another chunk. There will be body on the top of the slope where you can loot a Dim Ergo Fragment. After the third scene, another body ahead will have a Hidden Moonstone. A few other bodies in the area will contain another Dim Ergo Fragment.
Following the scene with the two boys training to be Stalkers, you will gain a Dim Ergo Crystal. The body nearby will have a Crescent Moonstone and a few other ones with a Hidden Moonstone and a Vivid Ergo Fragment. Your next scene will glow in red. This will be the final one. After listening to all the dialogue play out, Pinnochio could feel warmth depending on your choices and progress. There will be a Stargazer to activate in the area for the Black Seaside. Walk on to reach the Arche Abbey Entrance.
Arche Abbey Entrance
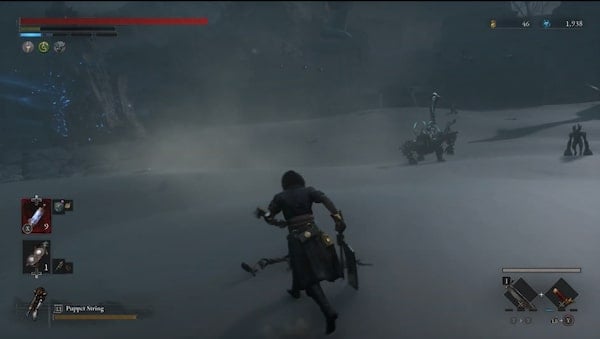
As you approach the entrance, the defensive Enemies atop the fort walls will begin to fire missile projectiles and the walls will be surrounded by a few elite enemies with a scorpion tail. There will also be a number of bodies strewn around the surrounding area where you can obtain more Dim Ergo Fragments Vivid Ergo Fragments, an Attribute Purification Ampoule, Gemini's Emergency Protection a Crescent Moonstone, a Shot Put, and other Materials.
To get in, approach the walls and there will be a few sets of stairs that you can use to reach the top. You can start clearing the enemies manning the missile launchers from behind them. Loot the table with the lantern to obtain So Said Pistris II. Walk the whole outer wall to find a few more bodies to loot. You'll be able to pick up an Acid Canister and an Acid Abrasive from these bodies. You will also be able to pick up a Fable Catalyst and a Thermite along the edges of the wall.
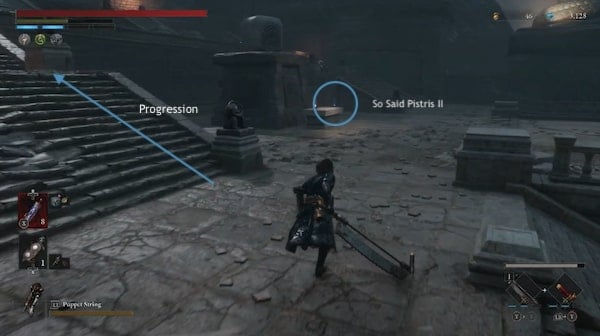
If you want to, you can clear all the enemies lining the wall to gain their dropped loot then destroy their launchers so you can go back and search the area surrounding the Arche Abbey more thoroughly without worrying about the projectiles. When you are ready to enter the Arche Abbey, head up the stairs and it will lead into a room with a mini-boss, the Door Guardian.
Boss: Door Guardian
The Door Guardian is a giant much like Champion Victor who relies on heavy fist attacks that involve a lot of punching, smashing, and slamming. Some of these attacks will be laced with Shock, which can slowly decrease your Stamina when afflicted. These heavy attacks are usually slow-moving, making them easier to dodge. However, they are likely to knock you over if you get caught in them. Take advantage of his lack of mobility by charging up your attacks to deal greater damage. Circle around him throughout the fight so it will be forced to reposition. This will give you more opportunities to deal standard attacks as he repositions for his next attack. Just make sure to steer clear of his rolls. If you do get in the way of his attacks, they will be able to knock you over. Stay close to him and dodge through his punches. Use a combination of dodging behind him and a combination of attacks. When he performs a larger attack, this will give you a longer period to deal heavier attacks of your own. For an attack breakdown and a more in-depth guide, view the Door Guardian page. Clear the fight to obtain the High-level Alchemist Badge.
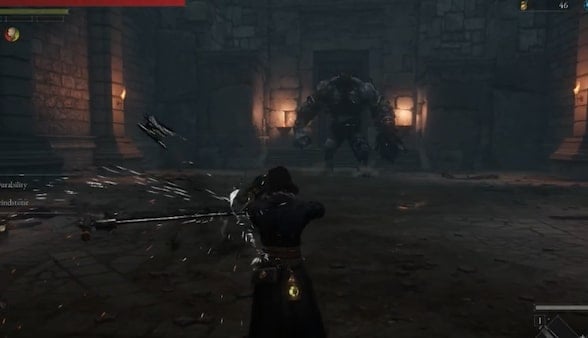
Arche Abbey Outer Wall
Use the badge obtained from the Door Guardian on the panel in front of the next set of doors to get through. There will be a Stargazer just in front of the door you can now activate for the Arche Abbey Entrance. Head up the stairs and you will be met by a few corrupted Carcass Enemies and a large elite Carcass enemy. The elite enemy could drop a Fable Catalyst, Radiant Ergo Chunk, and a Star Fragment. If you continue all the way up the stairs there will be another platform on the floor and a door where you can once again use the High-level Alchemist Badge.
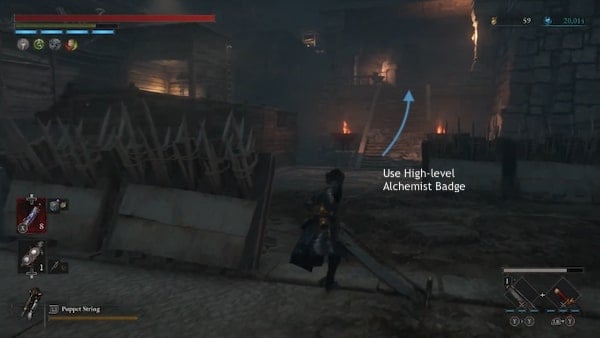
Use the badge and the next scene will trigger to reveal the new emerging platforms. Head back down and you can now use those newly raised bridges. This will lead you to the wooden fort fort area of Arche Abbey which will also be overrun by Corrupted Carcass enemies that will have the ability to inflict Decay. From here, you will need to continue ascending up the ladders, bridges, and ramps. Make sure to check the platform corners. You should be able to pick up Venigni's Urgent Repair Tool. Be careful of any stray missiles that could shoot down from above.
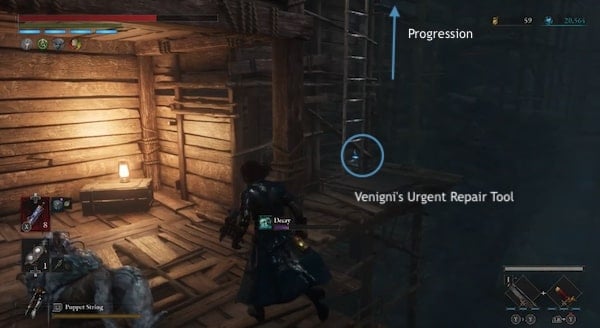
Once you climb this ladder, you will need to clear a few more Enemies. A plank on this platform will jut out and you can pick up a Star Fragment. Then up ahead, there will be a ramp leading down where you can press a button. Once you've activated the button, head back up. Take the stairs up all the way. The final platform with a lantern will have a Special Resistance Ampoule.
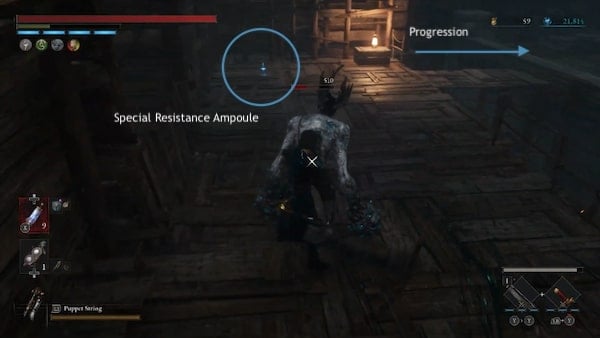
Pick it up then cross to the right. This is where you'll find the missile launcher. Clear the Carcass Dog in the area then go ahead and destroy the Missile Launcher and the enemy manning it. Behind the spiked fence will be a Saw Blade. After clearing this corner, you can then begin to ascend the large set of stairs.
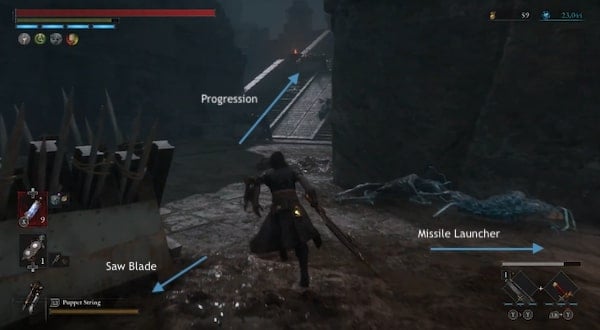
At the top of the stairs, pick up the Cluster Grenade by the spikes. On this level, there will be a couple more of those Scorpion-Tailed Carcass enemies on the bridge. Clear then at a chance for their enemy drops. They could drop a Star Fragment and a Radiant Ergo Chunk. The bridge will have a couple of stone Tablets that you can read. It will say: Wake up evolve, ascend. Greet the God who will soon resurrect from the top of the abbey. Loot the chest in the middle of the bridge to obtain the Veteran's Amulet. Cross to the other and you'll be met with a door. Before you enter, take the ladder to the right.
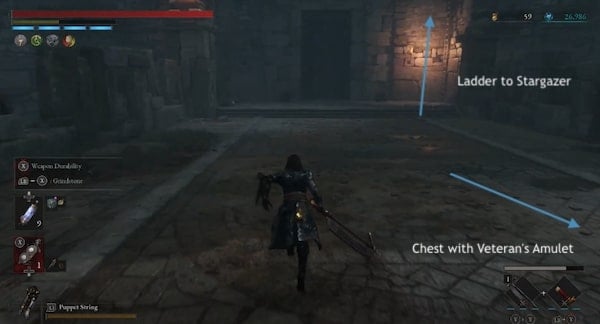
The ladder will lead up to the upper level where you can activate the Stargazer for the Arche Abbey Outer Wall. Behind the stargazer is a corridor leading up to the outer ledges of the wall. If you turn the corner, there will be a corrupted Carass waiting to attack. It may push you down to the lower ledges. If you manage to clear it, you can pick up the Dark moon Moonstone of the Covenant at the corner ahead from where the Carcass was. From here, drop down to the lowest ledge, it will be covered in more Carcass and a fog of Decay.
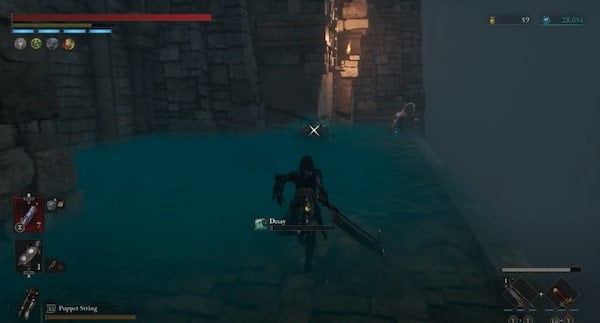
Destroy the spores in the corner to clear the fog. then clear the carcass in the area. There will be an Acid Abrasive at the edge that you can pick up and a Carcass Body Fluid Bottle at the opposite corner where the ladder is. Take the ladder back up and it will take you to a room with piles of books. Here, you can pick up a Bundle of Old Letters. Continue to the next room and a Dimensional Butterfly will appear which will drop a Full Moonstone of the Covenant.
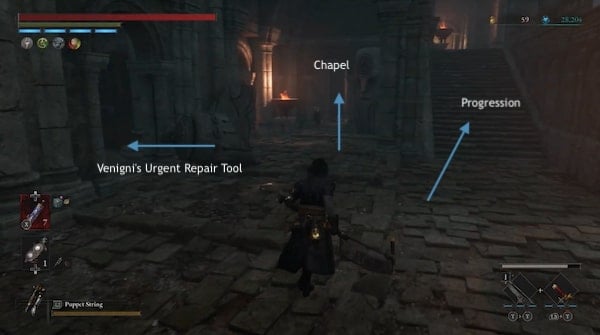
Be careful, since it could lead you into a chapel with carcass enemies that can inflict both Corruption and potentially Overheat if they knock over a fire barrel. Check the rest of the area for loot. You can pick up Venigni's Urgent Repair Tool in front of a brazier in the first room. Once you are done here, you can take the set of stairs leading up and it will lead you back outside to the outer ledges.
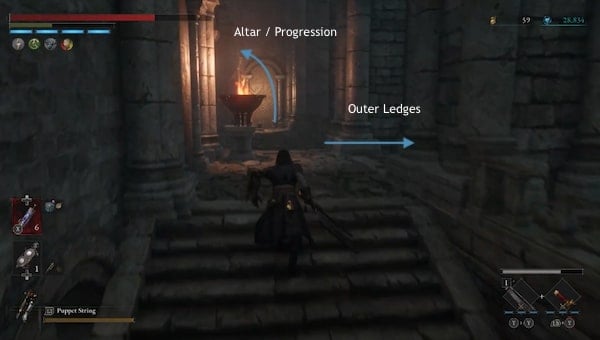
If you choose to explore the ledge and clear the Carcass here, it will lead you back to a closed gate- this is an unlockable shortcut to the Outer Wall Stargazer. Press the button and it will lead you back towards the path of the Outer Wall Stargazer, where the Carcass was hiding behind the corner. Once you have unlocked the door, you can easily access this area from the Stargazer. Go back to where the path leads out to the ledges where you took the stairs from the chapel.
This time, keep going straight ahead until you reach the end where there will be a set of stairs to the left leading to an altar and a few more Corrupted enemies spreading Disruption. Loot the ledge for a Shot Put. Take the second set of stairs up, and you can clear the enemy at the corner.
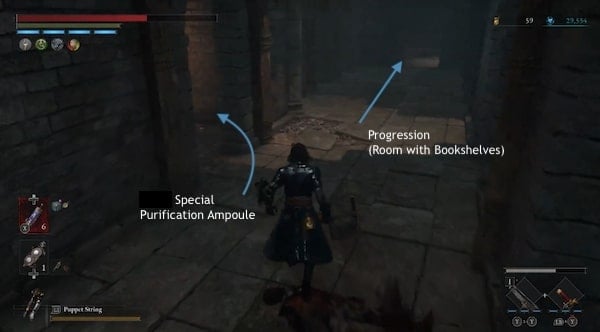
Take the left and there will be room ahead with another Disruption carcass and a body where you can pick up a Special Purification Ampoule. Go back to the entryway and continue down the path and the next room will have a few bookshelves. Loot the corner to pick up First Discovery, Camille.
Continue up the stairs and clear the Scorpion tail carcass in the next area. There will be a room here with a chest where you can pick up the Acidic Great Curved Sword Blade. Exit the room and keep going. The next exit will take you back outside. You will be able to see the lower levels and if you missed anything you can drop down and pick them up. There will be a small platform that you can land on before the lowest level to prevent fall damage. The lower ruins will have a Special Resistance Ampoule and a Full Moonstone of the Covenant. If you decide to jump down, it will take you down to the previous floors you visited while making your way up. You can easily find your way back up from there.
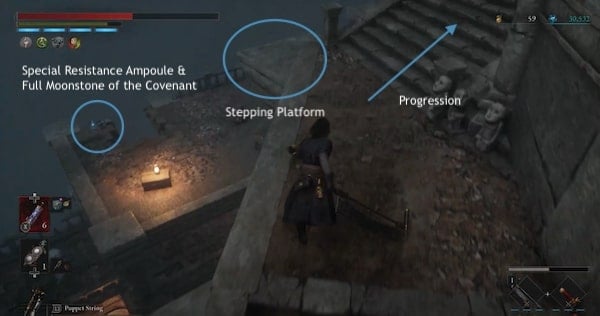
Once you are done with the lower floors, continue taking the stairs up. In this area, you will need to watch out for more incoming projectiles. Once you reach the top, there will be a large gap that you won't be able to jump. There is a platform on the floor indicating that you will need that you will need to activate the area to cross. Turn around and there will be an entryway heading back in with another set of stairs. There is a trap on the wall that will extend forward, so wait for it to retract. Make your way all the way up and finally, there will be a base platform where you can use your High-level Alchemist Badge. This will extend the platforms below filling in the large gap. Drop down to a ledge. There will be a Gemini's Iron Protection you can pick up.
You can now go back and cross the gap. Watch out for the missiles. Clear the Scorpion tail enemy and then you will be clear to loot the chest here in front of the altar table. The chest will contain an LADA F350 Frame. Continue up the stairs and you can destroy the missile launcher. There will be a set of stairs leading down ahead. You will be able to see the button mechanism that you can press just across.
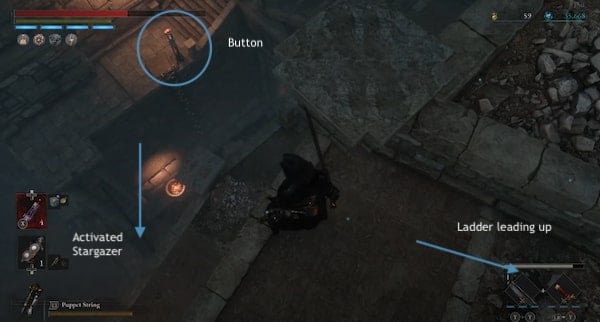
Make your way to the button and press it so you can now easily access this area. You should see a thin beam connecting the gap on a slightly lower level above the activated Outer Wall Stargazer. You can land and walk on this plank to get to the ledge across and pick up the Acid Canister on the ledge. There will be another plank sticking out slightly where the Brazer is at the corner. Loot the item and you will get the Electric Blitz Abrasive. If you fall anywhere here, you can take the ladders to get back up.
Go back all the way up to where the missile launcher was, and this time take the ladder going up. This will continue to lead you to another set of stairs going up. Once you reach the top, you will be in a room lined with arches and vaults. You can take a left to go straight ahead or a right to head to the lower level.
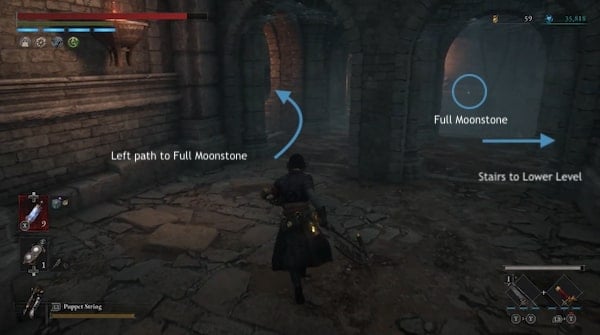
Head left first to reach the loot across and watch out for the emerging pillar trap. There will be an armed enemy at the end of the path hiding behind the pillar past the small wooden bridge on the gap. Take the loot. It will be a Full Moonstone. You can now head back and take the left route instead leading to a set of stairs going down. Another enemy will be at the base of the stairs. Watch out for when you pass a room lined with a nice rug. This room will have arrow projectiles shooting out of it laced with Electric Shock. Avoid the arrows and approach the room to loot the Fable Catalyst. You should also be able to pick up a Resplendent Ergo Chunk at the end of one of the corridors.
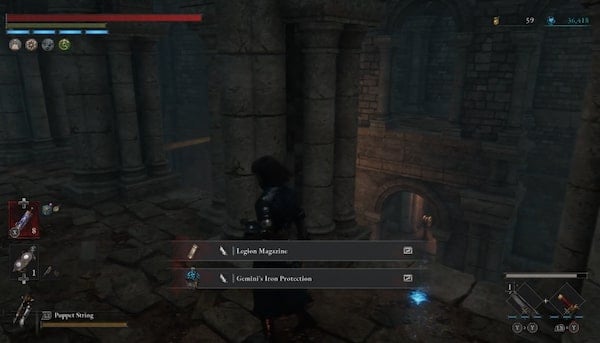
Once you are done with this floor, you can take the ladder to the lower floor. Clear the area. Loot Gemini's Iron Protection. This time, do not take a wooden beam across the gap, because it will break and drop you to the ground floor where an Elite Bawler enemy will be waiting. Circle this floor and loot the chest for a Legion Caliber. When you are done exploring the higher levels, drop down to the ground floor and clear the elite enemy. He may drop an Attribute Purification Ampoule, Dim Ergo Crystal, and a Star Fragment.
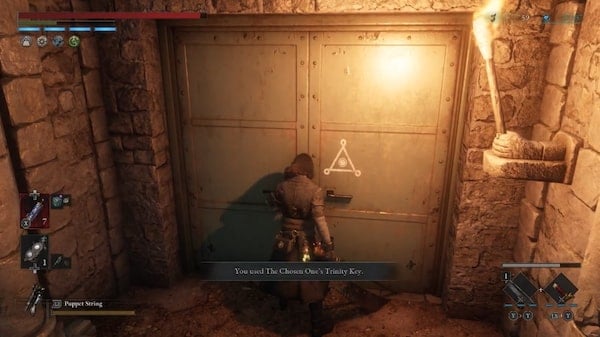
There will be a door on the ground floor where you can use The Chosen One's Trinity Key to reveal the King of Riddles, Arlecchino. You will be given the chance to answer.
Are you a puppet? or a human being? Which one are you?
- Puppet
- Human
Say that you are human and he will agree. You will receive the Alchemist's Cape and a Quartz at the end of your interaction. P could feel warmth depending on your choices and progress. When you are done with this location, there will be an elevator on the ground floor to take you back up. Just across where the elevator in the main square is, is a short corridor with another elevator at the end that can easily be missed. Take this elevator to another corridor and you will find Test Subject 826. Interact with him to obtain the Happy Gesture. Exhaust his dialogue and he will say that he will head to Rosa Isabelle Street. This is where you can find him again to proceed with his questline. Once you're done here, return to the room with arches and take the other main elevator. Lift the lever to activate the elevator. Another elite enemy will be here. You may also find a yellow Dimensional Butterfly that will drop a Full Moonstone. Once you've cleared the area, you'll be able to find another button that will activate the ladder.
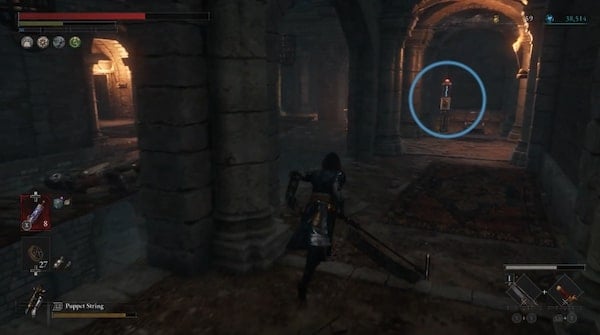
From here, unless you want to continue exploring there will be another set of stairs leading up.
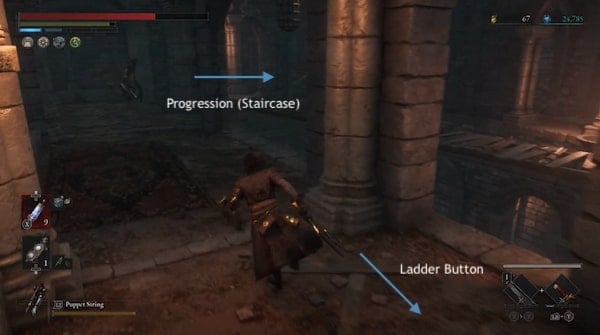
Loot the Electric Blitz Canister in between the flights of stairs. Continue on and it will lead you to a chamber where the Black Cat is.
Optional Boss: Black Cat (Boss)
Interact with him and he will request a Gold Coin Fruit. If you refuse, you will have to face him as a Mini Boss. Whether you choose to fight him or not, he will give you the Black Cat's Mask. If you defeat him, he will drop the mask.
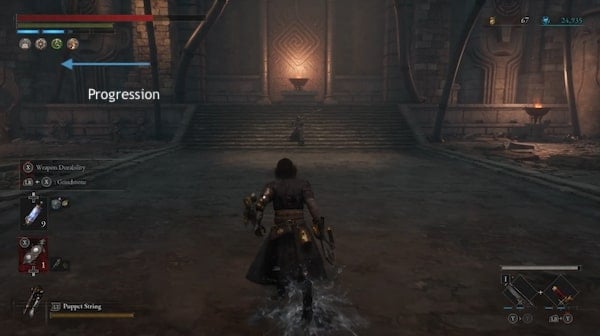
If you choose to fight him: Black Cat wields a City Longspear used to extend the range of his regular melee attacks. Wield a long weapon yourself if you have a good one. With his spear, he will commonly thrust and lunge forward and deal a number of striking attacks. The majority of his attacks will be a combination of back-to-back thrusting, poking, and stabbing, so you will be able to sidestep or dodge out of the way. There will be a slight indication of an incoming attack which will also allow you to block in time once you see his arm pull back in preparation to thrust his spear forward or dodge.
Be patient with your charged attacks which will take out a chunk of his health. Continue allowing his attack combos to complete and counter them as they come so that you can follow with your own attacks until the fight is cleared.
Arche Abbey Broken Rift
Continue onward, taking the corridor to the left behind the Black Cat. It will lead outside where there will be a wooden lift. Loot the area underneath the wooden lift platform to pick up Gemini's Emergency Protection. When you're ready, hop on the wooden platform and interact with the lever to ascend. This will take you to the next Stargazer: Arche Abbey Broken Rift.
Enter into the next area and another Corrupted enemy will attack. Watch out for Electic Shock Arrows in this room. Loot the area. The source of the arrows will have a Dark moon Moonstone of the Covenant for you to loot. Other enemies will litter the area. Clear them and loot the area to obtain a Fire Abrasive, Attribute Resistance Ampoule, and Half Moonstone. When you're done, take the stairs up to the next level. Clear the area. Loot the Dim Ergo Crystal then move on to the next room.
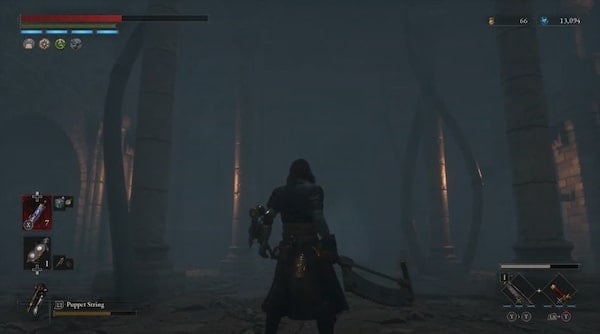
This room will have other connected rooms. Loot the area then locate the ladder to the upper floor. You will find an Electric Blitz Canister nearby.
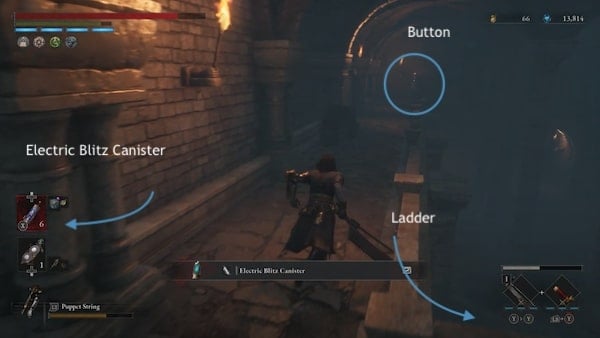
There will also be a button on the other end that will release the ladder. Activate it first before proceeding. As you continue this floor, be careful of the Jester Puppet, an elite enemy wielding two spiked clubs. If you lead it to the other enemies in the area, he will also proceed to clear them out. He has a chance to drop Special Resistance Ampoule and Star Fragment x1. There will be a chest for you to loot at the end of the opposite path that will contain a Mechanical Cryptic Vessel. When you are done here, there will be a set of stairs leading up to the higher level which will have a lever you can pull and another Star Fragment at the end of the path.
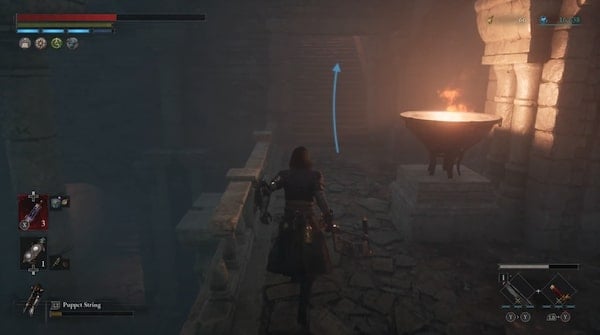
Pull the lever to raise the gates and open up the next area. A short scene will reveal the open gates. Head into the newly opened area. There will be a Special Purification Ampoule just past the gate. A giant elite Puppet Monkey will be in the next room. Clear it to obtain a Quartz.
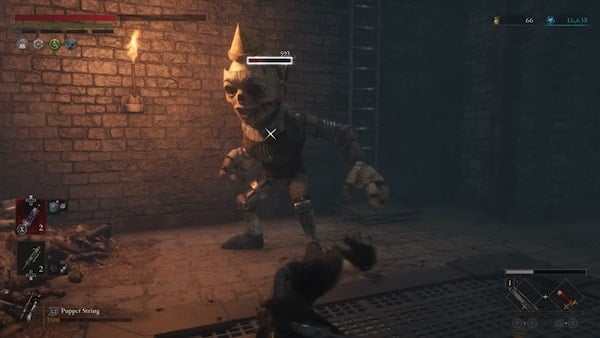
After clearing the Elite Monkey Puppet, take the ladder leading out and there will be another Dimensional Butterfly that will drop a Balance Crank. A few more corrupted carcasses will be in the area along with an Elite enemy with a top hat wielding a staff that can inflict Electric Shock. Continue making your way through the wooded area. Take the stairs up and you should come across a Half Moonstone. There will be another button here where you can release a ladder which will lead back down to the activated Stargazer.
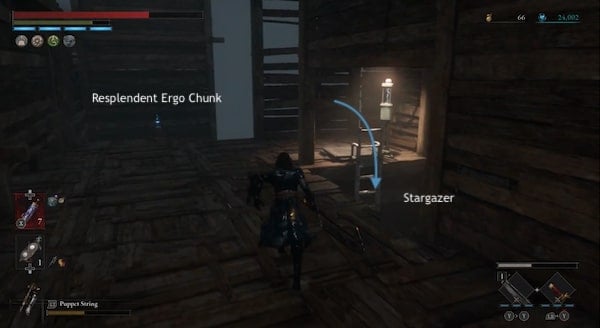
From this point onward, anytime you die, you will be able to resume and take the ladder all the way to this point. Take the loot at the tip of the extended plank to get the Resplendent Ergo Chunk. Then continue making your way up.
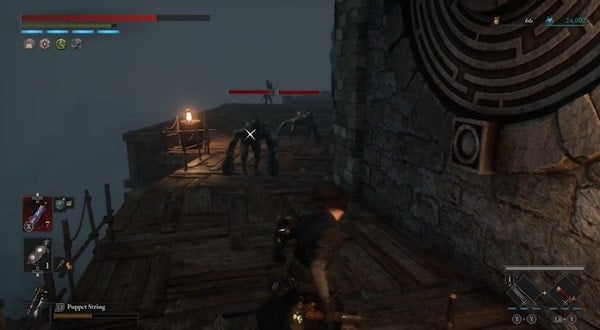
Keep going forward. Clear the way and another Dimensional Butterfly will appear that will drop Half Moonstone. Be aware of the enemies spraying Disruption mist. From where the butterfly appears, there will be a path leading down.
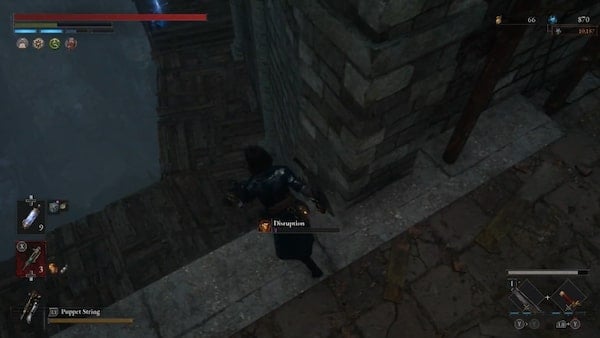
Drop to the lower platforms to pick up another Half Moonstone. Continue descending and there will be a red chest that will contain Red Fox's Amulet. After this continue making your way left when facing the wall, there will be a few larger enemies here. A ladder will allow you to go down one level.
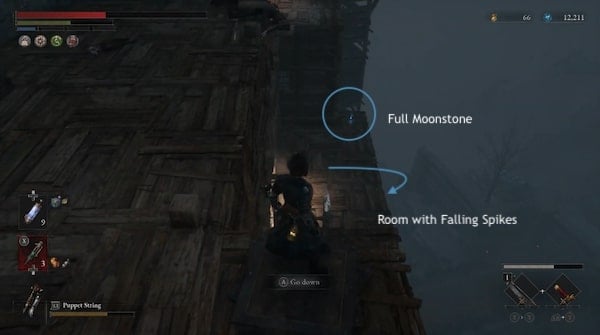
Loot the corner for a Full Moonstone. A gap in the wooden wall will lead to a hall with falling spikes.
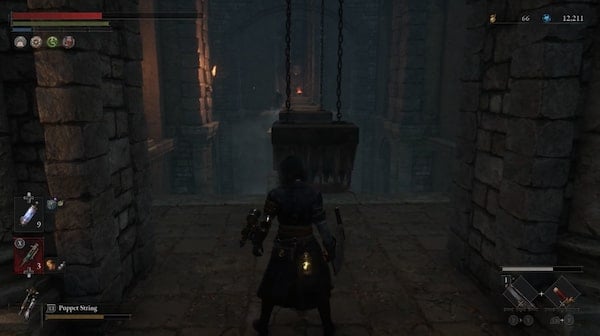
Make your way all the way to the end to reach a chest that will contain a Quartz and a lever for you to activate that will deactivate the spikes. There will also be one enemy waiting for you here. Make your way back. Follow the stairs up and there will be an elite enemy that will bust through the wall wielding a broken puppet.
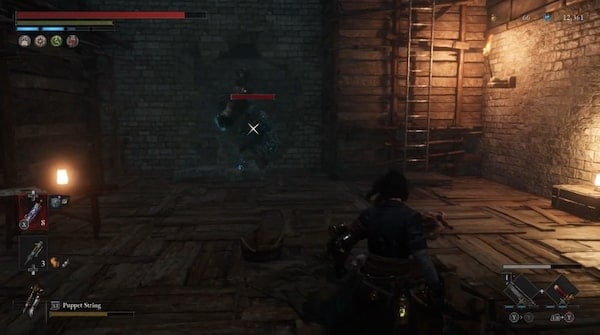
Take the ladder next to it and it will lead you back in. This room will have an Elevator. Loot the next room for a Carcass Body Fluid Bottle. Then enter the elevator to ascend. This will lead to the next repairable Stargazer in the Arche Abbey Prayer Room. This is a room right next to the next boss fight. There will be a summoning pool just before you proceed. This will lead to the face-off against Laxasia the Complete.
Boss: Laxasia the Complete
Laxasia is a large powerful boss whose boss-fight encounter is split into two phases. For each phase, you will need to clear a full bar of health. Her mobility and power of her attacks will significantly increase during the second phase and she will display a new set of attacks to accompany them.
She has the ability to afflict Electric Shock with her Weapon. She has a large Great Sword Swing that cuts downwards and follows up with an Electric shock in addition to her regular melee attacks. She has all the basic melee sword combinations from swinging, sweeping posting, and combinations of slashing and cutting that have a far reach due to how tall her sword is. Any chance you get, land a fully charged attack to stagger her in between these swings while they don't exert electricity. For the second phase, you will need to look out for the windows following her larger attacks. Her lightning attacks can now also be deflected back at her to deal a significant amount of damage. View the page for Laxasia the Complete to see an expanded strategy guide and a breakdown of her attacks. Once you clear her, she will drop Sad Zealot's Ergo and you will be able to activate the Stargazer for the Ascension Bridge.
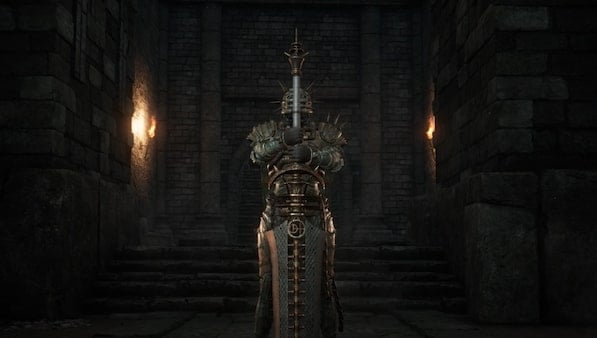
Walkthrough Proceeds on the Arche Abbey page.
Arche Abbey Entrance Map
Map to be added
Arche Abbey Entrance Videos
Videos Related to this Location
Someone left out Acidic Great Curved Sword Handle in two places.

 Anonymous
It’s worth noting the title screen changes when you reach this area

 Anonymous
Correction on the guide
Right after you make it to the large room and fight the elite brawler on the ground floor, look at the doorway the elite brawler busted out from. Here you want to enter, and avoid the two pressure-sensitive tiles as you make your way to the elevator.
Take the elevator all the way up - you'll see 826 just after the bend in the corridor. After speaking to him, DO NOT LEAVE JUST YET - go to the end of the corridor and use the High-Level Alchemist Badge to open a shortcut to the Arche Abbey Outer Wall Stargazer.
Then backtrack to the main room and take the elevator on the bottom floor near where you fought the elite brawler. You'll see another doorway while taking the elevator up - jumping off here and turn left for an item, then go to the other end of the corridor and drop down. This is where you'll pick up the Legion Caliber.
After that, make your way back to the bottom, call the elevator, and continue.
 Anonymous
"Circle the area and open the chest containing a Legion Caliber" Please fix this misguiding line because to reach the chest you have to go through the main elevator and then jump to the platform halfway up and then drop down to another platform and loot the chest.

 Anonymous
"Drop down to a ledge. There will be a Gemini's Iron Protection you can pick up."
Common sense says this will be a ledge that is nearby, but if this was a person explaining it to me, I'd think they were dumb as **** for wording it like that.
The description for one of the moonstone locations starts with "Find the room with the round red carpet"... in Arche Abbey. There is no other info to help narrow down the location of that room at all.
This whole wiki is riddled with vague **** like this and it's frustrating.
I've never submitted, so I don't know if there are any checks in place when a user adds something, but if there are, they need some work.
 Anonymous

HEY, You need to edit this guide. This guide is actually just a trash. Everything else but this guide is a trash. You missed so much items and details.
1
+11
-1